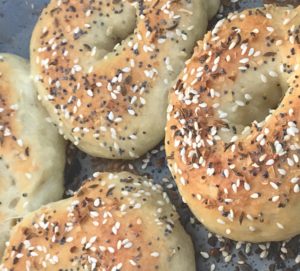
Insanely simple way to enjoy bagels while camping.
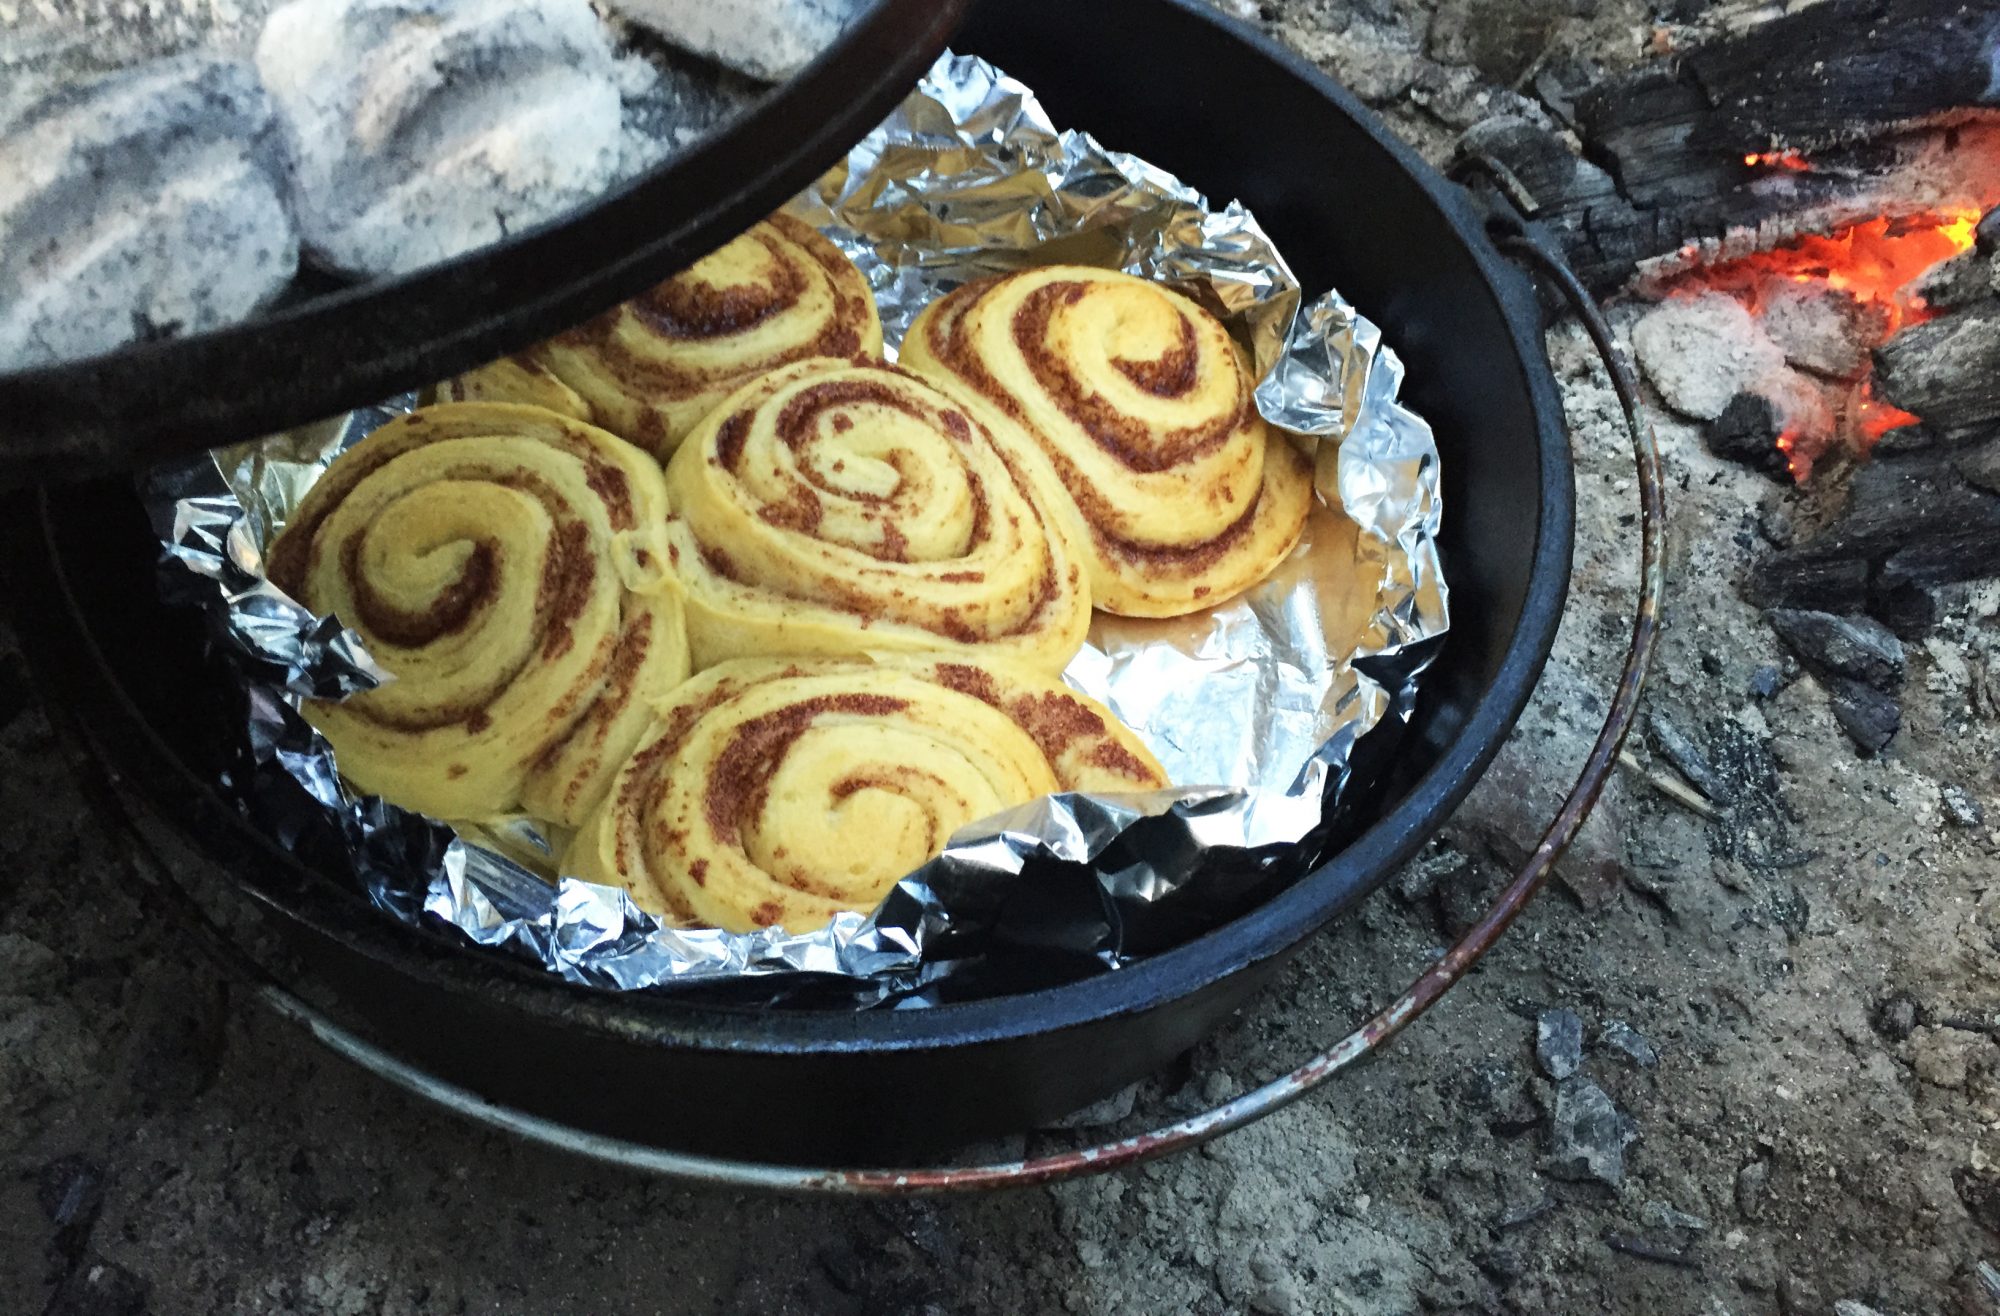
A 10, 12, or 14 Inch Dutch Oven will work. Be sure to have some parchment paper or foil along. You will need enough coals for 350° Heat and a few extra to raise the top temperature at the end. We steal coals from the bottom.
This recipe and technique was shown to me by my friend Kathleen LeBlanc on a recent camping outing. We are not sure where this originated from. But it is easy, simple, and requires only a few common ingredients.
Combine dry ingredients. Mix in the Yogurt and combine until a wet biscuit dough consistency.
On a floured board, knead the dough until it is just beyond the sticky stage.
Divide dough into 4 equal pieces. Roll between hands to form a snake. Take the rolled out snake of dough and form a loop and pinch the ends together to create a circle. Repeat for the other 3 pieces of dough.
On the bottom of a Dutch Oven place a piece of spray oiled parchment paper. Place the 4 bagel dough circles on the parchment paper and brush with egg wash.
Sprinkle with favorite topping(s).
Cover Dutch Oven and place coals for 350°F Heat. Bake for 20 minutes.
After 20 minutes heap coals on top to quickly raise the top heat. Bake with high top heat 2-5 minutes or until tops brown nicely.
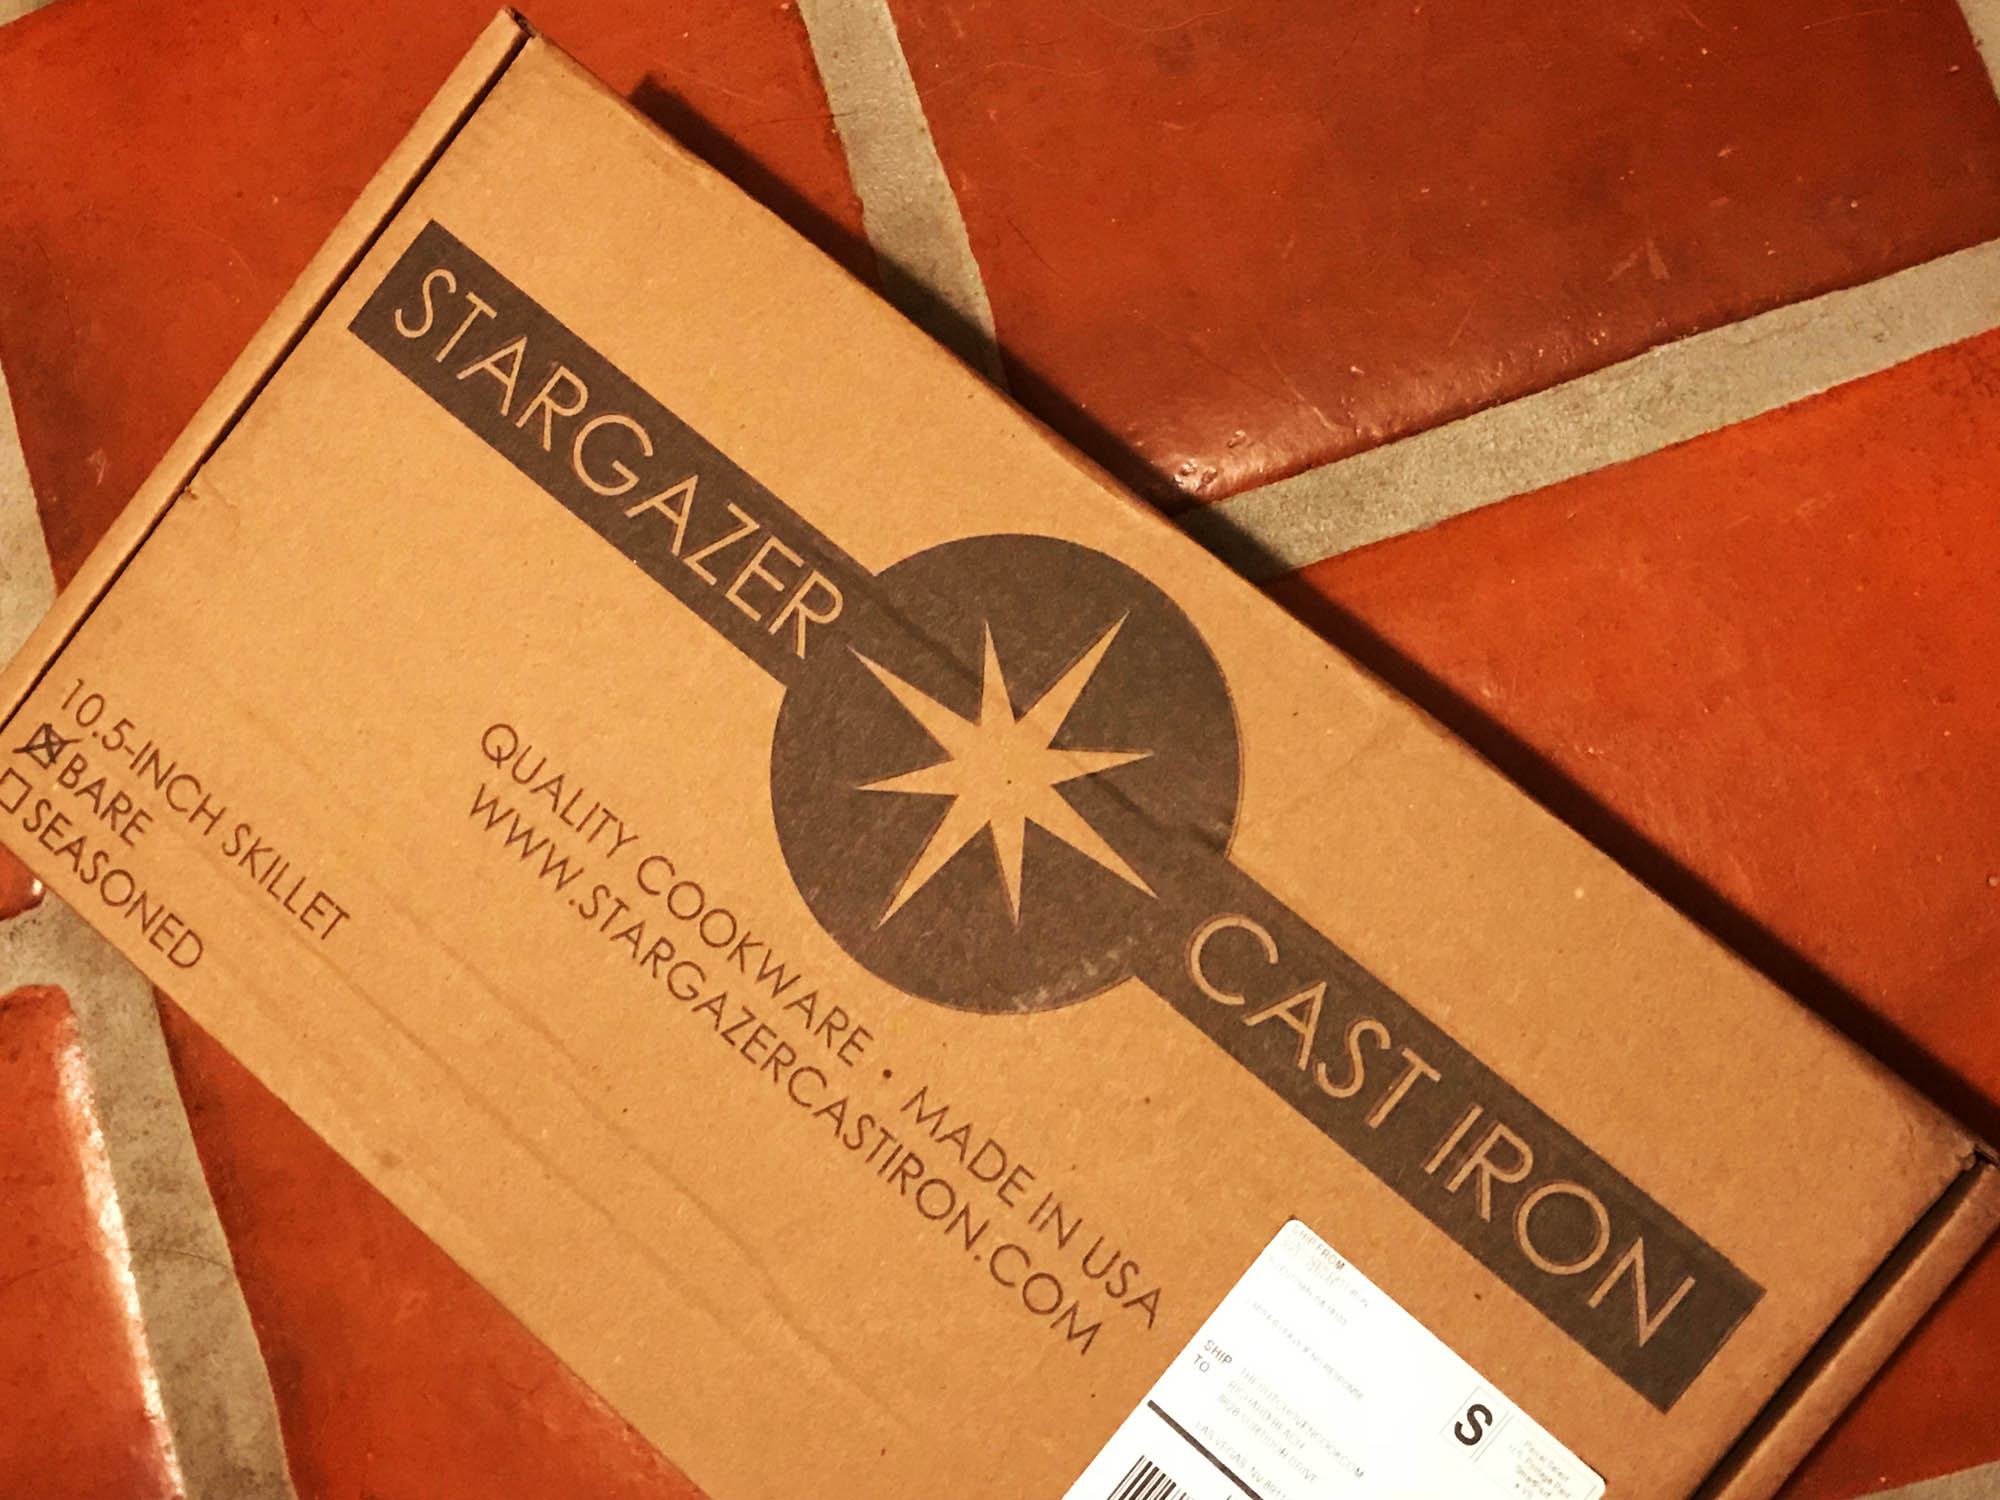
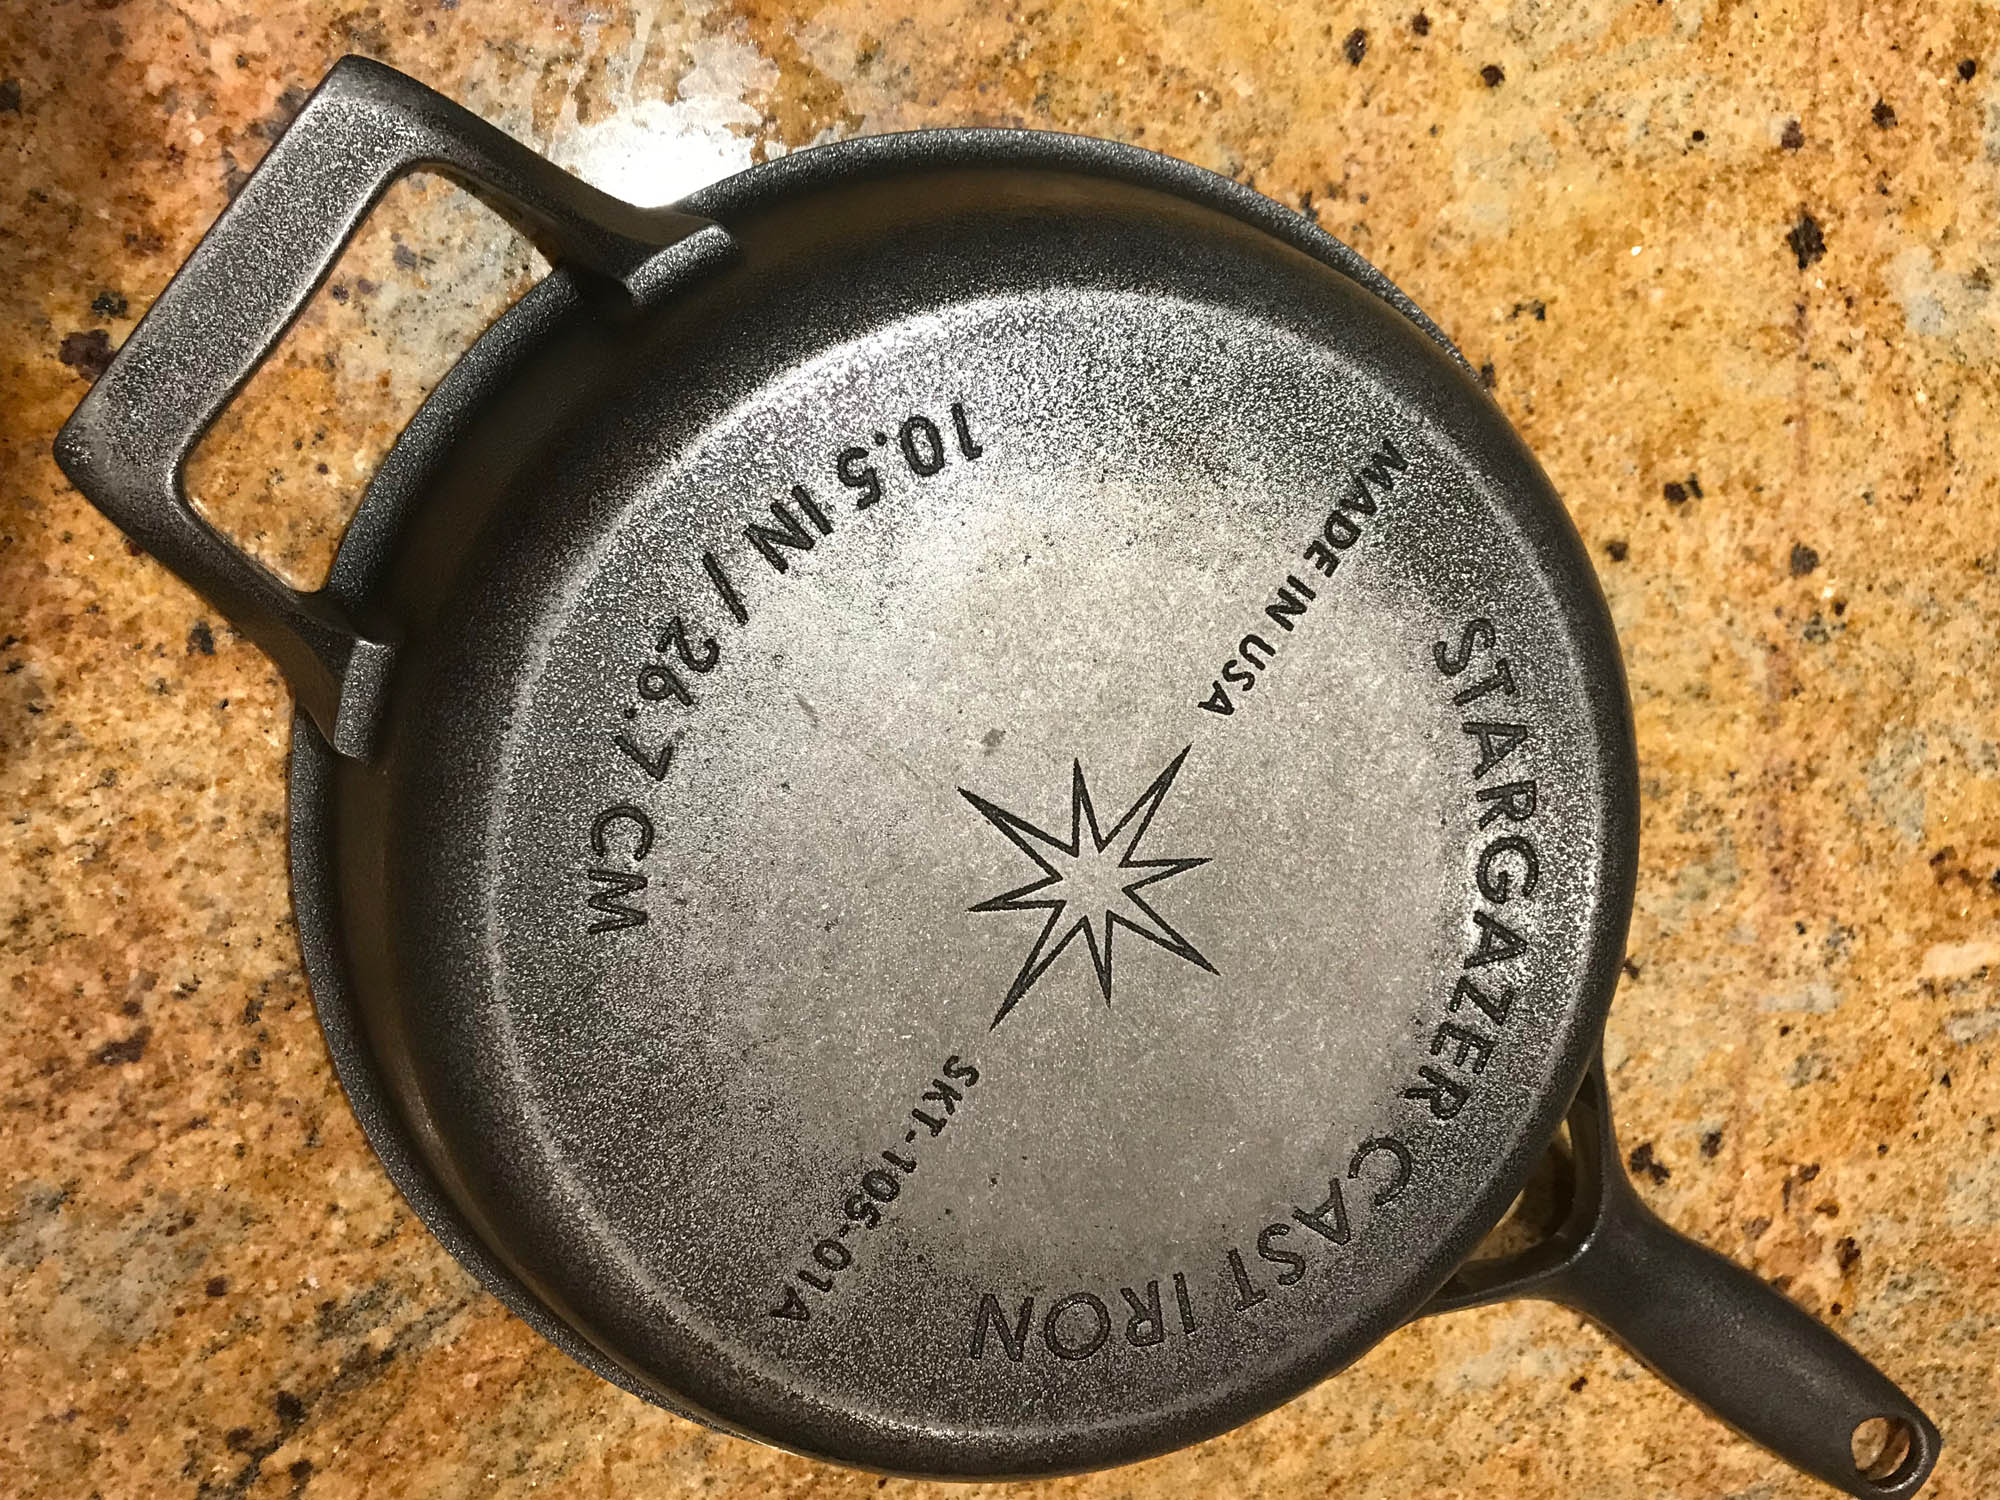
I was pleasantly surprised today when my new skillet, the SKT-105-01A , was delivered.
My intent is to document its arrival, my opinion of the product, how well it seasons, and how well it cooks.
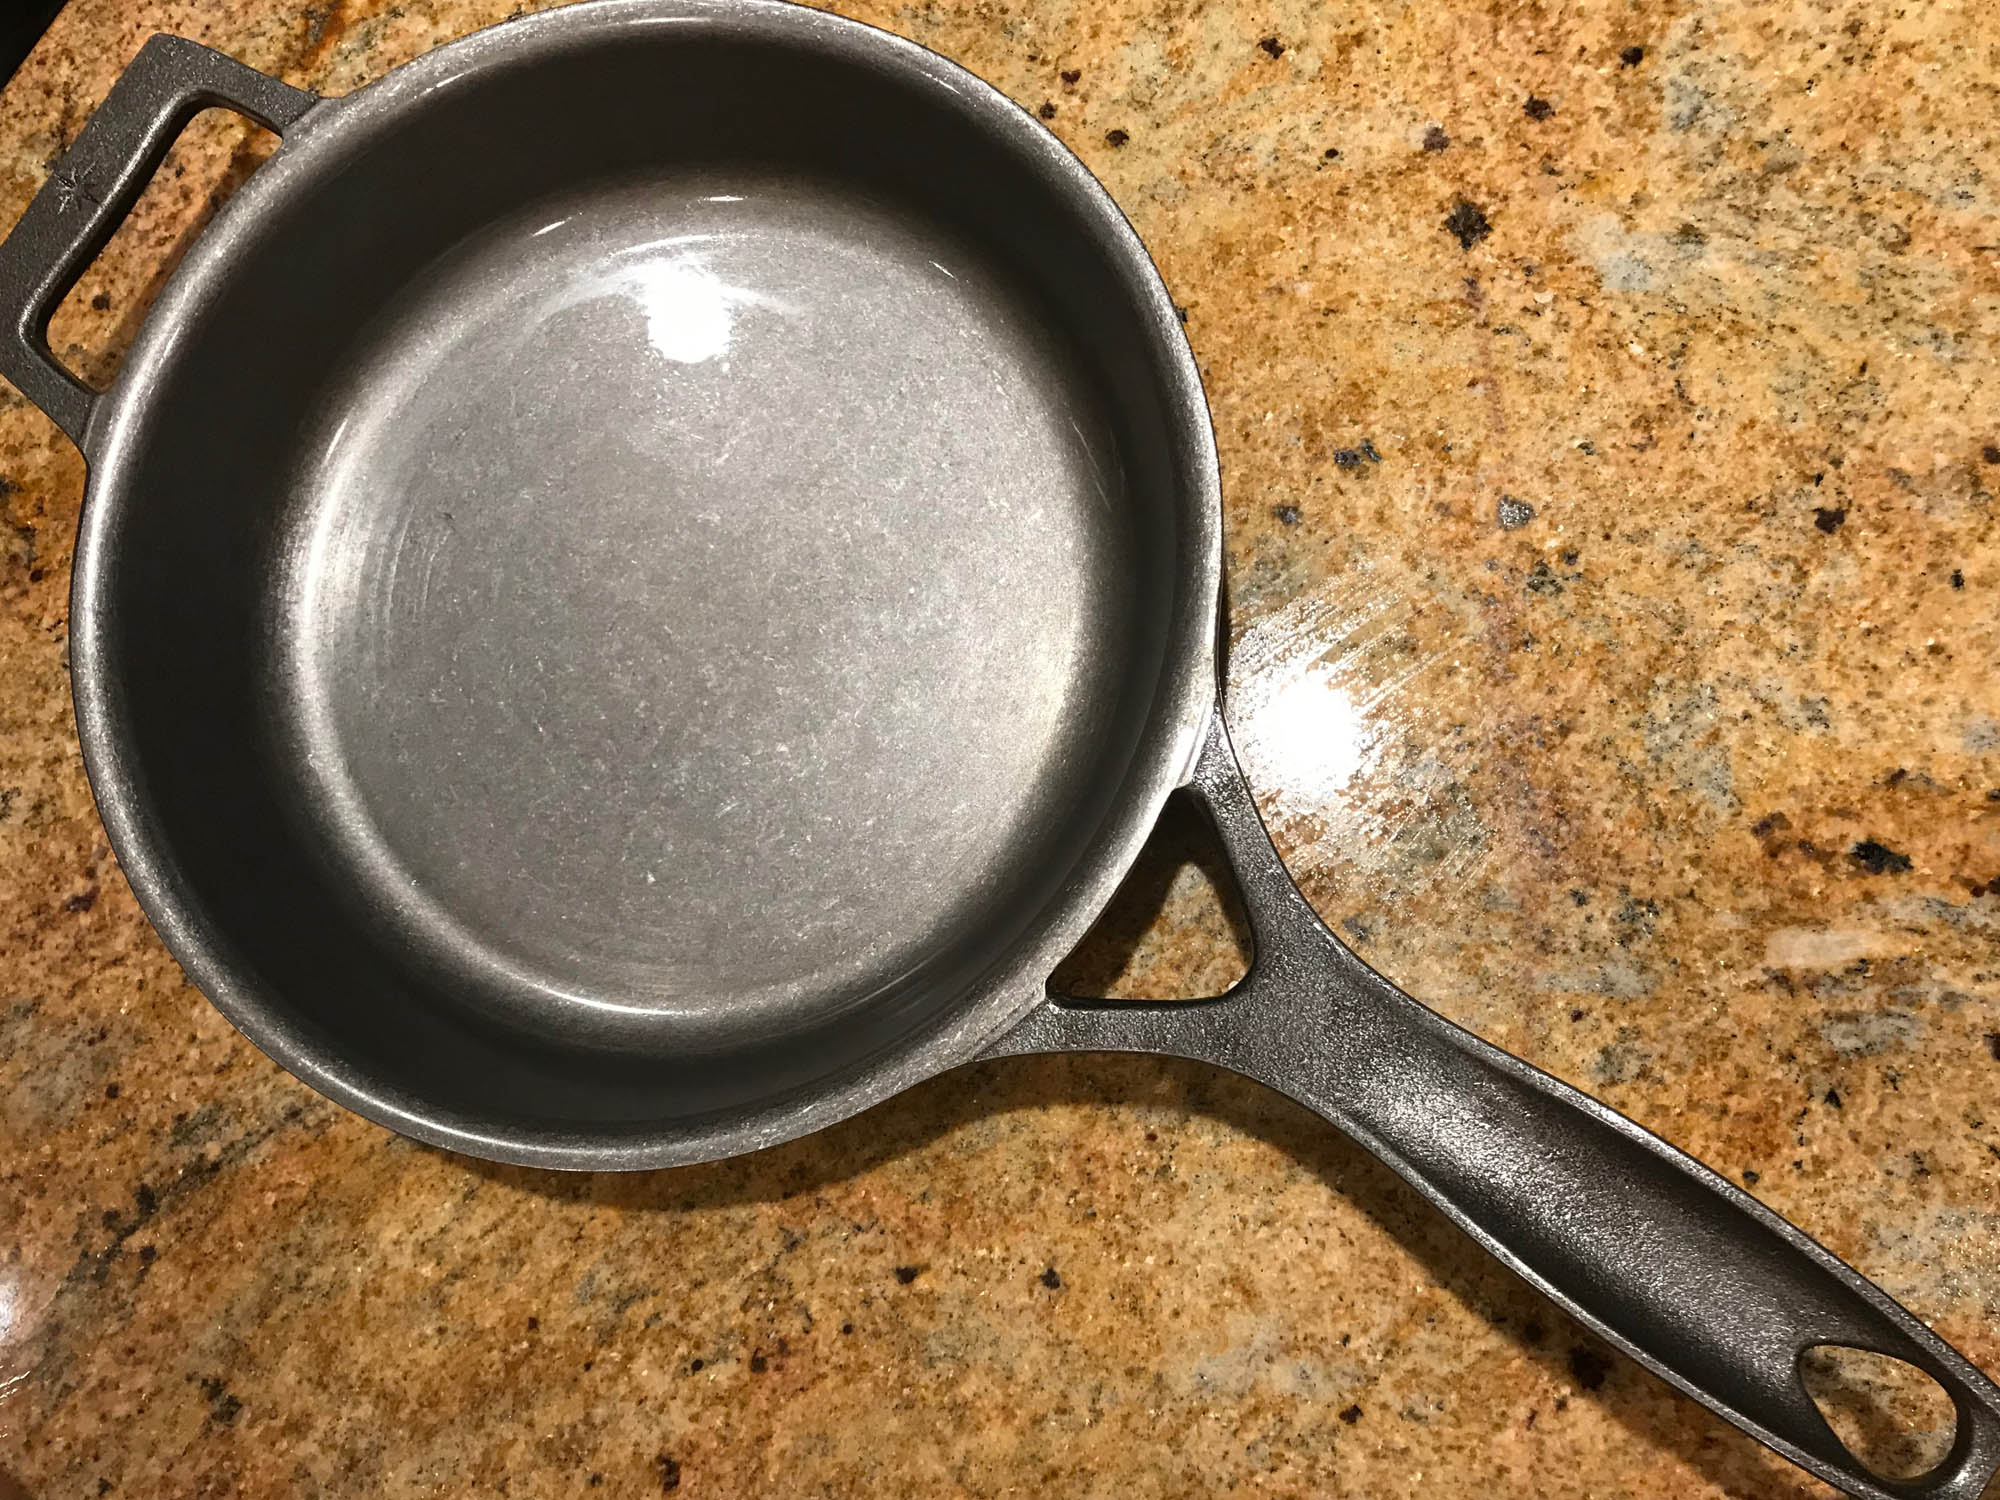
The cost was a bit pricey but it is USA made and I really wanted to check out the smooth interior surface. The outer surface is more rough but still smoother than most cast iron being produced today. The interior appears to be milled smooth on the bottom, sides and upper edge.
The exterior bottom appears to have the writing cast or engraved. With the bottom then partially machined, or it is a very smooth casting. The exterior sides and top and bottom of the handle are a fairly smooth cast surface.
The cost was $80.00, minus a $12.00 veterans discount, then tacked on shipping of $10 for a total cost delivered of $78.00.
The only negative so far is the wait time between ordering, shipping, and delivery. I placed my order on line and it was confirmed 12/13/2017. Delivery was today 1/20/2018.
Regarding the lag in shipping. Stargazer was up front when ordering and made it clear delivery would be delayed due to back orders and the Christmas season. They communicated well and advised once shipped, and advised again the day it was out for delivery.
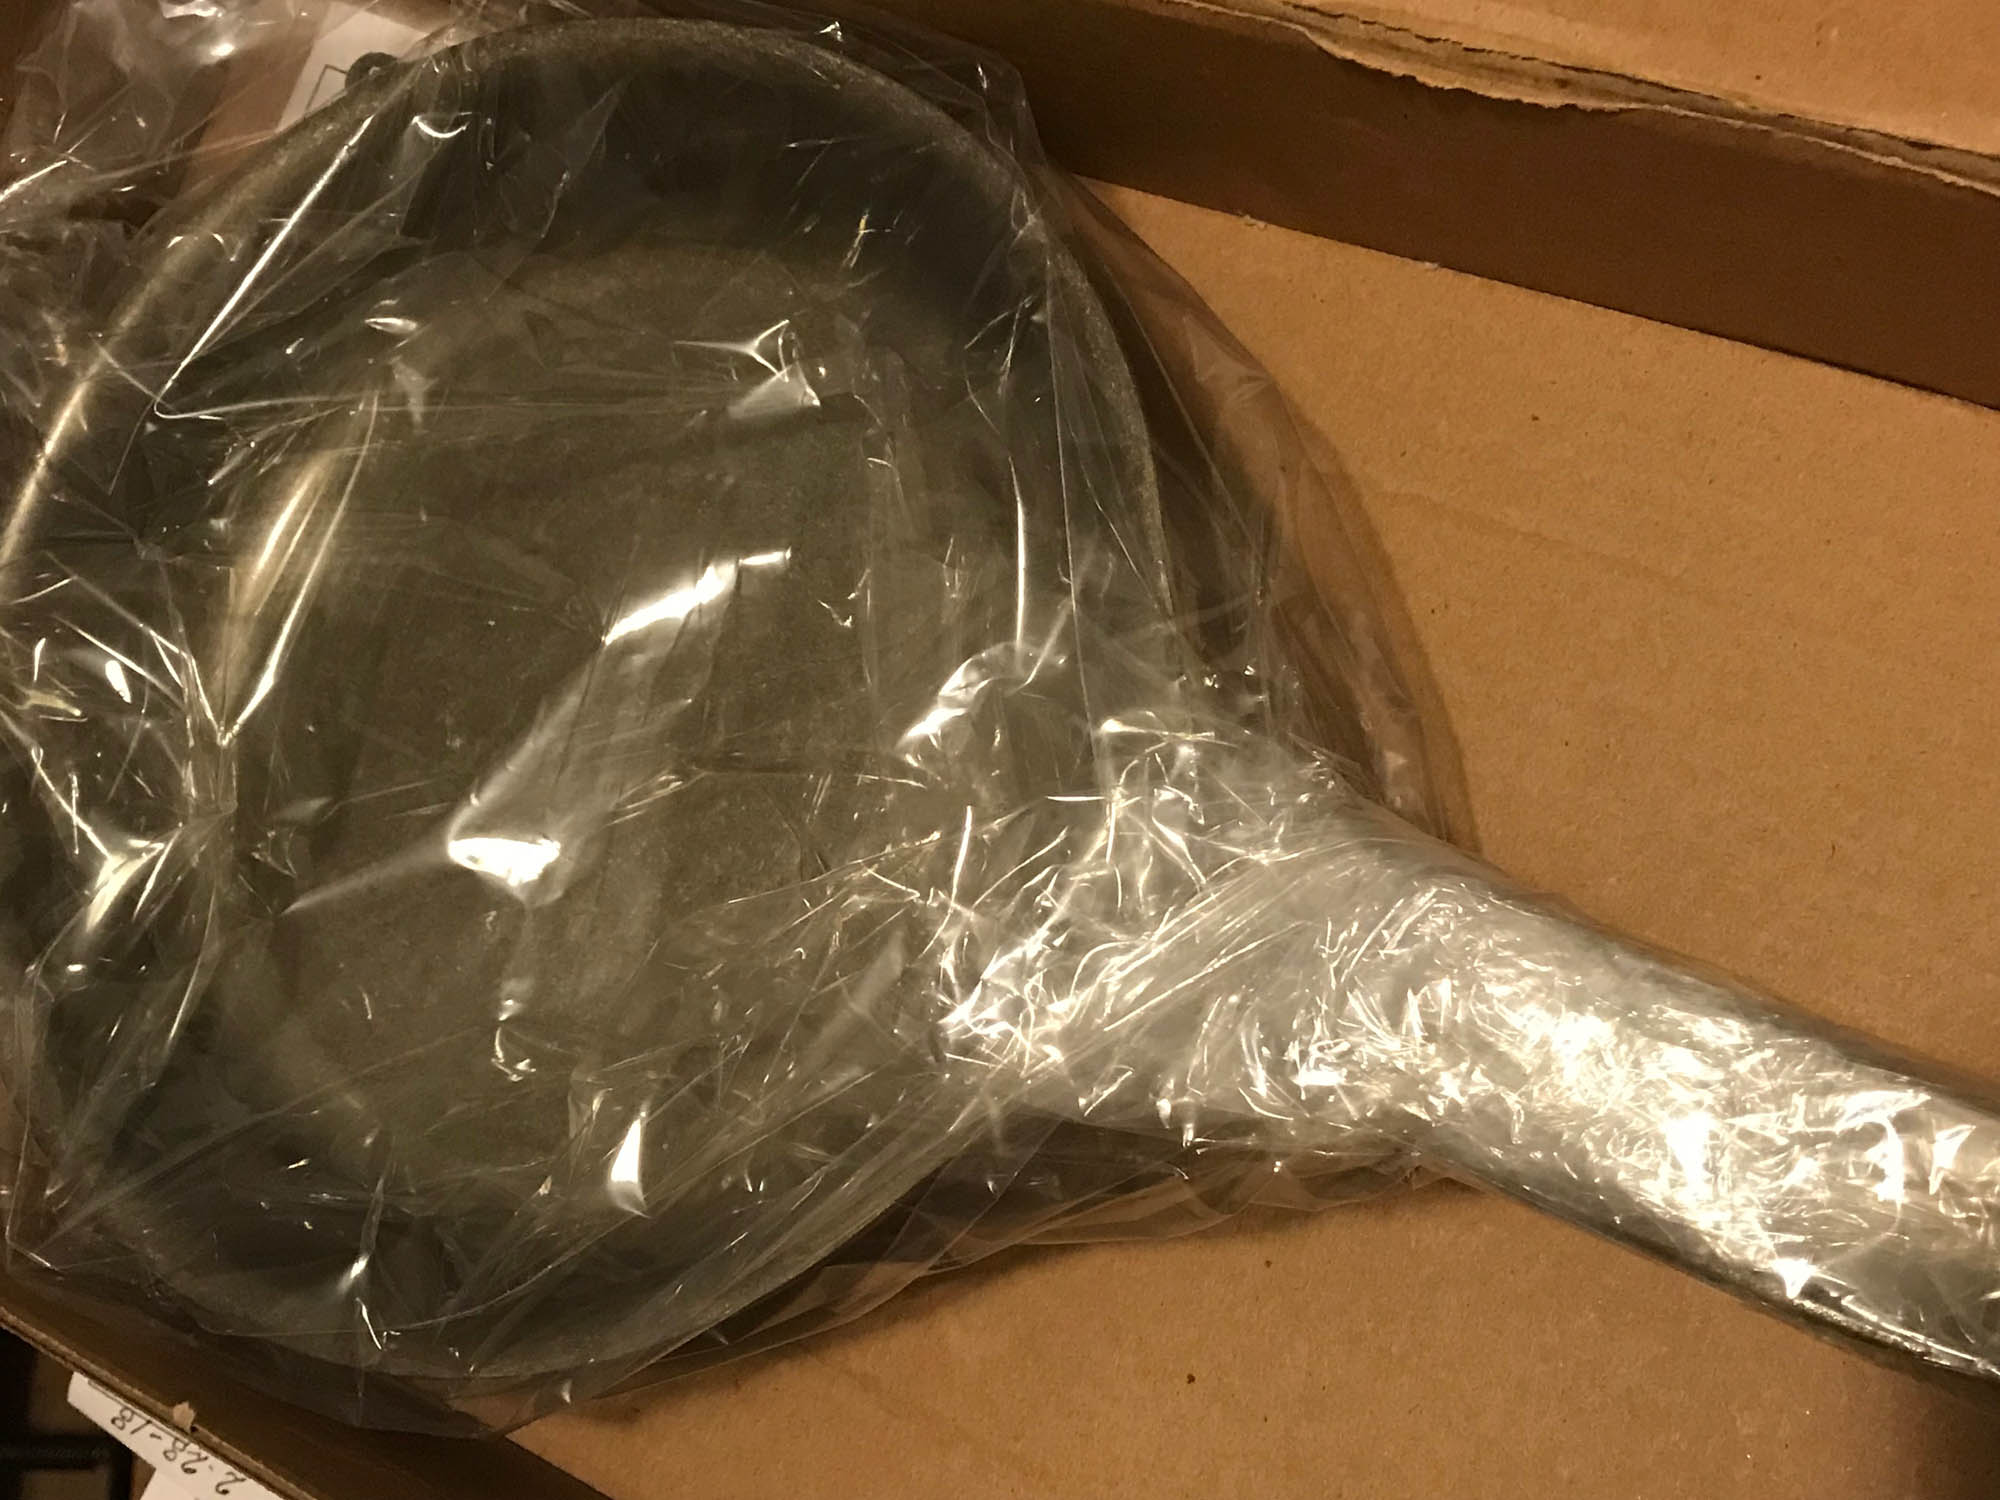
The skillet came packed well and secured well in the shipment box. A lesson some of the eBayer’s selling cast iron need to follow. It would be difficult for it to arrive damaged unless the delivery service miss handled it.
In the box it was wrapped and securely taped tight. The cast iron had a liberal coating of food grade mineral oil.
Following the enclosed directions I scrubbed the piece with soapy water and heated it to dry.
A thin layer of seasoning has been applied and the skillet is now in the oven getting its first coating of seasoning baked on.
Check back for follow-up on this Stargazer skillet.
Normally I am a “Crisco” seasoning person. I have used it for decades with excellent results. I use it because it is always on hand at home or when camping
I have some Crisbee product that I used on a griddle with great results. So I thought the seasoning on my Stargazer would be done with Crisbee.
Whatever your preferred product, apply it to warm cast iron (not hot). You can do this preheating the oven to 200°. Use a lint free cloth to apply product. Some paper towels are awful for this process. They leave behind fibers.
Coat all surfaces very lightly with seasoning product. Wipe away any excess. Place back in the warm (about 200°F) oven. Not in a hot oven.
Once the piece is in the oven adjust the temp up to your desired seasoning temperature. Set a timer for your seasoning bake time. I prefer 90 minutes.
Once the bake time is over shut the oven off. Do not open the door even to peek. Set your timer for 90 minutes and allow the oven and cast iron inside of it to cool down naturally together.
Update: 1/20/2018
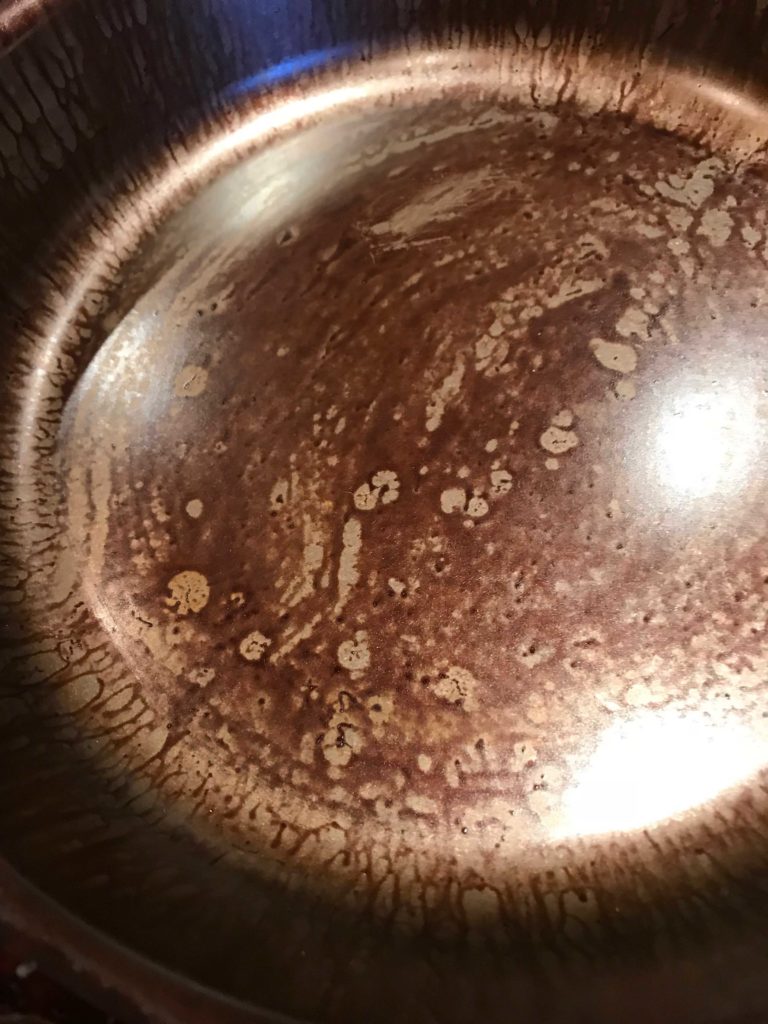
My first coat I was a little disappointed. The surface did not come out uniform. Even though the raw iron, as arrived with a layer of protective mineral oil, was well cleaned with hot soapy water several times. In hindsight I wished I had used #0 steel wool during my soapy hot water cleaning.
Mineral oil (which Stargazer’s inserted leaflet indicates) verses a Vegetable oil coating may make a difference? I have even dealt with other cast iron that comes new with a paraffin coating that needed burned off.
Doing the initial cleaning, if I was doing it again, I would do two 2 hot soapy scrub baths. Changing the water completely between the two, and using a scrub brush, then #0 Steel wool during the initial cleaning.
Something to consider should you be reading this and plan on seasoning something smooth or something with mineral oil on it.
I kind of expected it on this smooth surface though. I have had lots of experience seasoning and have seen this happen before.
I have noticed this same effect on other vintage cast iron that has a super smooth finish. Regardless of the seasoning product being used. So I am not overly concerned. The brown color on the first coat is normal None of this uneven seasoning can be felt with a finger. My solution from past experiences when dealing with extremely smooth surfaces, is to this is to use #0 steel wool.
Worst case scenario might be after evaluating the second coat. I might have to strip this bare again and start over. In hindsight, I am not so sure I did a good job of getting the factory protective coating of mineral oil off? Or if this is a smooth surface issue. I will know soon enough. Stripping it is no big deal if it comes to that.
Evaluate your initial seasoned coating.
First your initial baked on coat of seasoning should be hard. Not sticky or gummy even to the slightest degree.
If this layer of seasoning isn’t hard and firmly adhered you need to go through the baking stage again at perhaps a higher heat, or for a longer period (without applying additional seasoning product).
If you start using steel wool lightly and it starts loading up with residue, stop and repeat the bake cycle. That is an indicator of seasoning that has not been heated to the proper heat polymerization point.
If you have “pooling” (puddles of concentrated seasoning. These normally are sticky or gummy to some degree, you have applied too much seasoning. I would consider stripping it and starting over. A bad base coat will give you problems.
Update 1/21/2018
I had no problem with the first coat on this, not being hard and well adhered. On the smooth interior surface I can take the #0 Steelwool and hand/finger buff with almost as much pressure as I can muster, and still not cut through the seasoning unless I stay in one spot for a long time. I concentrate a little more on the spots I call “alligatoring”. Then lightly buff the entire surface to uniformly rough it up. This buffing is nothing you can see. I can not see scratches with my naked eye. This is all done by feel. It provides something for the next coat to grab.
While I am at it, I hit the whole exterior surface lightly, just to knock off anything thing there. Lint is the most common thing.
The piece is then washed a couple of times in hot soapy water. Rinsed and dried. I immediately place it in a 200°F prewarmed oven for several minutes. When it is warm and completely dry I remove it and spread a very thin layer of seasoning on all surfaces of the skillet.
It is put back into the 200°F oven, upside down. I crank my oven temp up to my desired seasoning temperature (This temperature varies product to product, and your actual oven output – read about Polymerization Temperature). I then set my timer for 90 minutes and bake at that temperature.
Once the bake cycle is complete I turn the oven off, leave the door shut, and reset the timer for and addition 90 minute natural slow cool down cycle. Once that is complete this seasoning coat should be complete.
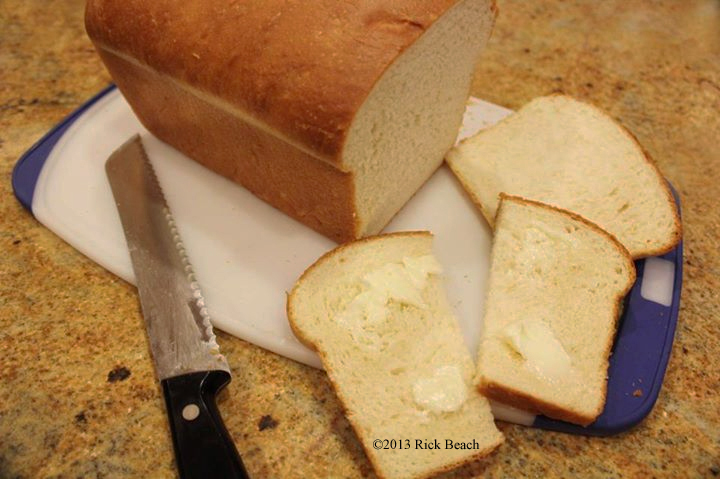
WHITE BREAD (Agave Coconut) Tastes like Old Fashion White Bread
The taste of this bread is that of old fashioned white bread. There is no coconut taste in the finished bread. Organic Blue Agave is used since it is a low Glycemic organic sweetener.
I often bake this in a Dutch Oven. Free form loaves could be used. Or small loaf pans. Use a large, tall, Dutch Oven and coals for 375°. I prefer to use one standard bread loaf pan. I place a wire rack in the Dutch Oven to elevate the loaf pan slightly.
This recipe assumes you know the basics of raised bread dough techniques.
1 1/2CupsWarm Coconut Milk13.5 oz can unsweetened - Room temp
1TbspAgave Liquid SweetenerCan use 1 to 4 Tbsp depending on use
2TbspButter Melted
1RawEggRoom Temperature
Method
SET BREAD MACHINE to “Quick”, “Dough” Start so pre-heat is going. PLACE Flour in bread machine. Make a little depression in the flour and add the salt in the depression. Cover the salt with some of the flour.
COMBINE in a separate bowl the Warm Coconut Milk, warm Agave, and yeast. Whisk and allow to "grow" 5 to 15 minutes.
Crack egg into a clean bowl and whisk until uniform. Whisk the egg into the milk and yeast mixture, Then whisk in the melted butter.
POUR combined liquid mixture into bread machine with the flour and covered salt. Let the bread machine starting running through Quick, Dough, cycle (Mix & First Rise 45 Minutes) This is normally a manual override setting on most bread machines. Monitor the initial mixing stage until the dough just begins to clump together and form a ball. Adjust flour mixture to correction consistency. If liquid is required add small amounts of warm water a little at a time.
PREHEAT oven to 375 degrees F. Grease Bread Pans. The warmed stove top will become your warm place 45 minutes later to raise your dough the second time. The bread machine will provide the raise the first time. ( If you are using a mixer/dough hook or hand method to create your dough, both raises will occur on the stove top or other warm place)
TURN DOUGH OUT (dough that has raised one time) on floured surface and roll out into a 12X8 inch rectangle. Roll as a jelly roll 8 inches wide. Pinch seam, tuck ends under and pinch seams, coat with light coat of oil, and place in greased bread pan, seam side down.
COVER Dough AND let RAISE, on warm stove 30-45 minutes. This is your second rise.
BAKE at 375 for 25-30 minutes (Until golden Brown and sounds somewhat hollow when tapped.
Remove from pan and rub all surfaces with butter for a softer crust. Cover with towel until cooled
Notes
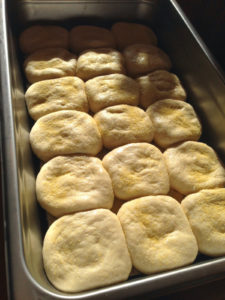
Liquids should be warm not hot. Rather than getting all technical and breaking out the thermometers. Test on inside of wrist as you would baby bottle milk. Proper temperature aids in the dough rising quickly. Overly hot will kill the yeast. Cold temperatures, and the yeast will not rise. On both Raise cycles the dough should double in volume. Your flour and other ingredients should all be at least room temperature. Make sure to oil the dough, and oil your rising bowl, or container. Cover and raise dough in a warm draft free location.We use a bread machine to speed mixing the dough and the first rise. The benefit of a bread machine is consistent results. When baking multiple loaves you can keep producing a ready batch every 45 minutes, ready for the second rise in your bread pan.This dough can be made using any traditional method including the old fashioned by hand method, or a mixer with a dough hook. By hand, the more you knead, the better the bread. Many people that get poor results when baking bread fail at the temperature, and or not enough kneading. Other yeast killers are combining your yeast and salt in the liquids. The salt will kill the yeast. Mix your yeast with warm liquids and allow it to "grow". Combined ingredients as recipe indicates. With any tried and tested recipe you might be following pay particular attention to how and when the salt is added.Just prior to placing in bowl or bread pan to raise, lightly coat all surfaces of the dough with olive or or vegetable oil. Loosely cover it with a light cloth towel and place in a warm place.Rising works best in a warm moist environment. I use (2) stainless steamer trays. The 6 inch deep, half size steamer tray 10x12 inch.Or full size if doing English muffins or multiple loaves. In the bottom tray, add a 1/2 inch of very hot tap water. A wire rack placed in that hot water (Rack should be slightly above the water level). Then place the bread pan with the oiled dough in it, on top of the rack. The second stainless tray placed inverted as a domed cover. This is placed on the top of the warm stove with the oven preheating. This warm, moist environment raises your dough quickly, usually in 30 minutes so. Standard size loaves have plenty of room to raise.Full size steamer tray shown with English Muffins being raised.
Top inverted tray is removed to photograph the bottom.There is a wire rack under the muffins (English Muffin Photo) that is foiled covered for this English muffin technique.Trays and properly sized racks are available at restaurant supply placesOther options are foil type trays, Dutch Oven with a trivet inside, then set in the sun, etc. I have also used an ice chest with hot water and pans to lift the loaf pans above the water...no ice 🙂 Anything you have around the house that can trap the warmth and moisture. Also before starting the "raise" process, remember to coat the dough with vegetable oil or olive oil. Spray Pam works great and is easy to apply with no waste.After removing the baked bread from the oven, and still hot, rub all surfaces with butter for a soft crust.Note: Dough can be made ahead of time and stored in the fridge. See the link below for more details.No...this bread does not taste like coconut.
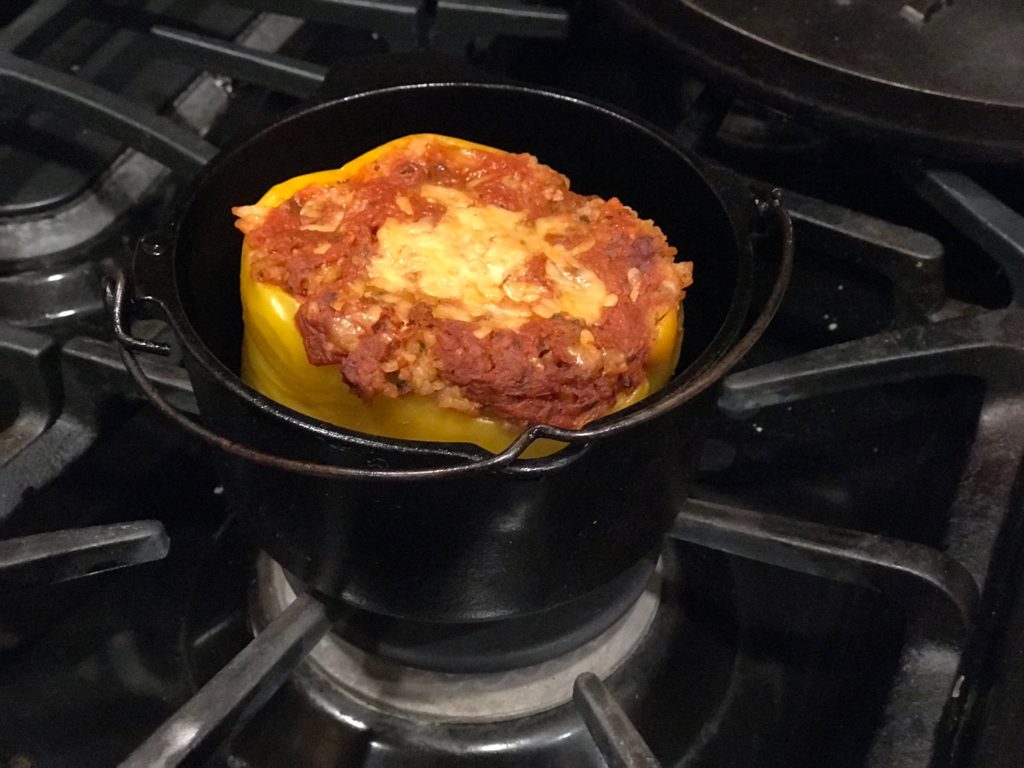
We served chips with this dip as an appetizer with rewarmed Stuffed Peppers. This dip recipe is simple and fast. Blend it up in a food processor and immediately serve. Keep a couple cans of white beans handy for unannounced guests. It could be made with the fresh Cilantro. You could substitute the fresh cilantro with dried cilantro, parsley flakes, or dried chopped chives. But I think you will sacrifice some of the flavor.
Recipe: Rick Beach
Place the fresh Cilantro and garlic in a food processor. Drizzle the oil on top of the Cilantro. Pulse to chop ingredients fine. Do not liquefy.
Add the remaining ingredients and pulse until well blended
Serve with corn chips.
Alternate option. Substitute 1 Tbsp Lime juice for 1 Tbsp of Olive oil.
Also could substitute the fresh cilantro with other dried herbs such as cilantro leaves, parsley flakes, or dried chopped chives.
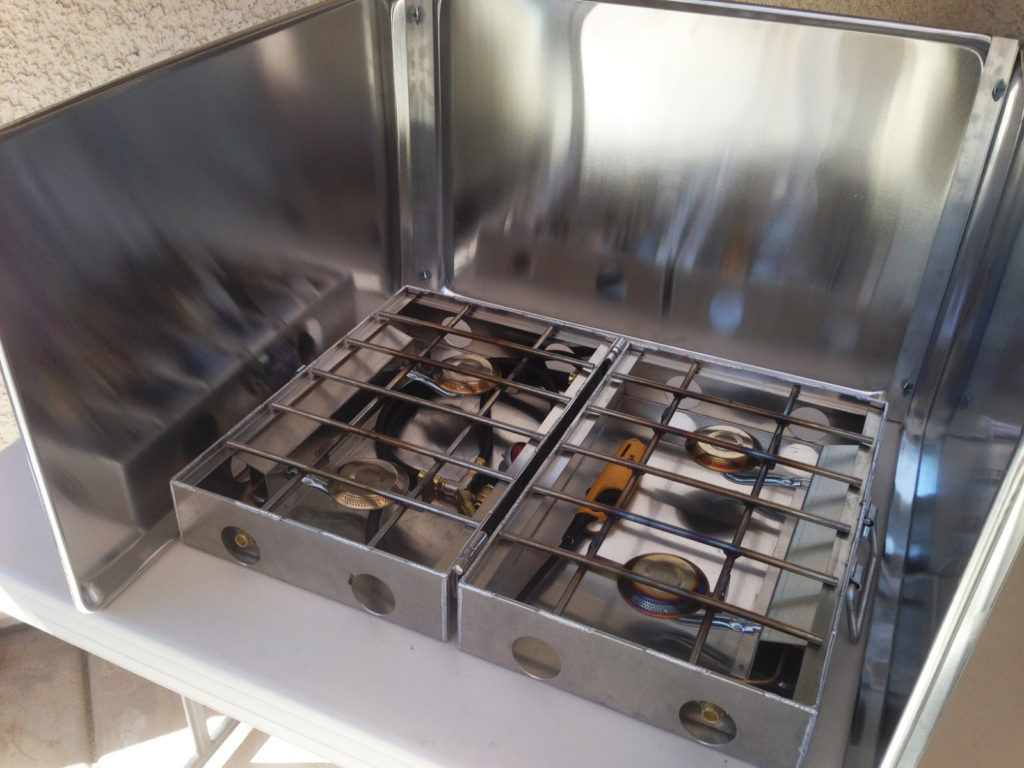
A wind screen or windshield is often necessary to properly cook in the outdoors. Especially if you are cooking on some type of raised platform. A platform such as a cook table, or a camp stove placed on a picnic table.
While both cook tables and camp stoves may come with their own shield, they are often too low, and inadequate.
I have seen numerous types of DIY wind screens, out of many materials.
THE THOUGHT
This DIY project was thought out to use readily available materials. With the idea in mind during fabrication, to use the simplest of tools found in nearly any household. Best of all, workable by nearly anyone with minimal tool handling skills.
I also wanted this to break down and sort flat as possible during transport or storage.
The final “must have” was that this screen needed no tools, to set up/erect for cooking, or to break down for storage.
This DIY project shows the basics of building a Windshield for your Camp Stove or Dutch Oven. Numerous modifications could be made to suit your personal needs.
I prefer the higher shield as shown. Both for use, and for ease of construction.
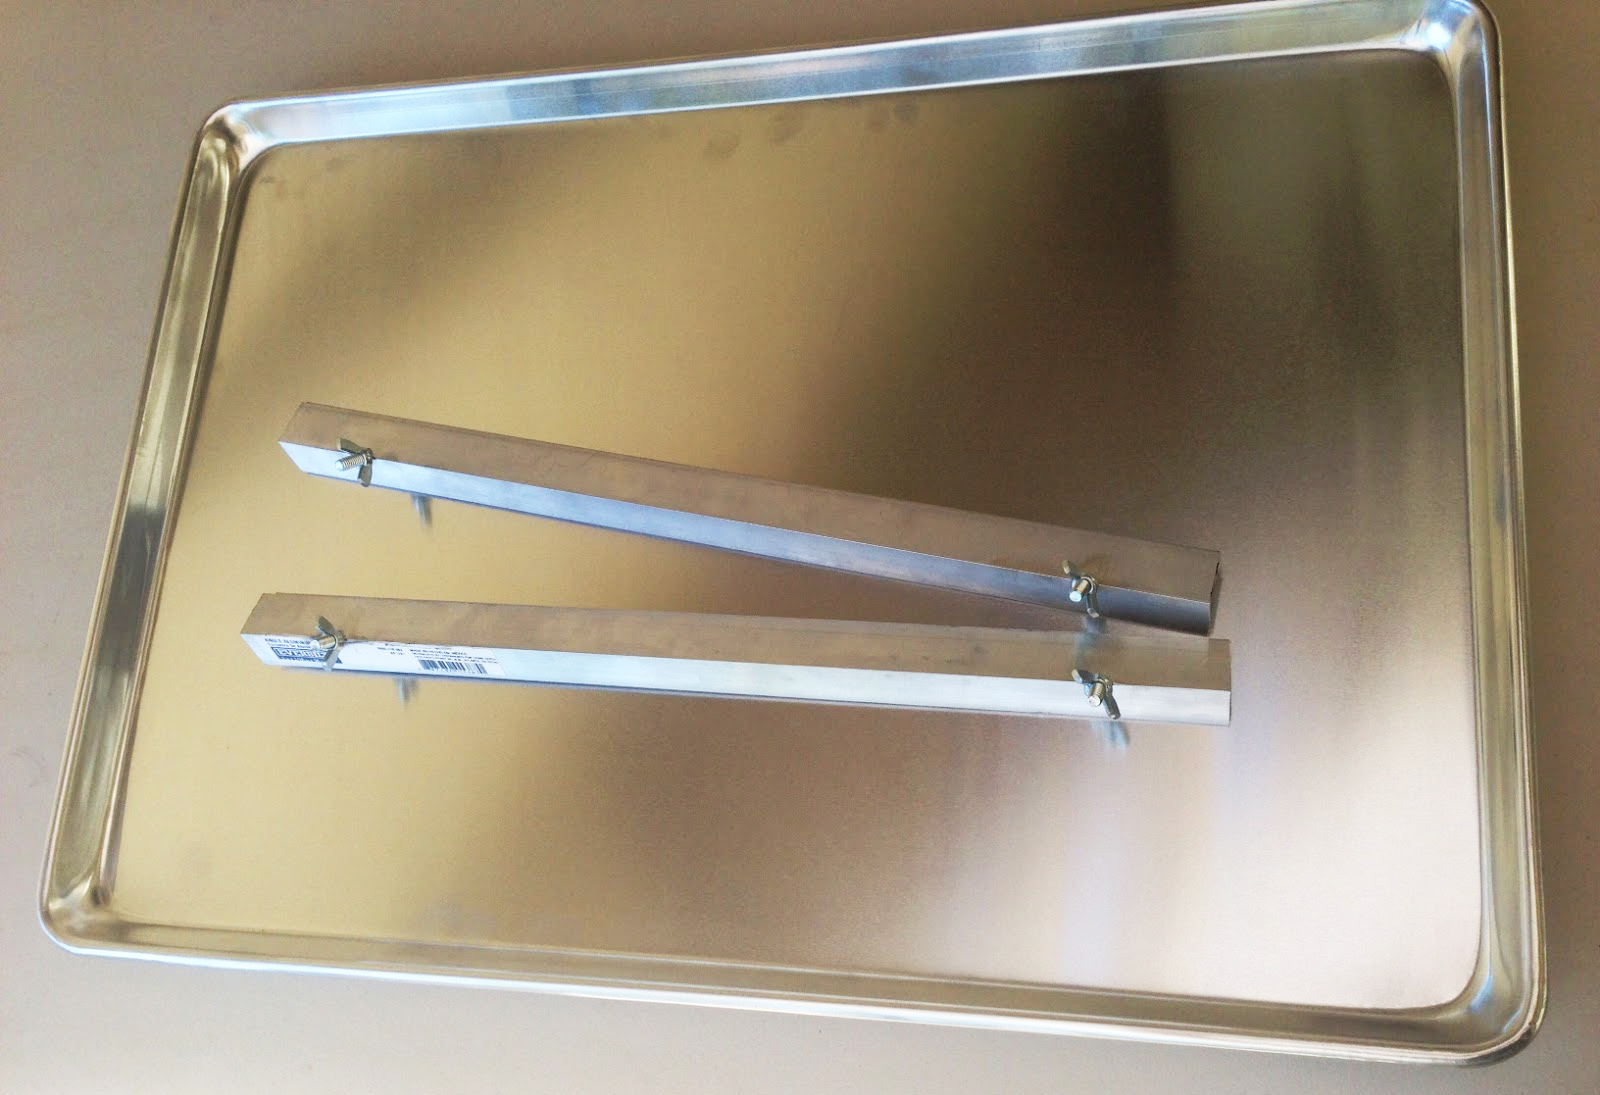
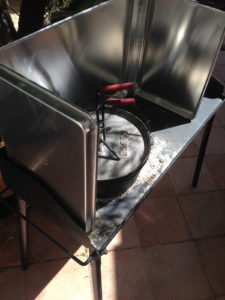
The long sides of mine are made from a 18X25 inch cookie sheet. The smaller ends are 13X18’s cookie sheets. These sizes will avoid the need to make any cuts concerning the cookie sheets. These cookie sheets are clamped together with easy to fabricate aluminum angle clamps.
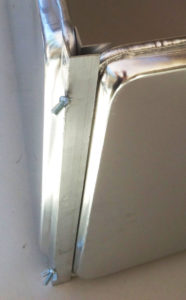
The clamps are snugged up using Thumb Bolts and Wing Nuts. No tools are required during set up.
While an electric hacksaw, drill press, and drill press vise, makes for an easy job of it. A simple hacksaw and hand drill will do just fine. Since the DIY clamps are soft aluminum, any required drilling is fairly easy. Do practice tool safety to protect body parts during fabrication. Eye protection is mandatory.
My initial build was a Windscreen for my Partner 4 burner stove. Made with three 18X25 cookie sheets. I later bought the 13X18’s for use when Dutch Oven cooking on a metal Dutch Oven Cooking Table.
For the Dutch Oven Cook Tables that are wide and rather narrow front to back. Two sets of an “L” Shape configuration can be arranged to adapt to most Dutch Oven Cook Tables. They can slide to adjust for whatever width table you may have. The two longer rear cookie sheets can be clamped together with a C-Clamp or Spring clamp.
In a good wind you might have to use small bungee cords to hold the shield down to the table. (Bungee attached at points away from high heat of course)
OBJECTIVES
*Something simple with minimum amount of complex fabrication.
*Free standing without the use of supports.
*Large enough to surround on 3 sides.
*Minimal cost.
*When not in use, something that stores flat for storage and transport.
*Multi-purpose.
*Easy to setup without the use of any tools.
All objectives were met. I am sure a good scrounger or person that has usable used material can beat what they cost me. For this article, all parts were purchased new, at full retail prices.
Additional benefits are this Windscreen is also easy to clean, and if not being used as a shield, the trays can be used for other purposes such as food prep, as serving trays, or perhaps other functions I am not even thinking of.
MATERIAL (3) 18X25 Cookie Sheets ($6.75 each) (For a 25X25X25 setup)
or (1) 18X25 Cookie Sheet ($6.75) + (2) 13X25 Cookie Sheets (2 Pack $10.25) (For 13X25X13 Setup)
(2) Aluminum Angle 1/16 inch 1×36
Both cut in half to make (4) 18 long pieces of angle ($5.37 each)
(4) Thumb Bolts 1/4inch, 20 thread, 1 ½ inches long ($1.18 each)
(4) Wing Nuts ¼ inch, 20 thread ($0.55 each)
These are local all new material prices. Cookie Sheets from Costco or Sams Club. Or a local restaurant supply retailer. Hardware was obtained from Home Depot. A good scrounger might be able to find this material at a thrift store or garage sale for much less.
FABRICATION (Read through this before starting)
Cut the two 36 inch Aluminum angles both in half to create (4) 18 inch angles. Make sure all pieces are of equal length. Trim if necessary.
Mark the 18 inch angle aluminum at 2 inches in from both ends. Keep these pretty exact so pieces will be interchangeable with each other during set-up. Meaning the holes will line up with one another. Its critical, that the distance measurement between the drilled holes on one piece of aluminum angle, is that same measurement on all pieces of aluminum angle.
If you decide to make additional wind screen parts in the future be sure to use one of your existing parts as a pattern. That way they will be interchangeable.
Stack 4 of your 18 inch aluminum angles together. Clamp in a vise if available to avoid having the stack twirling around and hitting you during drilling. If no vice is available use another method and proceed with caution. Drill a hole at your 2 inch marks, and drill down through all 4 angles stacked together. You start the hole on the inside of the V of the the angle. Use a 5/16 inch diameter drill bit.
Make sure the drilled holes on the first end of the stack do not become misaligned. Then Drill the other end at your mark using the same method.
The idea is to create 4 identical parts that can be interchanged even if flipped around or used with any other piece. Identical meaning the measurement distance between the drill holes are equal on all angle parts you fabricate.
Clean up any drill burrs and sharp edges with a wire bush, wire wheel, file, sandpaper, etc.
SET-UP
Insert your Thumb Bolt through a stack of two angles. The Flattened Thumb end of the bolt should be on the inside of the V of the angle aluminum. When held in place with a finger the angle aluminum prevents the bolts flattened thumb head from spinning. (No wrench required)
Loosely thread the wing nut on the threaded end of the bolt.
Repeat the bolt insertion and wing nut on the other end of the two aluminum angles.
Hold 2 of the cookie sheets up in a vertical position, with the top cooking surface side facing each other in an “L” shape.
Slip the clamp over the joint of the cookie sheets. One angle of the clamp with be on the inside of the cookie sheet joint. The other angle of the clamp will be on the outside of the cookie sheet joint.
Tighten the clamps wing nuts when correctly positioned. Repeat for the other corner to create a three side wind screen. (No tools required)
The whole set-up pretty much stores flat when not in use.
This Apple Cream Cheese Danish Recipe can be used in your home oven. Or easily adaptable for use in a Dutch Oven by cutting the pastry in half to fit in two Dutch Ovens.
1SheetFrozen Puff Pastry Sheet 16x24Not Pie Crust!
1/2StickButterSoftened
1CanCan Apple Pie filling
½ CupSugar
1Tbspcinnamon
1/4tspSalt
4ozcream cheese
ICING
½ StickButter Softened
3/4CupPowdered SugarMore or less - Start with 1/2 Cup
½tspOrange Juice
¼tspVanilla extract
1PinchSalt
Method
Pastry Prep
Pre-heat oven to 375°F
Lay out frozen Puff Pastry on a greased or spray oiled sheet of aluminum foil. Allow it to mostly thaw and come to room temperature. Spread the ½ Stick of soft butter over the entire top surface. Use more butter if necessary.
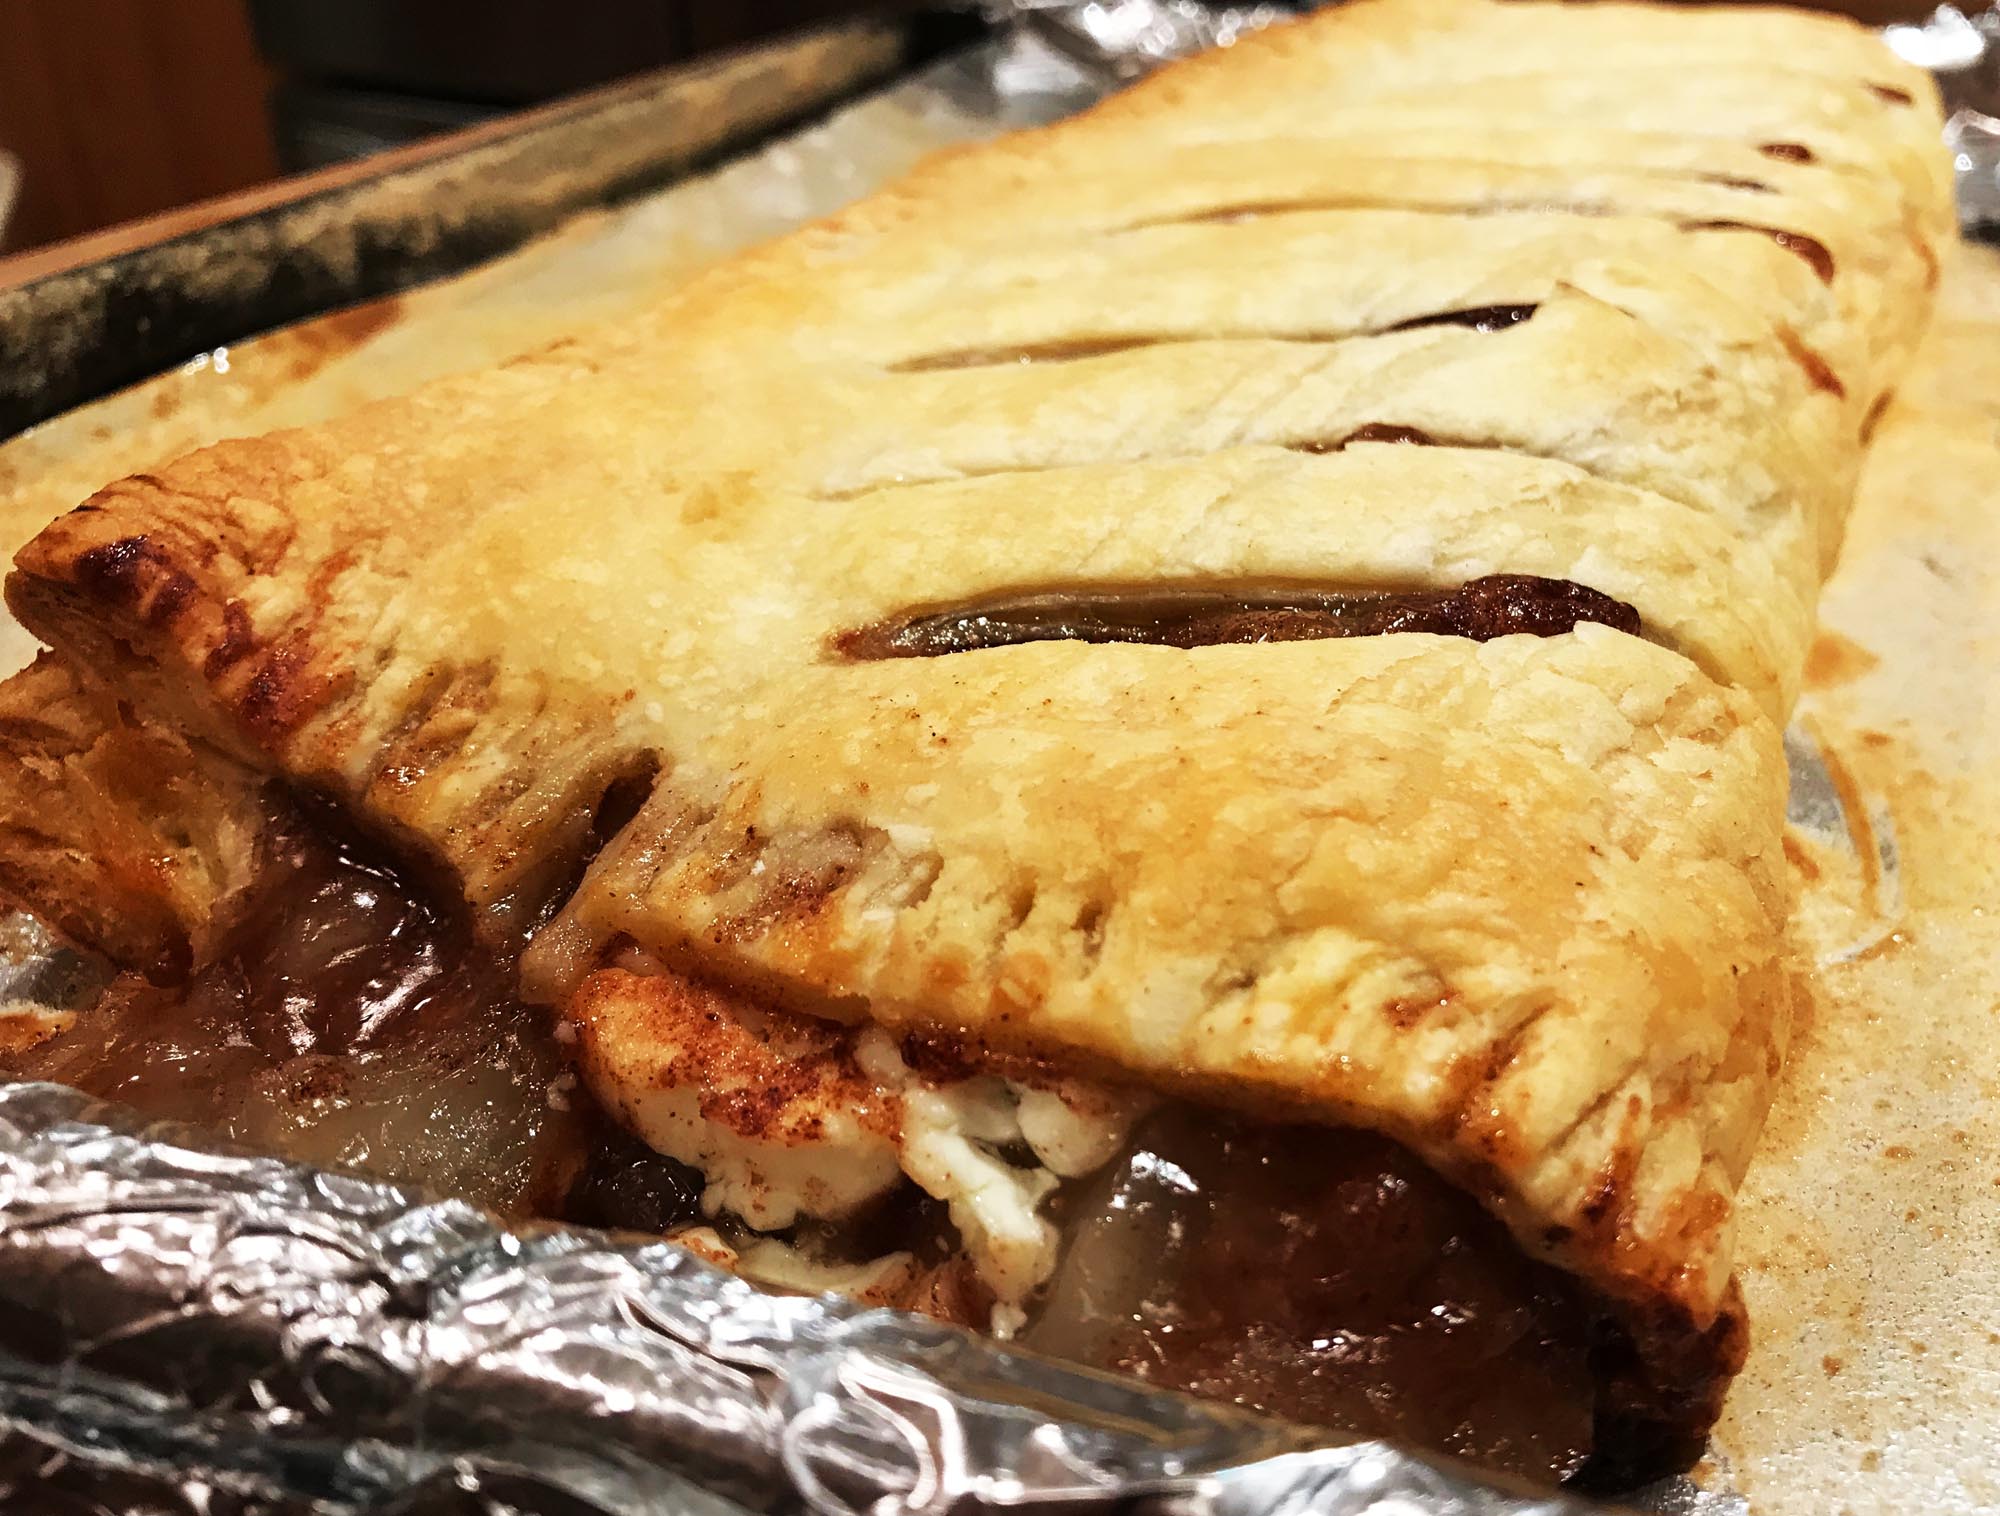
Dump the entire can of apple pie filling on the Puff Pastry. This has to be roughly down the middle of the long dimension. Prior to baking you will be folding the pastry dough in half to create a 8x24 baking dimension. Do not fold yet! Keep the filling about 1 inch away from all edges.
Spread the filling the best you can over half the puff pastry avoiding the edges.
Mix the Sugar, Cinnamon, and salt together. Sprinkle that sugar mixture over the apple filling.
I use (4) 1 oz foil packs of cream cheese for the next step. You could cut a softened 8 oz brick of cream cheese as an alternative. Nothing says you can't use 8 oz and use up the cream cheese. In my case I lay a 4 oz ribbon of cream cheese down the center of the filling from side to side.
Once the pastry is completely thawed and foldable without cracking, fold the pastry over the top of the filling on to itself to create a pocket. Use a fork to seal the top dough to the bottom dough on both ends and the long edge.
Cut some vent strips through the top of the Puff Pastry using a wet sharp knife.
Slip the aluminum foil onto a cookie sheet.
Bake in a preheated 375°F for approximately 30 minutes or until golden brown and flaky.
Once baked slide the pastry and foil off the hot cookie sheet onto a wire rack to cool.
Icing Prep
While the pastry is baking prepare the icing.
Mix the softened butter, orange juice, and vanilla together in a small but kind of deep bowl. Using a spoon, start beating small amounts of powdered sugar in by hand.
Continue adding and beating in powdered sugar until you obtain a desired stiff, but pipe-able icing. Adjust to taste. If adding any additional liquid, do so in very small amounts. Then beat in additional sugar to get a stiff consistency.
I then move the icing into a quart sized freezer zip lock. Snip one of the corners off with scissors, and this becomes a disposable piping bag.
Once the baked pastry has cooled some, pipe the icing across the top.
Stargazer gave us authorization to use some of their photos and info. The images and their story is lifted off their website. We would like to extend a huge thank you to Stargazer’s Luke Trovato for corresponding with us and authorizing the use of their images and text.
Also today I placed an order for one of their skillets. We will have a future article to let you readers know how this all went. We also intend to do some cooking as soon as it arrives. We will be putting the cast iron through its paces.
I personally am drawn to the Stargazer brand Cast Iron due to the fact this is made in USA. Secondly I own numerous vintage skillets such as Griswold, BSR and the like. Vintage pieces from back when the cooking surfaces were smooth, compared to other rough modern Cast Iron Cookware.
I am very curious to test out this surface. As a member of an active Dutch Oven Cooking group I often cook in competition. There isn’t an event that goes by that we aren’t discussing Cast Iron. The cooking surface is often a topic. All of use have wondered why no one was producing smooth cast iron cookware like the “old days”. We also all want USA made.
I just hope they start producing some Dutch Ovens too.
In the cast iron marketplace, we’re the new kid on the block. Stargazer Cast Iron was founded in 2015 by three old friends with a shared vision: creating the best cast iron cookware around.
It started with an obsession. Peter Huntley, professional designer and hobby cook, went searching for the perfect skillet and came up empty-handed. Dissatisfied with the options on the market, he turned to vintage cookware to find the quality he was looking for. After nearly a year of collecting, restoring, and cooking with vintage cast iron, he saw the untapped potential and decided it was time for something new. He created a unique cast iron skillet from the ground up: reimagined, redesigned, and revitalized. Huntley enlisted the help of two friends to bring the vision to life and Stargazer Cast Iron was born.
Our cookware is made using the same proven materials and manufacturing processes that were used over one hundred years ago, now aided by CNC machining for unrivaled precision. Our designs are practical and our quality is second to none. We believe we have created the finest cast iron skillet available today, or anytime for that matter.
Recipe and Images courtesy of : Rick Beach
Note: This is one of my personal recipes
These can be prepared in a cast iron skillet, Dutch Oven bottom pot, standard skillet, or a wok. This recipe makes 12. But only expect that to feed 3 people. Perhaps 4 if you have some sides. These make excellent appetizers when cut in half after frying them.
1Skinless Chicken BreastCooked and Diced in pea sized pieces
1tspMontreal Steak Seasoning(no other seasoning or salt used in recipe)
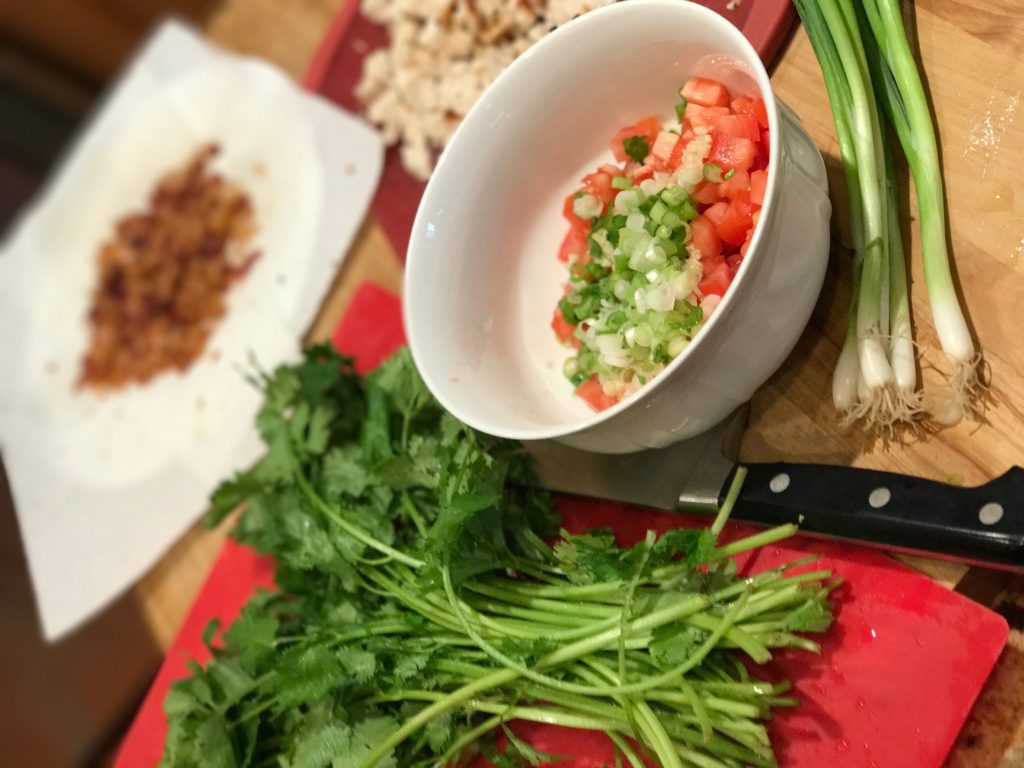
6Green OnionsThinly Slice the whites and green tops
2Fresh Roma TomatosDiced in pea size chunks
1/2BunchCilantro Fresh ChoppedCoarsely Chopped
2Large ClovesFresh GarlicMinced
2CupsMonterey Jack Cheese
Canola OilFor Frying the egg rolls
Ranch DressingFor Dipping Sauce
Sriracha SauceTo spice up the Ranch Dressing
Method
Fry bacon until very crispy, then crumble. Set aside.
Pour off the bacon grease and use the pan with the remaining stuck on bacon drippings to cook the chicken breast. Roll the raw breast in the Montreal Steak seasoning before starting to cook. Using medium high heat quick sear the seasoned breast on all sides. Once all sides seared, lower heat to medium low and cook covered. Turn occasionally for about 20 minutes but avoid drying it out. Once thoroughly cooked dice into small pea size cubes.
Toss the Chopped Tomatoes, Cilantro, Onions, and Garlic to combine. Then stir in the cooked and diced chicken, and cooked crumbled bacon.
Lay out an Egg Wrap and spoon about a 1/4 - 1/2 Cup (fill as much of the wrap that it will hold) of the combine Tomato and Chicken mixture onto a wrap. Sprinkle a generous amount of shredded Monterey Jack cheese on top of that. Start rolling/wrapping from a corner diagonally. About half way through the rolling, tuck the two side corners toward the middle of the roll. Continue rolling to seal the roll. Set on a clean surface with the tail of the wrap on the bottom to prevent unrolling of the egg roll.
In a wok, skillet or pan, cover the bottom with vegetable oil and bring up to temperature using medium high heat.
Place the egg rolls in the hot oil with the wrap tail down until that surface is golden brown. Rotate the egg roll with tongs and brown all surfaces. Once browned remove from the hot oil and place on absorbent paper towels to remove excess oil.
Serve hot.
Ranch Dressing by itself makes a wonderful dipping sauce. If you want to ramp it up a bit stir in very small amounts of Sriracha Sauce, taste testing as you go, until you get your desired taste. (Remember many don't care for spicy hot).
Though this recipe makes 12 Rolls. You will find 4 will be required per person if this is all you are serving. A side of seasoned rice and a nice salad may stretch this to 2 per person. But they are kind of addictive and I doubt 2 per person will be enough.
Recipe courtesy of Rick Beach
This is a great side dish. Or for use in other recipes that call for "Spanish Rice"
Add an addition of 1lb ground beef (browned) to be used as a main dish.
This recipe makes about 3 to 4 Cups of Spanish Rice.
Heat oil in deep skillet. Saute uncooked rice, onion, bell pepper, until rice is brown and onions tender. Add minced garlic toward the end. Stir in and don't burn the garlic.
Stir in water, & tomatoes. Stir in all seasonings. Simmer for about 30 minutes covered. Or until rice is cooked and liquid absorbed.
Notes
To use the basic Spanish Rice recipe as a main dish. Add 1 lb of browned ground beef, browned ground chicken, or browned ground turkey.
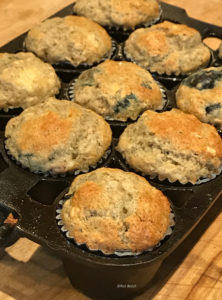
In medium bowl combine the oats and milk and set aside to allow liquid to absorb.
In large bowl combine the remaining dry ingredients and whisk to combine. The Nutmeg, Sugar, Baking Powder, Baking Soda, Flour, Salt, and Cinnamon.
Stir the melted butter and whisked egg into the milk and oats. Stir in the Smashed Bananas, then the Blueberries.
Stir the wet ingredients into the dry. Stir until well moistened.
Line muffin pan with paper cupcake/muffin liners. Spray papers with spray oil such as Pam. Fill muffin cups 3/4 Full. Bake in preheated oven 425°F for 15 minutes and passes the toothpick test.
 front to back. Two sets of an “L” Shape configuration can be arranged to adapt to most Dutch Oven Cook Tables. They can slide to adjust for whatever width table you may have. The two longer rear cookie sheets can be clamped together with a C-Clamp or Spring clamp.