Is it a new piece that comes with a Wax coating?
If you have a new piece that comes with a wax coating, that wax needs removed before cooking or seasoning for the first time. The brands that still come with a food grade wax, are are normally tagged as such. You can test with your fingernail too.
If you can scrape away a semi-clear material with your fingernail it is more than likely a wax coating. I have picked up garage sale purchases that have never been used, that still had the wax coating.
This needs burned off either in your oven or on a covered BBQ grill. Using a method similar to what is described later as oven stripping. Be sure to heat and then cool slowly will covered to avoid damage. This is a 2 to 3 hour process using heat at about 450-475°F.
The easiest and safest way, (Safest for the cast iron) for removing the wax is your kitchen oven. Hopefully you have an exhaust fan. The kitchen oven is preferred because you can regulate the heat. But this wax product does smoke while burning it off.
If your kitchen oven is used, line the bottom of the oven compartment with foil to catch any drips.
If your kitchen oven is not an option, the second choice would be a covered BBQ grill. A covered grill that includes a thermometer. One that can close completely. Using a BBQ grill you must be vigilant in regulating the temperature during the entire process.
Is the piece new with some other type of temporary protective coating?
If your cookware is new, and comes as raw cast iron but coated either with a food grade vegetable oil or food grade mineral oil these products must be completely scrubbed off. You can see it wipe off on your finger or a thin paper towel.
Hot Soapy Scrubbing bath before seasoning
The best way to remove residue on new cast iron before seasoning is to use very hot soapy water bath and a scrub brush.
#00 or #000 Steel wool, a soft bristle brush, or nylon pad could be used on the interior cooking surface with hot soapy water. Then rinse the cast iron with clear hot water. [Note: most die hard collectors will not use steel wool of any gauge. They claim it will leave scratches]. There is always a huge debate on that subject.
Clean the piece with a scrub brush and steel wool or nylon pad, with new clean hot soapy water.
Hot water rinse well
Change out your cast iron soapy washing water, to fresh clean hot soapy water. You want to eliminate any floating oil contamination that remains. Clean your brush, scrub pad or steel wool.
Repeat the second fresh hot soapy water scrub.
Do a hot water rinse again. Drain the water.
Rinse everything a second time with hot clear rinse water.
Wipe the cast iron dry with a lint free cloth. There should be not residue color. Not black residue or red/orange residue. Immediately put the dried off piece in a 200°F oven for 5 minutes or so to completely heat dry.
Do not leave your cast iron cleaned this way even for a couple of hours. Immediately proceed and bake on at least one coat of seasoning. Raw cast iron with no seasoning will quickly start rusting. It is amazing just how fast it will start.
If you can’t properly season at this point at lease wipe on a layer of your favorite seasoning product. Then properly season as soon as possible. Interruptions in life do occur. But wiping on a product and setting it on the shelf is not seasoning it. Some people do think that is all it takes.
Proper seasoning takes heat and time.
Is the piece new with Factory Pre-Seasoning?
Some brands now come with factory pre-seasoning. The Lodge pro-logic series is factory pre-seasoned with one coat. The new Lodge line of cast iron cookware, Blacklock, is factory seasoned 3 time. This is not a wax coating but truly pre-seasoned.
Don’t get confused that these pre-seasoned finishes such as the pro-logic type factory seasoning needs removed. But most recommend further coats of your own seasoning before you begin cooking with the pre-seasoned piece.
Many that have been cast iron cooking and have experience, all know one coat of seasoning is not really adequate. It requires multiple coats to create the near non-stick “teflon” type of seasoning finish you want.
Multiple coats are necessary to obtain that “Black” and “Slick” looking finish. Good seasoning also protects the cast iron from soapy water cleaning. If your seasoning is caramel brown in color, you are not there yet.
Second Hand – Garage Sale Finds – Estate Sale Finds
These should be approached with some caution. There have been cases of old cast iron having been used to melt lead. Especially some of the smaller sized pots. Some collectors claim they go as far as having them tested for lead. I suppose that could be a whole new subject to expand upon?
Vintage cookware is sometimes found that have been painted. Old paint often contained lead. I would not attempt stripping these, then ever eating food prepared in them.
If you don’t know where it has been, inspect it closely. If you see anything you suspect as lead I would think hard before ever using it as cookware. Re-seasoned or not.
You also have to think this used cast iron cookware could have been stored in a garage and exposed to insecticides, fertilizers, motor oils/fuels, or other non-food safe materials that were either stored in them, dripped upon them, or have sprayed residue adhered to them.
It is advisable to completely strip the piece, scrub it in several baths of hot soapy water [completely changing the water and cleaning the scrubbing tools between baths]. Then properly applying several new coats of your own seasoning.
Beyond that common sense will have to prevail.
Be careful of how you heat or cool your cast iron.
Cast iron that is heated too hot, or too quickly, when dry (no food mass inside) can be damaged easier than you might imagine. Likewise cast iron that is hot, then cooled quickly or touched with something cold or cooler, can result in an instant crack.
You never put a piece of cast iron in an already hot oven such as you might mistakenly do in the seasoning process. The cast iron piece needs placed in a cold oven. Then brought up to temperature along with the oven.
This is all more important when burning off wax, stripping, or seasoning, when the item has no food mass inside. The most common time a crack occurs is when the piece is at high temperature and it is picked up with a damp towel, glove, or mitten. So keep those items dry! Avoid touching them when hot.
Damage frequently happens when an empty piece of cookware is put on a heat source, such as a stove top, and forgotten. If you hear the telltale pop sound, it is too late!
Basic Seasoning and Oven Temperatures
Many think seasoning is as simple as wiping the cast iron with some type of food grade oil or shortening, or cooking some bacon in it. While that might provide a temporary protective coating this is NOT seasoning.
There are numerous seasoning products. Contrary to what some say, most products work equally well when properly applied. It does have to be food grade safe.
After the product is applied you basically heat the cast iron piece to the proper temperature, and hold the temperature for the proper time frame. Do not pre-heat the oven to high temperatures first. The Cast Iron and oven need brought up to temperature together.
As a generic rule, bring the temperature of your oven and your cast iron piece up to your desired temperature, together. Normal temps are 400°F to 475°F. You have to know or figure out by trial and error, your products polymerization heat point. It differs from product to product. Plus your ovens temperature may not be accurate within 25-50°F. More on this later. See polymerization, below.
Maintain the seasoning temperature for 1 1/2 hours to 2 hrs. Do not open the oven. At the end of the heat cycle, turn off the heat. But allow the piece to remain in the closed oven, or covered grill, to naturally cool down together. That cooling cycle is a minimum of an additional hour to hour and a half.
In summary, be careful with your Heat to avoid warping or cracking. Cast Iron Cookware for the most part seems indestructible. Failing to watch your heat can result in permanent damage. Quickly heating, or quickly cooling, can have disastrous results.
Note on buying used. For us collectors we often find vintage cast iron that we call “Rockers“. “Rockers” are created when the bottom is warped due to excessive heat. Skillets and Dutch Ovens should not rock when placed on a flat surface.
Many vintage pieces were used on top of a wood stove. Where a stove top lid was removed, and the cast iron cookware placed over the hole. The cookware was exposed to direct heat from the wood fire, or perhaps even hotter fire from coal. Most collectors pass on rockers and don’t buy them.
They do have a purpose to some. Great for camping for those that cook directly on wood coals. For that purpose the warp-age will not interfere with anything.
To date I have not heard of anyone using a milling machine to level out a warped bottom. There are often raised heat rings one would have to remove too.
Cracks are even worse. Some even split in two. The most common mistake is to put a piece on the heat of a stove, empty, to “dry”. Then either use too much heat too quickly, or get distracted and walk away a few minutes too long, or pour/throw something cold into it.. The sickening pop that may follow is a death blow to your cast iron. These are not worth attempting to have them repaired.
In summary: Bring cast iron up to temperature slowly whether seasoning or cooking. When seasoning put the piece in a cold oven. Let oven, and the cast iron piece, come up to temperature together. Cooling is done with the oven door shut and the oven, and piece of cast iron, cooling down naturally together.
When drying a washed piece on the stove or other heat source, use low heat, and stay very attentive.
Lets touch on Polymerization
Without going scientific on everyone, let’s just say “polymerization” in the cast iron season process is the temperature point that a particular seasoning product begins to bond to the surface. The temperature point that creates that desired slick, durable, and dark surface. Proper seasoning is dependent on temperature and duration. Products will differ. If you do not achieve proper/good polymerization, you are not seasoning your cast iron.
People that have seasoned and have gotten bad results often move on to another product. In reality the first product would have worked just fine. They simply did not hit the sweet spot for polymerization to occur with the failed product. Over decades I have used about every known product out there. They all work with very similar final results, but at different temperatures and time duration. The trick is finding the temperature that works….and how long to keep the heat on it. Once you get it, stick with the product you are successful with.
Settle on your product and keep using that product. That way multiple layers will all have same polymerization temperature requirement. This does not require specialized high priced products.
Note: Using too high of heat can actually cause the seasoning to start crystallizing, flaking, and coming off. At this point of the heat range, you are approaching the temperature that your valued seasoned coating will start burning off and leave bare metal. Be careful at temperatures 500°F and higher depending on what product your seasoning was or is. Some products are affected at even lower temperatures.
If you start getting flaking you need to strip it to bare and start over. Then lower your seasoning temperature. These flakes will end up in any food you cook.
For an example I use my ovens self cleaning mode to completely strip my cast iron to bare metals when I want to start over from scratch. Especially on pieces I pick up at garage sales or flea markets.
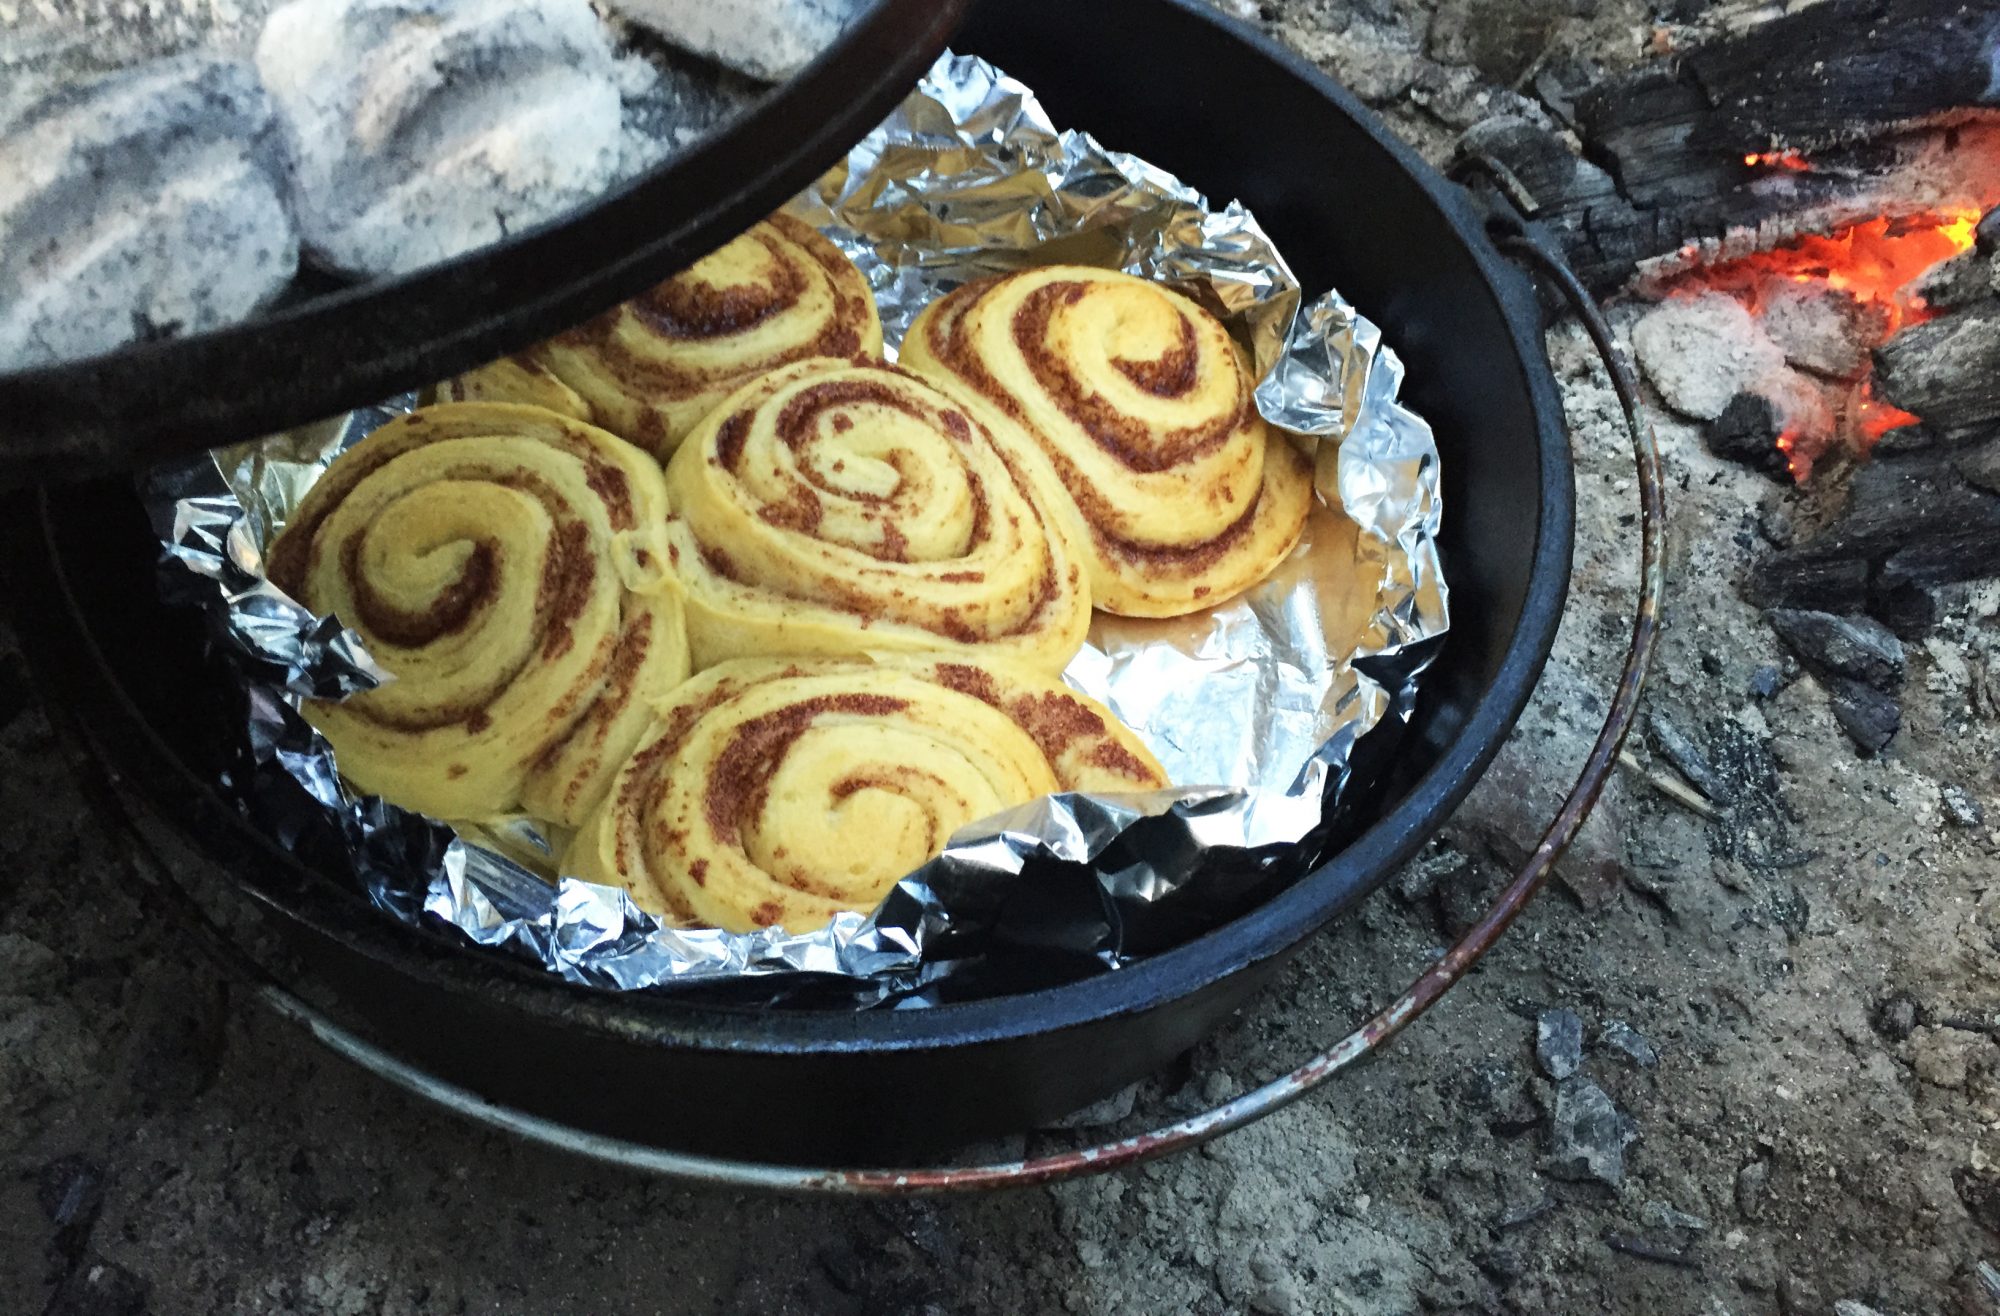
In the self cleaning mode, temperatures exceed any reasonable baking temperature. Most people never bake above 475°F. I understand self cleaning ovens approach close to 900°F? Great for stripping. Excessive high temps are death to seasoning. People cooking with campfires often wreck their seasoning with too high of temps. A campfire heat source for cooking, requires more experience and attention than cooking with charcoal. Also some people are willing to sacrifice their cast iron. Cooking with campfires verses charcoal is another topic in itself.
What Product or Seasoning should I use?
Any product you use must be an edible food safe product.
Beyond the food grade safe requirement it is…. Wow! This is like talking Politics or Religion. Once you throw out something is better than this or that, the zealot’s are going to crawl out from under their cast iron lids. They are going to start throwing hot charcoal briquets in your direction, if you question their opinion. Some might even hit you up side the head with a cast iron skillet.
I have tried just about everything over 40+ years of cooking with, and collecting cast iron cookware. It all boils down to personal preference. What is readily available in your pantry. Or what product you normally have available when camping.
I have even tested and evaluated some of the commercial products specifically made just for cast iron seasoning. Those products do work great. But my conclusion is. Any food grade product, oil or shortening, all work equally well if you find the proper Polymerization temperature. The proper time duration. And using proper seasoning techniques.
So my logical conclusion is to use something that is always available at home, camping, or during competition cooking events.
There are a variety of vegetable oils, vegetable shortenings, animal shortenings – grease -lard, and commercially available products. All of which work. They all work well! After all, the “old timers” weren’t using something they found at the store and squeezed out of a tube. Some of their cast iron cookware is still around today being used or admired a century later.
Some claim products such as vegetable oils and shortening will go rancid during storage. Others claim animal products will do the same thing. Perhaps this will affect you if you don’t season or store your cast iron properly.
Keep it simple. My suggestion is to simply pick something you normally have on hand in both your home kitchen, as well as when out camping if that is your passion too. Get to know what that products Polymerization point is. It is trial and error through several attempts.
Also the heat duration time for your product to season correctly is a factor. Both the temperature and time in that formula are important but also very forgiving. When you get it right, proper seasoning will produce a deep black and slick seasoned finish. Remember all common products, will get you there.
For me that is plain Crisco (Vegetable Shortening). It is inexpensive and always on hand. I know how to make it adhere and turn glossy black.
For the naysayers of this product, especially those that harp on the “rancid” subject, I have never experienced that issue. Certainly improper techniques can produce a rancid smell and taste. As well as other problems, if your cast iron is not cared for correctly.
The Rancid issue
The rancid issue is not strictly related to Crisco. That can happen with most products.
The “Rancid” smell or taste, or bad smell in general, is not isolated to vegetable shortening, Organic oils, Vegetable oils, or animal products such as grease and lard. The “rancid” issue is typically caused by wiping a product on raw. Not heat seasoning it. Then storing your cast iron for any length of time.
Most anything will go rancid or smell odd, if wiped on “raw” as a protective coat. Then left that way. Left raw, never heated to its Polymerization point, and left to sit too long without use.
This smell will transfer to food and you will taste it. It apparently won’t kill you because I have taken a mouthful of food cooked by others during potluck situations. It leaves a telltale taste for sure.
Anytime I put my cast iron in long term storage, it is always heat seasoned first. Heat seasoned, not just a “Wipe on”! Using the techniques that are outlined in this article. Seasoned a full term at the products Polymerization temperature point.
As we keep saying, seasoning is not just wiping a cast iron piece with a product after cooking or cleaning. Some people think that is all seasoning is. Sure wiping a layer on is great protection until its next use. If that is a matter of days, or a week or so. Beyond that, regardless of product, it is advisable to do a complete heat seasoning cycle, at Polymerization temperature. For lack of a better term, don’t leave your product wiped on “raw” for any extended storage.
Leaving wiped on “raw” products for any length of time will also result in a extremely sticky/tacky coating that seems impossible to wash or scrub off. I often find these as garage sale finds. I recommend that any you have like this, is to just heat strip all seasoning off that cast iron. Then build several new layers before using.
In fact, with any garage sale or estate sale find. I recommend stripping and laying down new seasoning. You never know what a previous owner may have had on the surface of the cookware. Especially if something non-edible had be spilled on it. Things like Insecticide, motor oil, etc., comes to mind.
In storage I always create a gap between the bottom and the lid with a rolled up paper towel. That allows air to circulate within.
Some use a sock with one new charcoal briquet in the toe. The toe with the charcoal goes in the pot, the other end of the sock is hung over the edge. With the lid cocked on top of the sock to create an air gap. Don’t store in damp/humid places, directly on concrete, or in overly hot area’s.
Overly warm long term storage may result in that rancid issue regardless of the precautions you take. Or the product you use. Attics and garages are not ideal storage locations. Do a sniff test before using. You will definitely know.
Applying seasoning product
Any choice of seasoning product should be applied to a slightly warm piece of Cast Iron. Coat all surfaces, corners, and crannies. Coat inside and out. This should then be wiped with an absorbent link free cloth. You want a very thin coat.
Paper towels should be avoided since many will leave small fibers or even little balls stuck in the seasoning product. If a paper towel is a must, purchase the higher grade that doesn’t disintegrate and get stuck into the surface your food will be cooking on.
Some claim you have to warm the cast iron to open the “pores”. Others scoff at that notion and claim there is no such thing as “Pores” in cast iron. Perhaps a misconception. Modern day cast iron is definitely much more rough than their older vintage cousins that were produced with nearly glass like finishes on the inside. So some do refer to the rough cast iron, as having “Pores”.
Another way of looking at this “pore’ subject, is there are “Peaks and Valleys” in the surface of the rough cast iron. To get a fine seasoned appearance and smooth cooking surface, it requires multiple layers that need built up. In essence, fill in those “Valleys”. That info is for those that don’t want shamed by the “Pore” police. If you say “pores” to us, we will know exactly what you are talking about. No problem. Some people keep this cast iron business way too close to their hearts.
Pre-warming your cast iron (not hot), prior to applying your coat of product helps liquefy your product. It allows you to apply a thinner coat of product. You can easily wipe away excess.
Saving your absorbent towel and reusing it will stretch your product since the towel will retain residual product. At some point you can simply wipe your cast iron with the towel to apply an adequate coat. I keep mine in my Crisco can.
“Pooling” or Sticky finish
Several things can cause either of these conditions. Too much product applied is the number one cause. Newbies quite often apply too much product. It is better to have too little, than too much.
The other factor is temperature. Temperature never hitting the polymerization point of the product you are using. If you do not know your specific temperature point, start out by using 400°F. Upping that to 425 or 450°F if need be until you hit it. Every product and even your oven is different.
Before attempting to apply additional layers on one that feels tacky. Run your piece through the heat process and up the temperature and time duration.
Once you hit the temperature & time for your product. The coating should not cool down and be sticky.
Length of Seasoning time & method
On new Cast Iron (Never Seasoned) be prepared to apply at least 5 coats before you start cooking with the piece. The first couple coats will more than likely result in a caramel to brownish colored finish. But not sticky.
You want to keep seasoning until you obtain a black and slick finish. People that complain food sticks have not seasoned well enough. Those cooking food at higher temps and trying to hurry things along will also find their food sticks. But cooking at high temperatures is another conversation for another article. For a general rule, adhere to cooking “low” and “slow”.
The general rule of thumb for the seasoning process is 1 to 1 1/2 hour per coat. In reality it is actually longer. That one hour is just the heat cycle once your cast iron is up to seasoning temperature.
After your slightly warmed piece is properly coated with your choice of seasoning product, place the piece inside a cold oven. Place upside down on the first coat. This includes any lid too. This is so any excess liquefied product runs and drips out. (but if this occurs on the first coat you know you have applied too much product. Also line the bottom of your oven with foil to catch any drips.
Turn the oven on to your temperature choice after the cast iron is already inside. I personally would start at 425°F. Allow the oven to heat up. Heating the cast iron inside as well. Once the set temperature is reached set your timer for 1 to 1 1/2 hours. Maintain the oven at your set temperature. Do not open the oven door during this process.
At the 1 to 1 1/2 hour mark turn the heat off, do not open the door even to peek. Allow your oven and the cast iron within to naturally cool down slowly. This cool down typically takes 1 to 2 hours. This completes the first coat. If you feel any stickiness, do not re-coat. Return to the cold oven and repeat this process upping the temperature another 25°F from your last go around. Go 1 hour on the additional heat cycle….then 1 to 2 hours to again cool slowly.
Once you get that first coat to adhere with no stickiness, and allowed to cool, repeat the coating and heating process. Apply a minimum of 3-5 coats of seasoning before ever cooking with the piece. I prefer closer to 10 coats. Your piece should be a slick black looking finish when done properly and ready for use. This may very well take you over several days to complete. If you are patient and apply many coats you will be rewarded with cast iron cookware that is nearly stick free as “teflon” is. The color should be slick black, not caramel or brown color.
If you short cut any of this and start using improperly seasoned cast iron, you will probably find you are in the group complaining that cast iron is not worth beans for cooking with. You can mail your worthless cast iron to me. 🙂
Below are various stripping methods to remove old or damaged seasoning
Kitchen Oven on Clean Cycle method
If you have a kitchen oven with a self cleaning cycle you have one of the easiest and most efficient methods for removing old seasoning. The advantage is no harsh chemicals and no set up cost associated with using soaking tanks or electrolysis.
Place your pots upside down on the oven rack and turn your oven on “Clean Cycle”. Let it run its course. You may have to open doors and windows though since these method will often times set off your smoke detectors. Burn off any seasoning that might remain.
Wash the cast iron in very hot soapy water. Dry over low heat (stove burner) and wipe with a paper towel. If rust appears on the paper towel repeat the hot soapy bath and rinse. Once again dry over heat immediately.
Once thoroughly cleaned, rinsed, and showing no rust color when wiped, dry the cast iron with a towel. Immediately heat on the stove and lightly coat with a very thin layer of Crisco (or your preferred product). The heated surface will liquefy the Crisco. Wipe off any excess. This process will protect the cast iron from immediately starting to rust. Once cast iron is stripped to a bare unseasoned state it is unbelievable how quickly rust will show up. This step is not seasoning. Proceed with seasoning next
Seasoning Process: Place the cast iron pieces that have been lightly coated with Crisco (or your favorite seasoning product), upside down, in a cold oven, close the oven door and set oven to 425°F. Once up to temperature set timer for 1 1/2 to 2 hours.
Remember to use a light coat to avoid runs and drips. Protect the bottom of your kitchen oven with aluminum foil to collect any drips that do happen. If you have it right there will be no drips. Bake for 1 hour. Leaving the cast iron in the kitchen oven, with the door closed, turn off the heat. Let the cast iron naturally cool in the kitchen oven.
Repeat seasoning step a minimum of 5 times. Repeat the seasoning step only after the cast iron has cooled. Season the cast iron at least 5 times before attempting to cook food. Alternate the upside down seasoning to right side up Once at least 5 coats have been built up your cast iron should be turning a darker color with a very slick surface.
Heavy Duty Easy Off Brand (Yellow Can) Oven Cleaner Method.
Removing old seasoning: Warning.: Wear eye protection and chemical resistant rubber gloves. Do not get the oven cleaner on your skin or in your eyes.
The easiest method is to first clean your cast iron item(s) with hot soapy water. Then dry with a paper towel.
Place the cast iron item in a plastic garbage bag. Heavily coat the cast iron with oven cleaner on all surfaces. (i.e. half a can for a Dutch Oven) The Oven Cleaner will immediately foam up upon contact.
Close the bag and let the oven cleaner work on the cast iron for 12 hours. Then take a wire brush and remove all the old built up seasoning, burnt food, etc. (Again using Rubber Gloves and Eye protection)
Remove the Oven Cleaner treated cast iron and thoroughly clean and rinse several times in hot soapy water. Change water between each cleaning. And be sure to wear rubber gloves and eye protection. You are working with lye.
Once thoroughly cleaned and rinsed, dry the cast iron with paper towels. Immediately heat on the stove and lightly coat with a very thin layer of Crisco. The heated surface will liquefy the Crisco. Wipe off any excess. This process will protect the cast iron from immediately starting to rust. Once cast iron is stripped to a bare unseasoned state it is unbelievable how quickly rust will show up. This step is not seasoning. Proceed with seasoning next
Seasoning Process: Place the cast iron pieces that have been lightly coated with Crisco (or your favorite seasoning product), upside down, in a cold oven, close the oven door and set oven to 425°F. Once up to temperature set timer for 1 1/2 to 2 hours.
Remember to use a light coat to avoid runs and drips. Protect the bottom of your kitchen oven with aluminum foil to collect any drips that do happen. If you have it right there will be no drips. Bake for 1 hour. Leaving the cast iron in the kitchen oven, with the door closed, turn off the heat. Let the cast iron naturally cool in the kitchen oven.
Repeat seasoning step a minimum of 5 times. Repeat the seasoning step only after the cast iron has cooled. Season the cast iron at least 5 times before attempting to cook food. Alternate the upside down seasoning to right side up Once at least 5 coats have been built up your cast iron should be turning a darker color with a very slick surface.
To Remove Rust – Common Kitchen ingredients Method
Here is a method for removing stubborn rust. This can be made from common kitchen ingredients.
½ Gallon White Vinegar
1/3 Cup Salt
8 oz bottled lemon juice
Multiple this recipe enough times to mix a batch that you can submerge your piece. It is preferred to use a plastic container as a soaking vat. Both the Vinegar and Lemon juice are mild acids and will react with metal.
You can reuse the solution over and over. Test your piece about every 6 hrs. Do not soak over 15 hours without constant hourly checking to avoid pitting the cast iron. Once the rust has loosened up use a nylon bristle brush, scotch brite pad, 00 Steel Wool, or similar means to remove all residues. Sand paper or a wire brush is not recommended. Scratching will reduce the collector value.
Once thoroughly cleaned and rinsed, dry the cast iron with paper towels. Immediately heat on the stove and lightly coat with a very thin layer of Crisco. The heated surface will liquefy the Crisco. Wipe off any excess. This process will protect the cast iron from immediately starting to rust. Once cast iron is stripped to a bare unseasoned state it is unbelievable how quickly rust will show up. This step is not seasoning. Proceed with seasoning next.
To Remove Rust – Evapo-Rust product
Many people report even better results using a product called Evapo-Rust. This product is currently available at Harbor Freight for around $25 a gallon. I am sure it can be found in other hardware type stores. Use a plastic tub sized to your piece of cast iron, and enough product to completely submerge the Cast Iron. Length of soaking will depend on the severity of the rust. Some say no longer than 24 hours. Spot check periodically unit you see how it does.
This product is reusable so pour it back into its original containers and seal them up. As it is used over and over and looses its effectiveness it will need replaced.
As soon as soaking is complete remove your piece and scrub well with hot soapy water. Rinse and immediately heat on the stove on low heat to thoroughly dry. Wipe a very thin coating while still hot, using your preferred Lard, Oil, Crisco, etc. Proceed with proper seasoning next.
Seasoning Process: Place the cast iron pieces that have been lightly coated with Crisco (or your favorite seasoning product), upside down, in a cold oven, close the oven door and set oven to 425°F. Once up to temperature set timer for 1 1/2 to 2 hours.
Remember to use a light coat to avoid runs and drips. Protect the bottom of your kitchen oven with aluminum foil to collect any drips that do happen. If you have it right there will be no drips. Bake for 1 hour. Leaving the cast iron in the kitchen oven, with the door closed, turn off the heat. Let the cast iron naturally cool in the kitchen oven.
Repeat seasoning step a minimum of 5 times. Repeat the seasoning step only after the cast iron has cooled. Season the cast iron at least 5 times before attempting to cook food. Alternate the upside down seasoning to right side up Once at least 5 coats have been built up your cast iron should be turning a darker color with a very slick surface.
Lye Bath Method
Use a lye product marked 100% Sodium Hydroxide Crystals. Ace Hardware is still a source, but the product is becoming increasingly hard to buy. Just make sure you purchase a brand that is marked 100% lye.
Use 1 lb of Lye crystals per 5 gal of clean water. Always add the lye to the water…..NEVER ADD THE WATER TO THE LYE. When mixing and pouring always use eye and skin protection. Wash any splattered clothing immediately.
Use Plastic containers as your lye bath tubs. Cat litter boxes, plastic mortar mixing boats, heavy plastic storage tubs, all work. Preferably something that can be covered to keep children and animals out of the lye water. Your Cast Iron item must be able to be completely submerged.
You need to completely submerge your item from a few days, or more, to soften up the old baked on seasoning and old food.
Once softened remove all residue with a wire brush (Use eye and skin protection). Once all surfaces are scraped clean, neutralize the lye with a mild acid (vinegar). Then rinse and clean with hot soapy water.
Thoroughly clean and rinse several times in hot soapy water. Change water between each cleaning. And be sure to wear rubber gloves and eye protection. You are working with lye.
Once thoroughly cleaned and rinsed, dry the cast iron with paper towels. Immediately heat on the stove and lightly coat with a very thin layer of Crisco. The heated surface will liquefy the Crisco. Wipe off any excess. This process will protect the cast iron from immediately starting to rust. Once cast iron is stripped to a bare unseasoned state it is unbelievable how quickly rust will show up. This step is not seasoning. Proceed with seasoning next.
Seasoning Process: Place the cast iron pieces that have been lightly coated with Crisco (or your favorite seasoning product), upside down, in a cold oven, close the oven door and set oven to 425°F. Once up to temperature set timer for 1 1/2 to 2 hours.
Remember to use a light coat to avoid runs and drips. Protect the bottom of your kitchen oven with aluminum foil to collect any drips that do happen. If you have it right there will be no drips. Bake for 1 hour. Leaving the cast iron in the kitchen oven, with the door closed, turn off the heat. Let the cast iron naturally cool in the kitchen oven.
Repeat seasoning step a minimum of 5 times. Repeat the seasoning step only after the cast iron has cooled. Season the cast iron at least 5 times before attempting to cook food. Alternate the upside down seasoning to right side up Once at least 5 coats have been built up your cast iron should be turning a darker color with a very slick surface.
Electrolysis (E-Tank)
This is method is more elaborate and is used by Cast Iron Collectors that are processing larger volumes of pieces for re-seasoning.
Perhaps a little too technical or more complicated for the occasional piece you wish to recondition?
This process requires an electrolysis tank, a car battery charger, and a piece of metal that will serve as a anode from which the current will flow from, to the piece being cleaned.
A water solution with Washing Soda added is used to increase conductivity.
If you are considering this method, search on the internet for more details and setup.
Fire to Clean method
Note: STOP!!! We do not recommend this method at all. We actually caution you not too. Most of the information in this entire article, is a collection of information from experienced collectors. Those that have handled hundreds of pieces of Cast Iron Cookware. All collectors I know, will all advise against using fire. We have all seen too many pieces of wrecked iron. You can find photos on the internet.
Sure it doesn’t mean in every instance you will end up with damage. It does mean you have to be extremely careful. Or perhaps lucky?
It may equate to someone that tells you they have driven through an intersection on a red light at 45 mph and nothing bad happened. Then recommend that method of driving.
Sure we have heard the obscure story of cast iron that has even survived a house or barn fire. Or that sort of thing. We aren’t saying it won’t. Just advising to use another safer method.
We believe this may have been a handed down method. Sure it may work in many cases. But it many cases it may not. Those not aware of things like “red iron”, or quick temperature changes, may sadly not be successful using the fire method.
We only list this method because many swear by it, or have been told it is a preferred method. Or someone is recommending it as the best way!
We also want you to stop and reconsider before proceeding. We swear if you don’t know what you are doing, it is the easiest and quickest ways to wreck a piece of cast iron. It will have you swearing too…in a most negative way if you wreck a collector piece or your favorite cookware.
When the cast iron is heated at too high of a temperature it may warp, crack, crystallize, or become “red iron”.
Red Iron is exactly what it suggests…it looks red. We aren’t talking rust. This is something that can’t be cleaned off. A possible indicator the Cast Iron has been at a very high temperature. In most cases “Red Iron” is beyond fixable. Reconditioning won’t normally fix it for cooking. If you find such an item used, think hard before you purchase it. I would pass on these when buying used.
There is plenty of evidence out there in the form of vintage cookware that is commonly referred to as a “rocker”. Something we wrote further up in this article. We also touched on quick hot and cold temperature changes.
Some while re-seasoning, use the fire method. Which is exactly what the name implies. The cast iron cookware is placed in a bed of wood or charcoal coals and covered with them also. The idea is the intense heat will burn everything off.
We imagine this method was used in the early days since it seems to be the most logical. A campfire would sure to have been available. But we again caution those contemplating this method. We have many giving us feedback that this method can result in ruined cookware.
There are numerous safer ways of accomplishing this.
We do list this method since a few are adamant it works. We can only caution you, and let you know we won’t be using this method, especially on collector pieces. Beyond that the choice is all yours.
Types of wood and other conditions could create a wide range of heat. It is difficult to control heat using this method. Difficult to slowly bring up to temperature.
Most then don’t allow the cast iron to slowly and naturally reduce the temperature. They want to pull it out of the fire and set it aside.
But if you proceed and do remove most of the old seasoning or burned on gunk you would then want to continue with finishing & cleaning the iron. Then re-seasoning.
Wash the stripped cast iron in very hot soapy water. Dry over heat (stove burner) and wipe with a paper towel. If rust appears on the paper towel repeat the hot soapy bath and rinse. Once again dry over heat immediately. Then wipe a very thin coat of Crisco or your product over all surfaces.
Once thoroughly cleaned and rinsed, dry the cast iron with a towel. Immediately heat on the stove and lightly coat with a very thin layer of Crisco. The heated surface will liquefy the Crisco. Wipe off any excess. This process will protect the cast iron from immediately starting to rust. Once cast iron is stripped to a bare unseasoned state it is unbelievable how quickly rust will show up. This step is not seasoning. Proceed with seasoning next
Seasoning Process: Place the cast iron pieces that have been lightly coated with Crisco (or your favorite seasoning product), upside down, in a cold oven, close the oven door and set oven to 425°F. Once up to temperature set timer for 1 1/2 to 2 hours.
Remember to use a light coat to avoid runs and drips. Protect the bottom of your kitchen oven with aluminum foil to collect any drips that do happen. If you have it right there will be no drips. Bake for 1 1/2 to 2 hours. Leaving the cast iron in the kitchen oven, with the door closed, turn off the heat. Let the cast iron naturally cool in the kitchen oven.
Repeat seasoning step a minimum of 5 times. Repeat the seasoning step only after the cast iron has cooled. Season the cast iron at least 5 times before attempting to cook food. Alternate the upside down seasoning to right side up Once at least 5 coats have been built up your cast iron should be turning a darker color with a very slick surface.
![]()