We have just added one of our favorites to the recipe list.
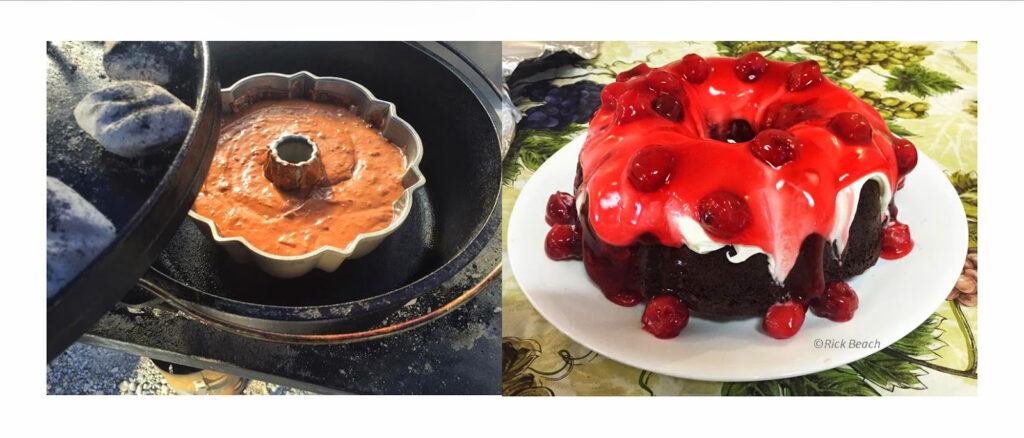
Link to Recipe CHOCOLATE CHERRY BUNDT CAKE
![]()
Dutch Oven & Cast Iron Cooking, Cast Iron Care & Reconditioning, Events, and Friends
We have just added one of our favorites to the recipe list.
Link to Recipe CHOCOLATE CHERRY BUNDT CAKE
![]()

![]()
A wind screen or windshield is often necessary to properly cook in the outdoors. Especially if you are cooking on some type of raised platform. A platform such as a cook table, or a camp stove placed on a picnic table.
While both cook tables and camp stoves may come with their own shield, they are often too low, and inadequate.
I have seen numerous types of DIY wind screens, out of many materials.
THE THOUGHT
This DIY project was thought out to use readily available materials. With the idea in mind during fabrication, to use the simplest of tools found in nearly any household. Best of all, workable by nearly anyone with minimal tool handling skills.
I also wanted this to break down and sort flat as possible during transport or storage.
The final “must have” was that this screen needed no tools, to set up/erect for cooking, or to break down for storage.
This DIY project shows the basics of building a Windshield for your Camp Stove or Dutch Oven. Numerous modifications could be made to suit your personal needs.
I prefer the higher shield as shown. Both for use, and for ease of construction.
The long sides of mine are made from a 18X25 inch cookie sheet. The smaller ends are 13X18’s cookie sheets. These sizes will avoid the need to make any cuts concerning the cookie sheets. These cookie sheets are clamped together with easy to fabricate aluminum angle clamps.
The clamps are snugged up using Thumb Bolts and Wing Nuts. No tools are required during set up.
While an electric hacksaw, drill press, and drill press vise, makes for an easy job of it. A simple hacksaw and hand drill will do just fine. Since the DIY clamps are soft aluminum, any required drilling is fairly easy. Do practice tool safety to protect body parts during fabrication. Eye protection is mandatory.
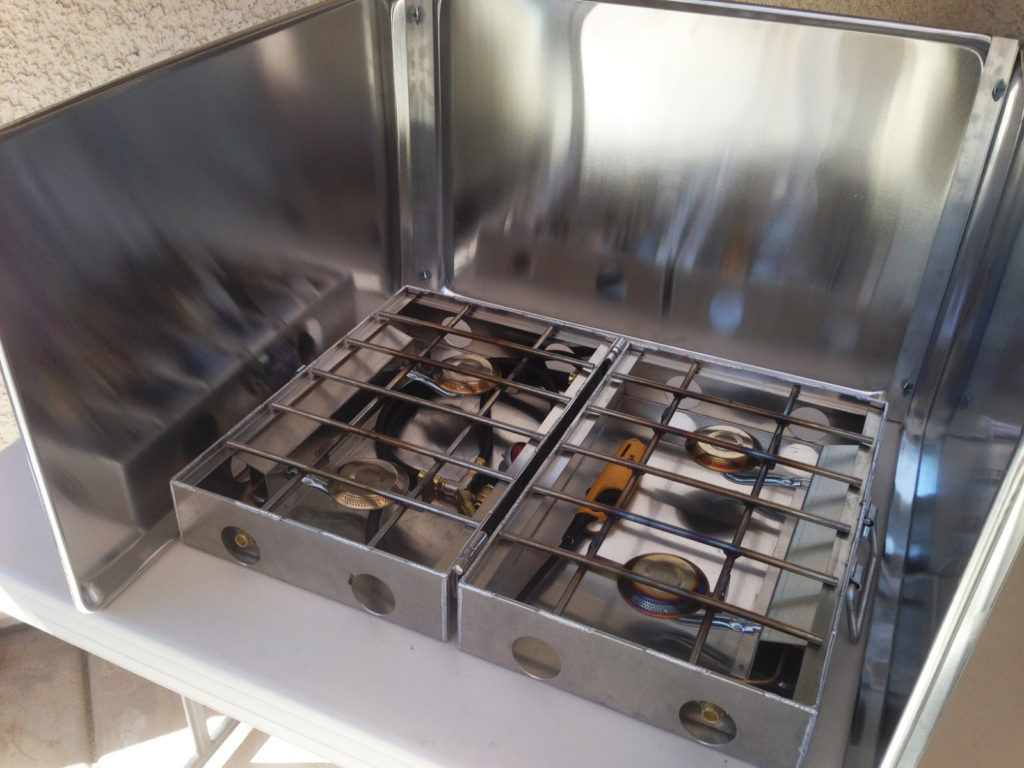
My initial build was a Windscreen for my Partner 4 burner stove. Made with three 18X25 cookie sheets. I later bought the 13X18’s for use when Dutch Oven cooking on a metal Dutch Oven Cooking Table.
For the Dutch Oven Cook Tables that are wide and rather narrow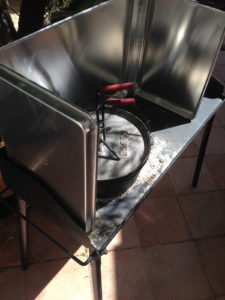 front to back. Two sets of an “L” Shape configuration can be arranged to adapt to most Dutch Oven Cook Tables. They can slide to adjust for whatever width table you may have. The two longer rear cookie sheets can be clamped together with a C-Clamp or Spring clamp.
In a good wind you might have to use small bungee cords to hold the shield down to the table. (Bungee attached at points away from high heat of course)
OBJECTIVES
*Something simple with minimum amount of complex fabrication.
*Free standing without the use of supports.
*Large enough to surround on 3 sides.
*Minimal cost.
*When not in use, something that stores flat for storage and transport.
*Multi-purpose.
*Easy to setup without the use of any tools.
All objectives were met. I am sure a good scrounger or person that has usable used material can beat what they cost me. For this article, all parts were purchased new, at full retail prices.
Additional benefits are this Windscreen is also easy to clean, and if not being used as a shield, the trays can be used for other purposes such as food prep, as serving trays, or perhaps other functions I am not even thinking of.
MATERIAL
(3) 18X25 Cookie Sheets ($6.75 each) (For a 25X25X25 setup)
or
(1) 18X25 Cookie Sheet ($6.75) + (2) 13X25 Cookie Sheets (2 Pack $10.25) (For 13X25X13 Setup)
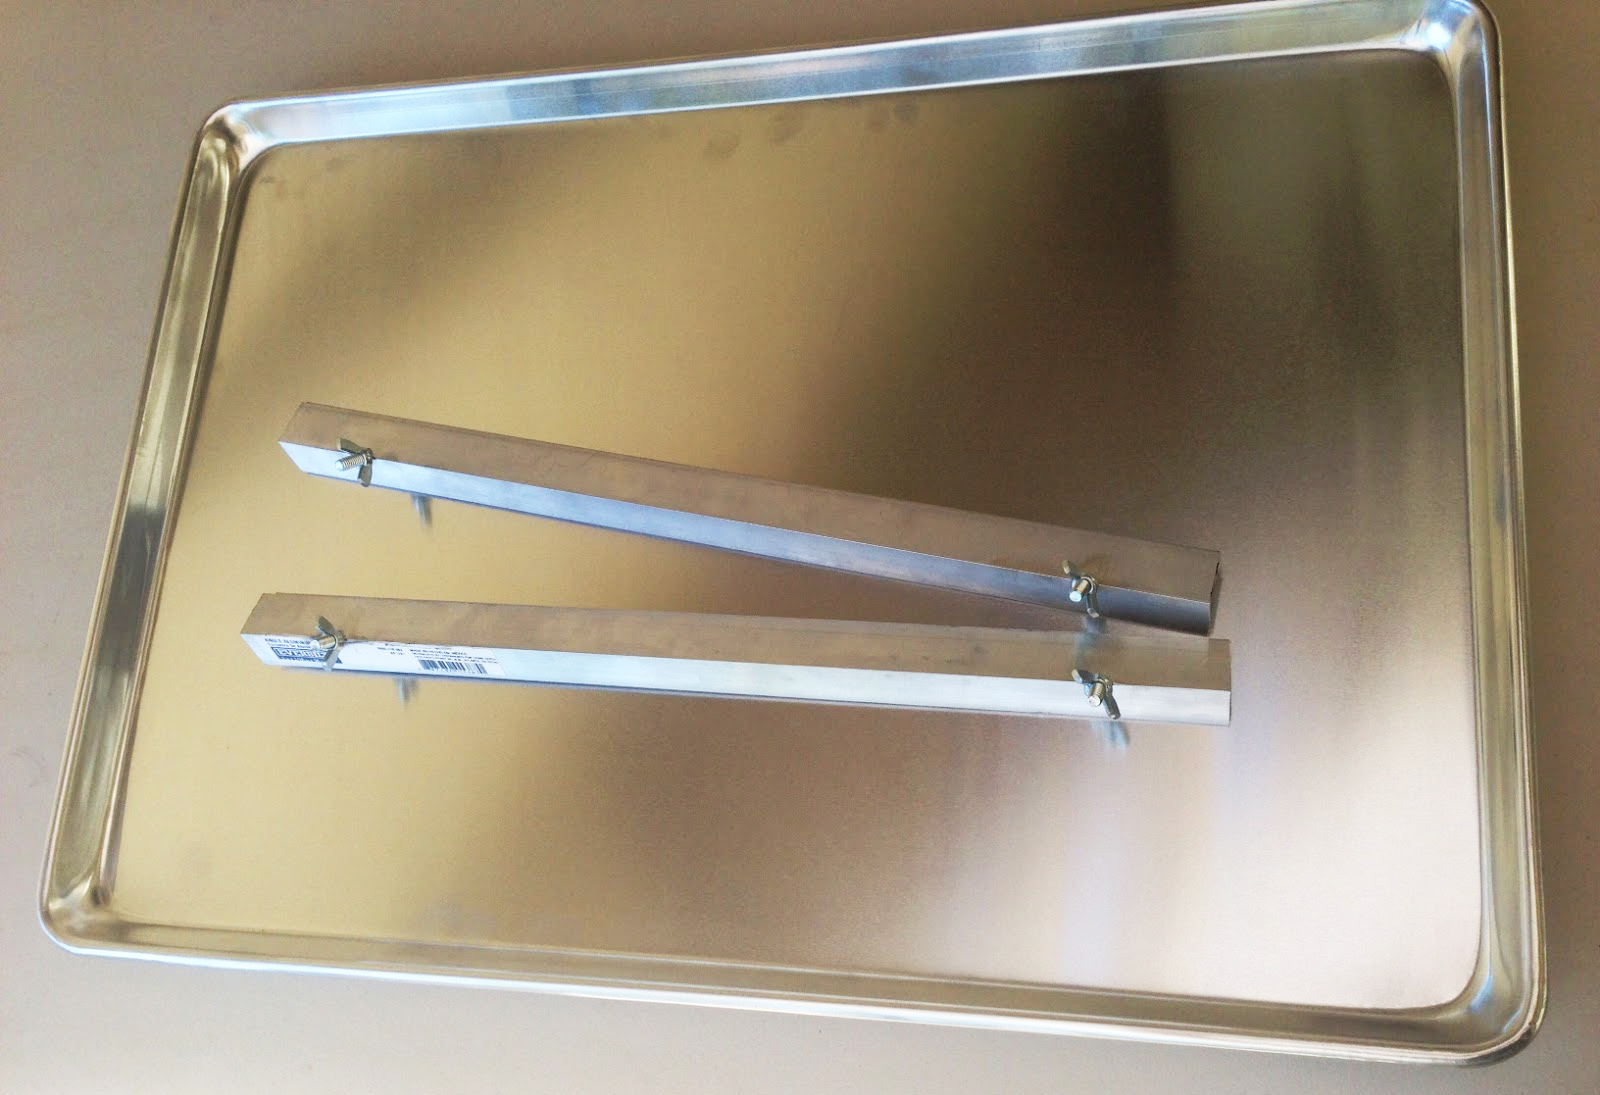
(2) Aluminum Angle 1/16 inch 1×36
Both cut in half to make (4) 18 long pieces of angle ($5.37 each)
(4) Thumb Bolts 1/4inch, 20 thread, 1 ½ inches long ($1.18 each)
(4) Wing Nuts ¼ inch, 20 thread ($0.55 each)

These are local all new material prices. Cookie Sheets from Costco or Sams Club. Or a local restaurant supply retailer. Hardware was obtained from Home Depot. A good scrounger might be able to find this material at a thrift store or garage sale for much less.
FABRICATION (Read through this before starting)
Cut the two 36 inch Aluminum angles both in half to create (4) 18 inch angles. Make sure all pieces are of equal length. Trim if necessary.
Mark the 18 inch angle aluminum at 2 inches in from both ends. Keep these pretty exact so pieces will be interchangeable with each other during set-up. Meaning the holes will line up with one another. Its critical, that the distance measurement between the drilled holes on one piece of aluminum angle, is that same measurement on all pieces of aluminum angle.
If you decide to make additional wind screen parts in the future be sure to use one of your existing parts as a pattern. That way they will be interchangeable.
Stack 4 of your 18 inch aluminum angles together. Clamp in a vise if available to avoid having the stack twirling around and hitting you during drilling. If no vice is available use another method and proceed with caution. Drill a hole at your 2 inch marks, and drill down through all 4 angles stacked together. You start the hole on the inside of the V of the the angle. Use a 5/16 inch diameter drill bit.
Make sure the drilled holes on the first end of the stack do not become misaligned. Then Drill the other end at your mark using the same method.
The idea is to create 4 identical parts that can be interchanged even if flipped around or used with any other piece. Identical meaning the measurement distance between the drill holes are equal on all angle parts you fabricate.
Clean up any drill burrs and sharp edges with a wire bush, wire wheel, file, sandpaper, etc.

SET-UP
Insert your Thumb Bolt through a stack of two angles. The Flattened Thumb end of the bolt should be on the inside of the V of the angle aluminum. When held in place with a finger the angle aluminum prevents the bolts flattened thumb head from spinning. (No wrench required)
Loosely thread the wing nut on the threaded end of the bolt.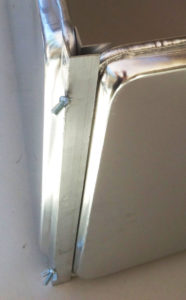
Repeat the bolt insertion and wing nut on the other end of the two aluminum angles.
Hold 2 of the cookie sheets up in a vertical position, with the top cooking surface side facing each other in an “L” shape.
Slip the clamp over the joint of the cookie sheets. One angle of the clamp with be on the inside of the cookie sheet joint. The other angle of the clamp will be on the outside of the cookie sheet joint.
Tighten the clamps wing nuts when correctly positioned. Repeat for the other corner to create a three side wind screen. (No tools required)
The whole set-up pretty much stores flat when not in use.
![]()
![]()