CAPACITY SIZE CONVERSIONS

Many people often want to know what the cast numbers or letters mean on the lids, or bottoms of cast iron cookware.

Often times a stand alone number, or letter, is simply a unique mold number.  An identifier the has no relationship to anything other than the mold it was made in.  It was used to identify and make corrections to, or to eliminate a defective master mold, when large batches were poured.

Other numbers or letters may be an indicator of the capacity or size.

For details please follow over to the full page on:

Cast Iron Cookware Size Conversions

Loading

CATHEDRAL GORGE STATE PARK 2020 Dutch Oven Cook-off (Canceled)

This did not come as any surprise.

The Nevada State Parks “Cathedral Gorge Annual Dutch Oven Cook-off 2020” is canceled due to Covid.

This event is always held in September.  Those that have it on your schedule for 2020 need to remove it.  We just received  official confirmation back from a  Cathedral Gorge State Park spokesperson this morning.

We will be updating our various social media locations and websites.  Please spread the word to others you know may have had plans to attend, and not see this changes.

Loading

Hollands Cast Iron

Just when we thought we had seen them all, another unknown is found.  We only say that with tongue in cheek because there seems to be an endless list of Cast Iron Manufacturers.  It is fascinating how many existed in the late 1800’s up until the mid 1900’s.

This Hollands #9 Pot was purchased at a garage sale.  Possible Circa 1890’s to Early 1900’s?  This one is in very good condition.  Valued at $100-$150.

For more info, photos, and the reason you need to test such finds for lead, click Link to full page on Hollands Manufacturing Co.


Hollands 9 Pot

Loading

LASAGNA (8 inch Dutch Oven batch)

LASAGNA (8 inch Dutch Oven batch)

While this recipe was created for Zucchini, you can easily substitute with regular lasagna noodles. I pre-cook normal lasagna noodles, then proceed with the same recipe. Various cheeses can be mixed or matched based on your preference or availability. The quantity is ample for about 4-6 people. Serve with a salad and garlic toast.

Recipe and Photo: Courtesy R Beach
Prep Time 15 minutes
Cook Time 1 hour 30 minutes
Total Time 1 hour 45 minutes
Servings 4 People

Ingredients
  

  • 2 Small Zucchini sliced thin lengthwise Or substitute with pre-cooked lasagna noodles – about (8) of the approximately 2×10 sized noodles. See Barilla brand n.397).
  • 1 lb Ground Turkey Could substitute with ground beef or ground chicken
  • 1 Tbs Dried Cilantro flakes
  • 3/4 Sweet Onion diced
  • 1/2 tsp Salt Adjust sauce to taste
  • 1/4 tsp Pepper Adjust to taste
  • 15 oz Fire roasted diced tomatoes (canned) drained
  • 15 oz Tomato Sauce
  • 1 Tblsp Garlic minced
  • 1 Tblsp Dried Italian Seasoning
  • 1 tsp Dried Marjoram
  • 3 cups Fresh Spinach leaves/Baby leaves Loosely Packed to measure
  • 8 leaves Fresh Basil chopped
  • 16 oz Cottage Cheese small curd or Ricotta Cheese
  • 8 oz Mozzarella Cheese Shredded

Instructions
 

  • Slice Zucchini thin lengthwise. Lay out on paper towels while preparing other ingredients. This will absorb some of the liquid the zucchini would otherwise generate while baking.
  • Saute: Ground Turkey, Dried Cilantro flakes, 3/4 Sweet Onion diced, plus Salt & Pepper to taste.
  • In a separate bowl Whisk the following: Fire roasted diced tomatoes, Tomato Sauce, Garlic, Italian Seasoning, Marjoram, Salt & Pepper to taste.
  • Coarsely Chop & Mix together: 3 cups Loosely packed chopped fresh spinach leaves, and the chopped basil leaves.
  • Layer in a well greased 8 inch Dutch Oven
  • A little Sauce mixture
  • A layer of sliced zucchini/or noodles
  • A layer of the Sauteed Meat mixture
  • A layer of Small curd Cottage Cheese
  • A layer of shredded Mozzarella Cheese
  • A layer of the chopped Spinach and Basil
  • Repeat the layers
  • End by spreading any remaining sauce on top. Then some shredded Mozzarella Cheese.
  • At this point the 8 inch Dutch Oven will be heaped slightly but will cook down as the spinach wilts. A 10 inch Dutch Oven will work too.
  • In your kitchen, using zucchini, oven bake uncovered @ 375°F for 90 minutes (Uncovered to evaporate the liquid due to the water in the zucchini)

    Using zucchini in camp with Charcoal, bake 90 minutes covered. To get the evaporation required, when baking with charcoal slightly elevate the lid with spoon handles, (regular thin handled eating spoons) to make a slight gap….or some similar method.

    If using regular pre-cooked pasta noodles (Kitchen Oven) reduce the cook time. Bake covered 30 minutes, then uncovered an additional 30 minutes.

    If using regular pre-cooked pasta noodles (Camp Dutch Oven & Charcoal) Bake covered 60 minutes, and Do Not use any air gap technique between the pot & lid.
  • Cook on something covered with foil since a full pot tends to ooze some of the ingredients until it cooks down a bit.

Notes

Loading

We made a correction to our Hamburger Bun Recipe

For those of you that subscribe to our email list.  Please be aware we made an edit to the Hamburger Bun Recipe.

It was brought to our attention that we omitted the yeast and its measurement in the ingredient list.  We did have it in the instruction area.  Most experienced cooks might  catch this right away and be able to wing it without the measurement.

We made the correcting edit today.  If you printed out the original recipe, please throw that copy away, and reprint a new copy.  Sorry for any confusion.

For those that don’t know.  The recipes have a “Printer” icon near the top for your convenience.  Just click to print.  No need to mess with copy and paste methods.

Loading

HOMEMADE HAMBURGER & HOT DOG BUNS

HOMEMADE HAMBURGER & HOT DOG BUNS

This recipe can be used to make soft Hamburger or Hot Dog buns.
This is a Rick Beach personal recipe.
Servings 12 Buns

Ingredients
  

  • 1 1/4 Cup Canned Coconut Milk (Regular Milk would work) Warm
  • 1 Raw Egg Room Temperature and beaten
  • 1/4 Cup White Sugar
  • 2 Tablespoons Melted butter
  • 3/4 teaspoon Salt
  • 2 teaspoons Yeast Rapid rise or regular both work
  • 1 teaspoon Vital Wheat Gluten (This is not Gluten Flour) - This creates light and fluffy buns
  • 3 3/4 Cups All purpose or Bread Flour Sifted

Instructions
 

  • Warm the coconut milk to proper bread making temperature. (I test on the inside of my wrist as if warming for a baby - no thermometer required - not too hot). Whisk in the yeast and sugar and set aside for 10-15 minutes and let it bloom (When ready it will appear as a bit of foam or thick material on the surface ). If it doesn't bloom your yeast is bad or your liquid to cold or too hot.
  • In another bowl combine (dry whisk) the flour, Vital Wheat Gluten, and salt. Then set aside.
  • Whisk the room temperature egg with the melted but cooled butter (If the butter is too hot it will cook the egg as added). Once the egg and butter are combined, whisk in the Coconut Milk, sugar, yeast mixture.
  • At this point the Flour mixture can be added to the liquid mixture using any traditional bread making techniques, or continued using a Bread Machine custom set to "Dough" only. Whatever method is used it must satisfy mixing, kneading, and the first rise of the dough.
  • Punch the dough down and turn out on a floured board. Cut in 12 equal sized pieces for 12 Hamburger buns.

    You can form Hamburger Buns with rounds, and Hot Dog buns with a longer shape.
  • Form your buns, coat with oil or spray oil, and lay out almost touching each other.

    I personally use a greased 4 inch deep stainless steel Steamer tray for this. The high sides help make sides on the buns where not touching other buns.

    The 4 inch deep tray is placed in a 6 inch deep stainless steel Steamer tray that contains a couple inches of hot tap water. A stainless steal Steamer tray lids goes on top. This is placed on the warm stove, This becomes the 2nd rise proofing chamber. But any successful method you use to allow the dough to rise will work. Let this 2nd rise go 45-60 minutes or until your buns look doubled in size.
  • Preheat oven to 350°F. Place the buns in the oven and bake for at least 9 minutes. Take a peek at 9 minutes without letting all the heat escape. They should just be beginning to brown. Often they will not at this point. Check every 2 minutes until they just begin to brown. Then remove from the oven. Remove from the pan and place on a wire rack to begin cooling. DO NOT OVER BAKE or the buns will not be soft.
  • While still very warn use a piece of buttered wax paper (old butter wrap works great) and lightly butter all surfaces of the bun to create a soft surface. Once cooled, bag and twist tie to avoid having the buns dry out.

Loading

BREAD – OLD FASHIONED WHITE BREAD (Coconut Milk)

BREAD - OLD FASHIONED WHITE BREAD (Coconut Milk)

Recipe and photo by: Rick Beach
The taste of this bread is that of old fashioned white bread. There is no coconut taste in the finished bread. Organic Blue Agave is used since it is a low Hypoglycemic organic sweetener. A Dutch Oven cooking friend of mine (Kathleen LeBlanc) got me into using Agave syrup. I am so glad she did. I often bake this in a Dutch Oven. Free form loaves could be used. Or small loaf pans. Use a large, tall, Dutch Oven and coals for 375°. I prefer to use one standard bread loaf pan. I place a wire rack in the Dutch Oven to elevate the loaf pan slightly. This recipe can be used for Loaves of Bread, English Muffins, Pizza and more.
Servings 1 Large Loaf

Ingredients
  

  • 4 Cups All-purpose flour An additional 1/2 Cup may be required to adjust
  • 1 1/2 teaspoon Salt
  • 13.5 oz Unsweetened Coconut Milk
  • 2 teaspoons Rapid rise yeast Mix into flour - Do not mix your yeast into the liquid with the salt
  • 4 Tablespoons Agave Liquid Syrup Sweetener Warmed/Room Temperature
  • 2 Tablespoons Butter Melted
  • 1 Egg raw whisked Use a room temperature egg

Instructions
 

  • SET BREAD MACHINE to "Quick", "Dough" Start so pre-heat is going.
  • PLACE Mixed Flour and Salt in bread machine
  • COMBINE in a separate bowl the combine the Warm Coconut Milk, warm Agave, and yeast. Whisk and allow to "grow" 5 to 15 minutes.
  • COMBINE in yet another separate bowl whisk the warm raw egg,
  • COMBINE the Milk/Yeast mixture to the whisked Egg mixture Slowly whisk in the melted butter (make sure butter is not hot) then whisk to combine all the liquids.
  • POUR combined liquid mixture into bread machine with the flour/salt mixture. Let the bread machine starting running through Quick, Dough, cycle (Mix & First Rise 45 Minutes) This is normally a manual override setting on most bread machines.ADD the salt. Monitor the initial mixing stage until the dough just begins to clump together and form a ball. Then sprinkle the salt over the dough and allow the mixing to proceed.
  • PREHEAT oven to 375 degrees F. Grease Bread Pans. The warmed stove top will become your warm place 45 minutes later to raise your dough the second time. The bread machine will provide the raise the first time. ( If you are using a mixer/dough hook or hand method to create your dough, both raises will need to occur on the stove top or other warm place)
  • TURN DOUGH OUT (dough that has raised one time) on floured surface and roll out into a 12X8 inch rectangle. Roll as a jelly roll 8 inches wide. Pinch seam, tuck ends under and pinch seams, coat with light coat of oil, and place in greased bread pan, seam side down.
  • COVER Dough AND let RAISE, on warm stove 30-45 minutes.
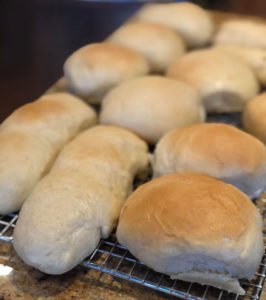
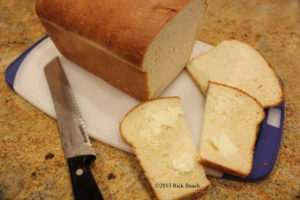
  • BAKE at 375 for 25-30 minutes (Until golden Brown and sounds somewhat hollow when tapped.
  • Remove from pan and rub all surfaces with butter for a softer crust. Cover with towel until cooled
  • -----------------------------------------------------------
  • Note: Liquids should be warm not hot. Rather than getting all technical and breaking out the thermometers. Test on inside of wrist as you would baby bottle milk. Proper temperature aids in the dough rising quickly. Overly hot will kill the yeast. Cold temperatures, and the yeast will not rise. On both Raise cycles the dough should double in volume. Your flour and other ingredients should all be at least room temperature. Make sure to oil the dough, and oil your rising bowl, or container. Cover and raise dough in a warm draft free location.
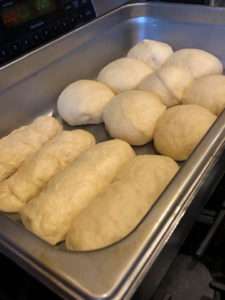
  • We use a bread machine to speed mixing the dough and the first rise. The benefit of a bread machine is consistent results. When baking multiple loaves you can keep producing a ready batch every 45 minutes, ready for the second rise in your bread pan.
  • This dough can be made using any traditional method including the old fashioned by hand method, or a mixer with a dough hook. By hand, the more you knead, the better the bread. Many people that get poor results when baking bread fail at the temperature, and or not enough kneading. Other yeast killers are combining your yeast and salt in the liquids. The salt will kill the yeast. Mix your yeast with warm liquids and allow it to "grow". Combined ingredients as recipe indicates. With any tried and tested recipe you might be following pay particular attention to how and when the salt is added.
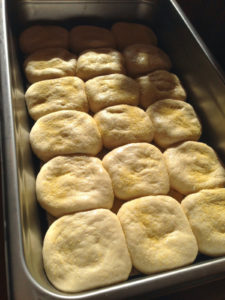
  • Rising works best in a warm moist environment. I use (2) stainless steamer trays. The 6 inch deep, half size steamer tray 10x12 inch. Or full size if doing English muffins or multiple loaves. In the bottom tray, add a 1/2 inch of very hot tap water. A wire rack placed in that hot water (Rack should be slightly above the water level). Then place the bread pan with the oiled dough in it, on top of the rack. The second stainless tray placed inverted as a domed cover. This is placed on the top of the warm stove with the oven preheating. This warm, moist environment raises your dough quickly, usually in 30 minutes so. Standard size loaves have plenty of room to raise.
  • Full size steamer tray shown with English Muffins being raised.
  • Top inverted tray is removed to photograph the bottom
  • There is wire rack under the muffins that is foiled covered for this English muffin technique
  • Trays and properly sized racks are available at restaurant supply places
  • Other options are foil type trays, Dutch Oven with a trivet inside, then set in the sun, etc. I have also used an ice chest with hot water and pans to lift the loaf pans above the water...no ice 🙂 Anything you have around the house that can trap the warmth and moisture. Also before starting the "raise" process, remember to coat the dough with vegetable oil or olive oil. Spray Pam works great and is easy to apply with no waste.
  • After removing the baked bread from the oven, and still hot, rub all surfaces with butter for a soft crust.
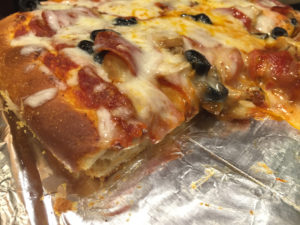
  • This dough is an excellent choice for making thick or thin pizza.
  • Note: Dough can be made ahead of time and stored in the fridge. See the link below for more details.
  • No...this bread does not taste like coconut.

Loading