This past weekend (September 16, 2017) had us at Cathedral Gorge State Park, Nevada.
Having some great fun Camping and Dutch Oven Cooking. For the full story follow the link to the full article on this 2017 Dutch Oven Cook-off.
![]()
Dutch Oven & Cast Iron Cooking, Cast Iron Care & Reconditioning, Events, and Friends
This past weekend (September 16, 2017) had us at Cathedral Gorge State Park, Nevada.
Having some great fun Camping and Dutch Oven Cooking. For the full story follow the link to the full article on this 2017 Dutch Oven Cook-off.
![]()
Final preparations are going on for me today. Loading the trailer and taking inventory of camping gear and cooking utensils.
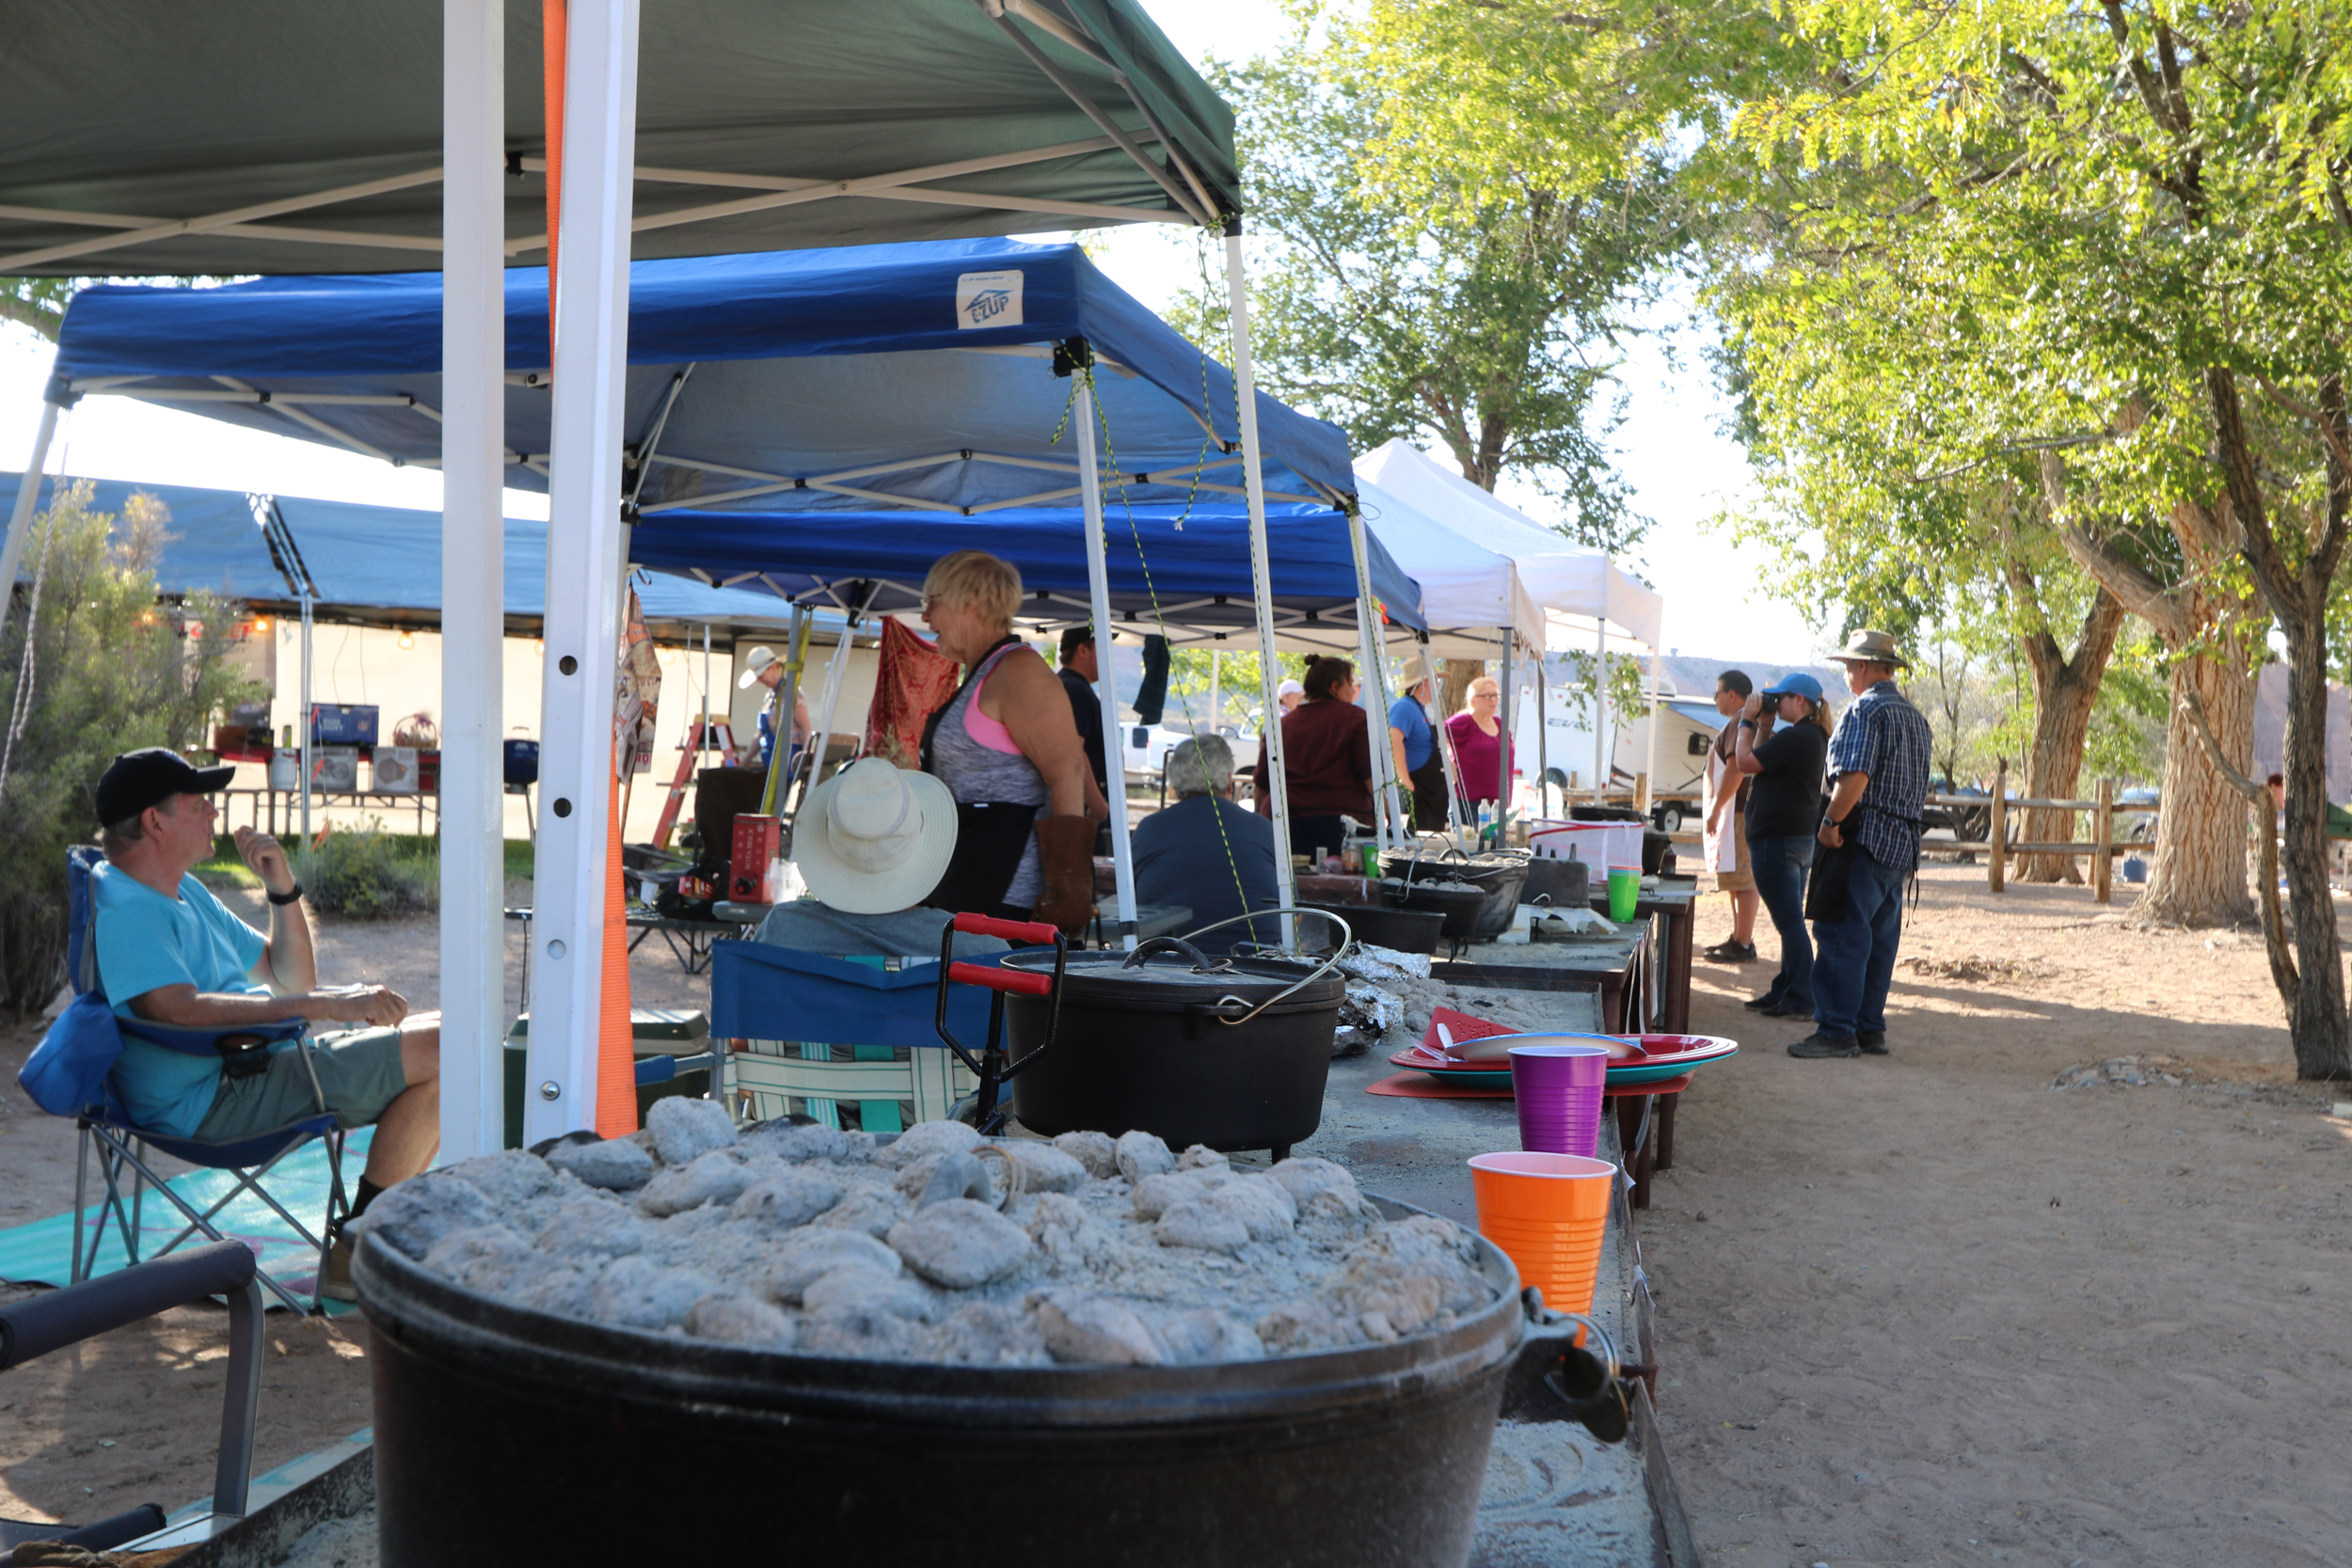
This coming weekend is the annual Cathedral Gorge Dutch Oven Cookoff (September 16th, 2017) Sponsored by the Nevada State Park and surrounding businesses. The weather is looking to be near perfect.
This cookoff is a big deal. At least for the competitions we normally attend. There are normally around 50 cooks, and some of those preparing multiple recipes. We have seen crowds of people (250+) showing up to taste, vote on their favorite, and just plain enjoy the day.
If you are in the area, be sure to come out and support the event. Enjoy the food, enter the raffle, and enjoy the beautiful Nevada State Park.
Cathedral Gorge State Park Website

![]()
While many of you have been enjoying camping away the summer months, some of us have been getting “cabin fever”.
Most of the country gets “cabin fever” when cooped up during the winter months. Ironically those of us that live and camp in the desert southwest mostly “hole” up the hot summer months. Then start camping as the summer heat starts to wane into cooler temperature of the approaching Fall season.
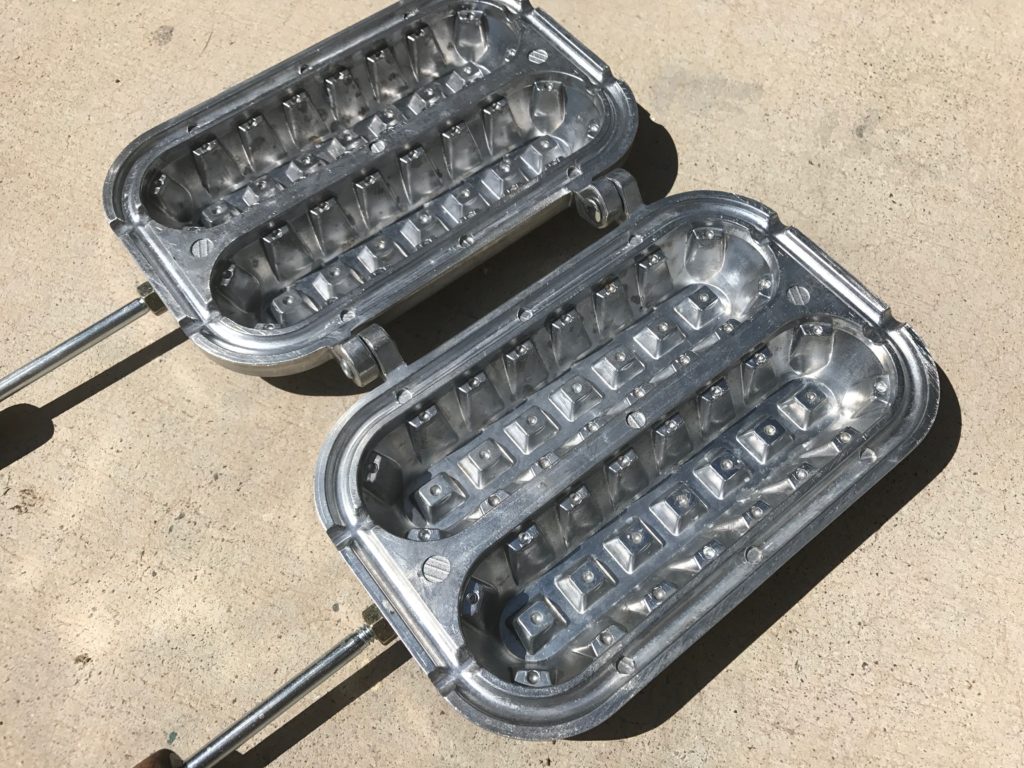
So for some of us it is time to dust off the waffle dog maker, air out the sleeping bags and tents, and start prepping for prime camping season.
Does anyone have any tried and true recipes for use in a waffle dog maker? I need one for Corn Dogs, and another for Waffle Sausages.
![]()
It’s nearly that time of year again. Camping and Dutch Oven Cooking Competition at Cathedral Gorge State Park near Panaca, Nevada.
Link to the official State Park information
Actual competition cooking is on Saturday September 16, 2017
A group of us camper/Dutch Oven cooks have been attending this event for years. The rangers at this State Park make this the best cooking competition we have ever competed in. Aside from the awesome prizes the rangers solicit from supporting businesses, they just make this plain fun.
This is not IDOS sanctioned and the rules are lax. Just plain old fun! Be prepared to come up against a lot of very good cooks. The competition is tough!
Be prepared to arrive early and to stay until after dark.
Even if you don’t participate in cooking. The whole day can be taken up hiking early in the morning, then wandering around watching the cooks prepare the food. Judging and serving food to the public, is early evening.
Buy your raffles tickets and take a chance on winning prizes and supporting a great event.
Many of us start arriving Thursday and Friday to also spend a few days camping. Sites are first come first served. Though the rangers have always made room for everyone even if it means “dry camping” off the edge of the pavement near the picnic area.
This time of year expect warm days and cool nights. The Milky-way will blanket you in the sky above. The coyote’s will sing you to sleep at night.
![]()
Las Vegas in the middle of summer is easily hitting 110°F daytime temperatures. For some that is not conducive for enjoying a hot bowl of Chili. Many reserve that cuisine for chilling winter days.
Not me. I enjoy Chili year round. Then Chili isn’t at it’s best, unless you have cornbread as a side to accompany it.
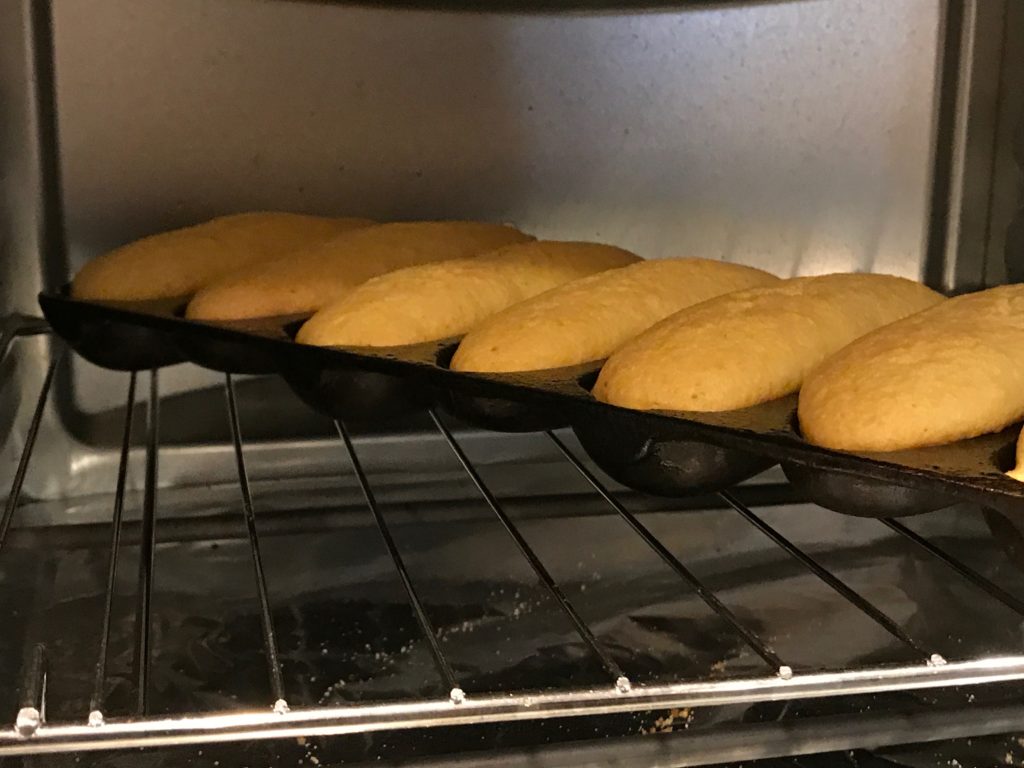
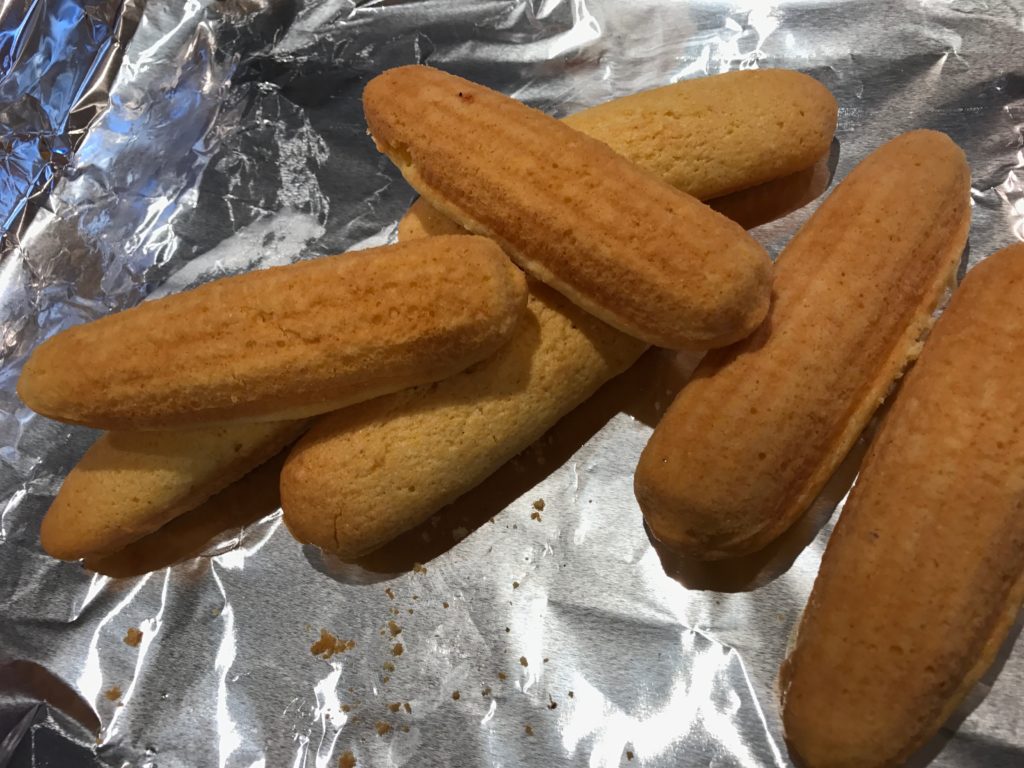
On a hot day outside I often drag out the crock-pot to make a batch without heating up the kitchen. While I am a cast iron connoisseur, I am certainly not firing up some charcoal and Dutch Oven cooking when it is a scorching +110°F outside either. Thinking about getting the kitchen oven up to 425°F for a batch of cornbread doesn’t sound too appealing either. That heats the whole house up.
This is where vintage Cast Iron meets the modern Counter-top Convection Oven. The combination works well together and doesn’t kick my air conditioner on more than normal.
Now I am sitting back enjoying a bowl of Chili. Dipping my hot buttered corn sticks in some maple syrup. What a killer combination. Both in the cooking technique, as well as the food paring.
![]()
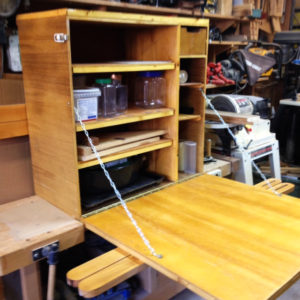 Credits for this Chuck Box version go out to Paul Bridgewater. Paul was kind enough to share his Chuck Box concept, and some photos. I am kind of envious. I wish I had the patience and the work space/shop to produce these.
Paul gives some insight on his design with the photos. Also some dimensions that might prove helpful.
Paul says his first ones were 3/4 plywood construction. His words “Too Heavy!”
He now builds these from 1/2 Birch Plywood. The legs are 1x4x36 Oak. These are custom made for the Scouts.
The legs are slotted to aid in leveling. The box is 36″ Wide, 24″ tall, and 15 1/2″ Deep.
![]()
![]()
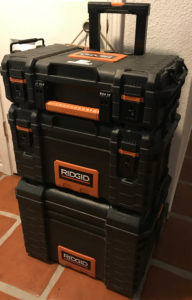 This is “Chuck Box V.2” for me. My current upgrade, from previous Stanley “Fat Max” tool boxes that I used for several years. My latest upgraded version uses these Rigid Brand Stackable and Wheeled tool totes, shown in this article..
Ever since covered wagons, I would imagine the Chuck Box has been a common term. Before that, I am sure migrating people had a simpler and smaller means of transporting some of their precious spice items. Those items that were not easily obtained foraging natures surrounding supplies.
If you have camped many years you have probably changed out your own method of carrying your own staples. Having your items with you, rather than being dependent on an inconvenient source to purchase (forage) your own items while camping. I say this is version 2 for me, but that is version 2 in a recent sense. In reality I have tried numerous configurations over a lifetime of camping. All common containers many people use, such as Tupperware or plastic shoe boxes.
My current method is “Rigid” totes. I hope people viewing the blog take the time to forward us photos of your own “tried and true” method. We want to add them to this article. So tell us a little about yours and about yourself. Or what you think of ours?
Ours does not have the “coolness ” factor of a handcrafted wood Chuck Box, but they are highly functional. The boxes have been along on multi-day trips, Dutch Oven Cooking events, and regular campground camping. We have ours loaded so we are not wanting of anything.
We use 3 Stack-able and Wheeled totes made by Rigid. Finding ours at Home Depot for about $130. They seal well against rain, have latches to slow down critters, carrying handles, and side handles that also serve to latch all 3 together as one unit.
The totes are often left on the picnic table at all times (unless in bear country) and they have never had the critters get in them. They also sit out, getting rained on at times. When we return home from camping, the used items are replenished. Everything is kept inside the house so the ingredients are always fresh and ready to go for the next trip.
Dry Ingredients such as flour, pancake mix, etc is rotated when we replenish. We dump the unused portion out on foil. Refill the used portion from new supply in the house, then dump the older ingredient now on the foil, back in on top to fill our camp container.
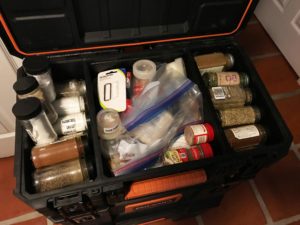
The top box is all spices and several small containers of Crisco. This box is equipped as well as my home kitchen.
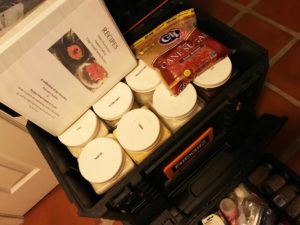
The middle box is the dry ingredient box. Larger containers of things like Flour, Sugar, and Coffee. In in their own larger screw lid containers. There is also extra room for cookbooks and bags of backup items. A couple containers do double duty.
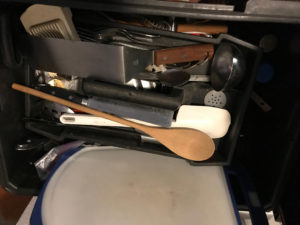
The largest box, on the bottom is also wheeled and has a telescoping handle to assist in wheeling all three boxes as a single unit. This bottom box is my catch all for small cutting boards, utensils, knives, and silverware.
Here is a list of items in my three boxes. I cook with large groups and can cook or bake anything with what I carry. Adjust your items to suit your needs.
Top Box
(8) 1/4 Cup containers of Crisco
Spray oil
Salt
Pepper
Cilantro Flakes
Garlic Powder
Onion Powder
Italian Seasoning
Paprika
Corn Starch
Baking Soda
Baking Powder
Nutmeg
Cinnamon
Ginger ground/powder
Nutmeg ground/powder
Clove ground/powder
Burger Seasoning
Chili Powder
Cumin Powder
Vanilla Extract
Sage
Dry Milk
Cayenne Pepper
Bay Leaves
Vegetable Oil
Dry Yeast
Middle Box
Flour
Sugar
Powdered Sugar
Coffee
Brown Sugar
Vanilla Coffee Powder
Buttermilk powder
Oatmeal
Cornmeal
Pancake Mix
Cookbook(s)/Recipes
Bottom Box
Utensil Box
Mixing Bowl
Cutting Boards
Hand Mixer
Tongs
Serving Spoons
Several sets of Knife, Spoon, Fork
Oval Metal Plate
Butcher knife
Bread knife
Paring knife
Can opener
Wine/Bottle Opener
Measuring Cups
Measuring Spoons
Whisk
Scissors
Pot holders
Ladles
Wooden Spoons
Spatula
Biscuit cutters
Rubber Batter Scrapers
Butane Lighter Sticks
Spare Lantern Mantels
Aluminum Foil
Plastic Wrap
Sifter
Small Vegetable Oil
Vinegar
Agave Syrup
Pancake Syrup
![]()
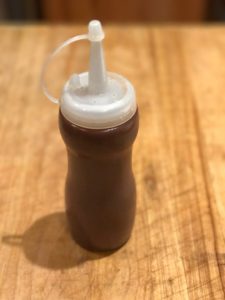
A couple of weeks ago I really nailed the taste on some homemade BBQ Sauce. The trouble is I didn’t write any of the ingredient portions down.
A few days ago I attempted to duplicate the sauce. While it wasn’t a total failure it did not match the home run from the previous batch.
That great batch was sweet and zesty for sure. Some might call it a Southern style. Or Carolina style.
So this is a work in progress recipe. I have the ingredients jotted down. They are here for you to experiment with. I will keep adjusting, and updating the ingredients and portions until I get it right again to my taste at least. Enjoy!
7/3/2017 Version 0.3
15 oz Tomato Sauce
10 oz Tomato Soup (Condensed/No water added)
1/4 Cup Dark Molasses
1 Cup Brown Sugar
1/4 Cup Vinegar (Apple or Wine Vinegar)
3 Tbsp Mustard (yellow French’s brand -Hot Dog style)
2 Tbsp Cilantro Flakes
1 Tbsp Garlic Powder
1 Tbsp Onion Powder
1 tsp Sage Powder
1/3 Cup Agave Syrup (Start with none then adjust to desired sweetness)
1 Tbsp Sriracha Sauce
1 Cup Ketchup
1/16 tsp Cayenne Pepper (See “Note” Warning below))
2 Tbsp Worcestershire Sauce
1/4 Cup Liquid Smoke (I use Hickory Flavor)
2 Tbsp Lime Juice
3/4 tsp Salt
1/4 tsp Black Pepper
2 Tbsp Corn Starch
Cooked down until thickened. This can be brushed on meats being grilled.
Once thickened whisk in the Agave starting with small portion of the 1/3 cup. You may not need to add any. If you do add it slowly until you reach your desired sweetness. For some the 1/3 cup Agave called for in this recipe may be too sweet. So start adding slowly. Combine thoroughly then taste
This recipe can be whisked together without cooking, and dumped over ribs to be slow cooked in a crock pot, or baked in a baking dish in the oven.
Note: Cayenne Pepper tends to increase in the “Hot” factor as it cooks, or sits mixed in with other ingredients. In low doses it is a great food taste enhancer. Do not increase the amount based on taste when first added. Especially if you are the cook and like things “hot”! This recipe is not what I would call “spicy hot”. But for people that prefer mild spicy tastes, this might be just on the upper edge of the spicy scale, for their liking. This recipe also gets some kick from the Sriracha Sauce. You can easily push this over the edge from a food enhancer, to something many people would not prefer.
You can quickly ruin a big expensive batch of meat if you don’t heed this spice warning. This above recipe is what I would say is the most popular level of ‘heat” when feeding a variety of people. Better to serve hot pepper seeds, or hot sauce, “on the side” for those that enjoy the extreme. Because most people, truth be known, do not enjoy extreme “spicy hot”.
![]()
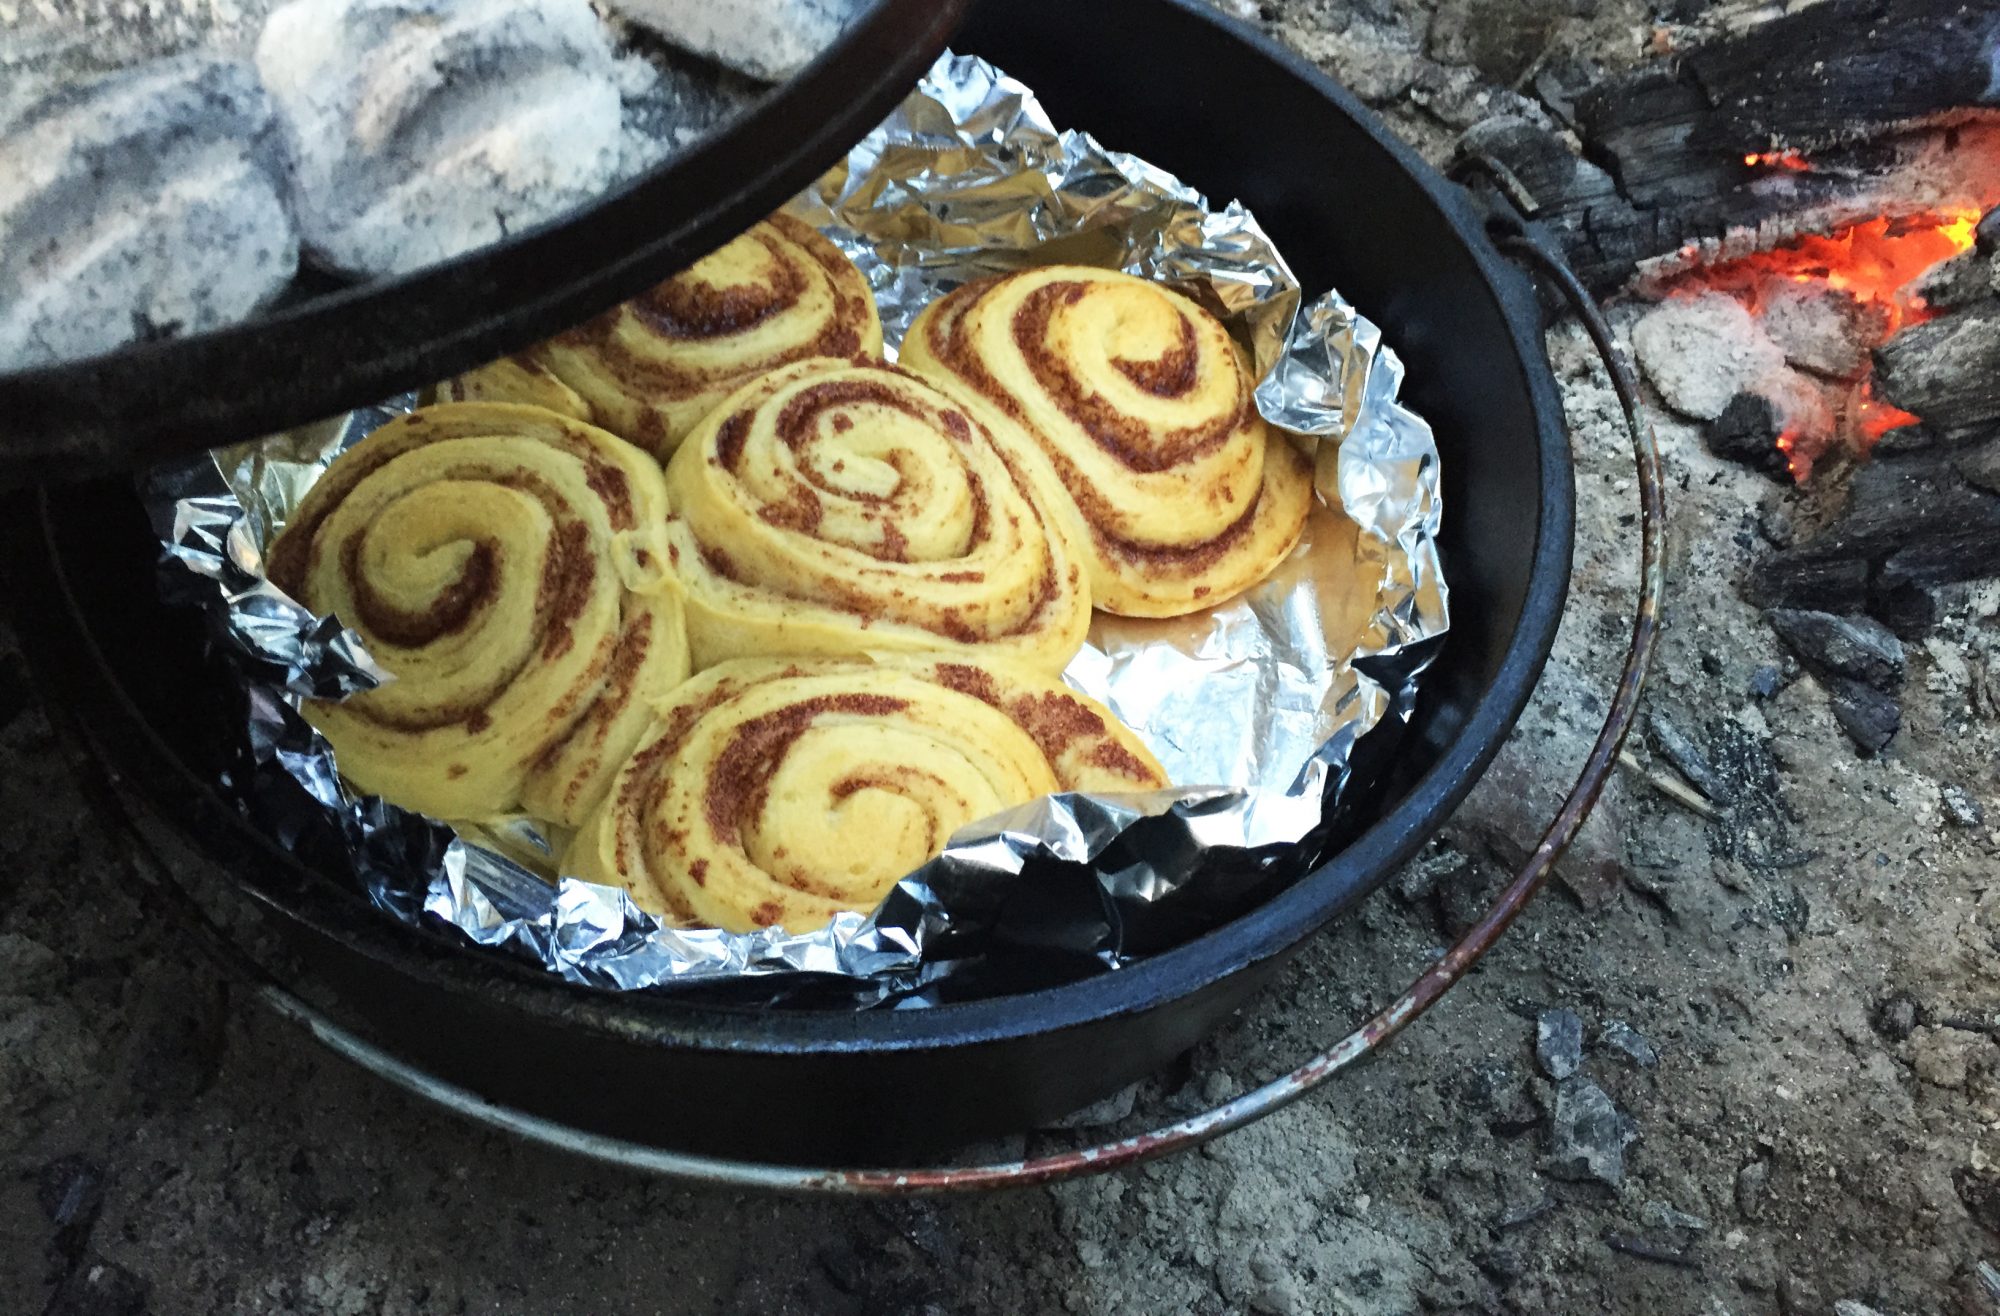
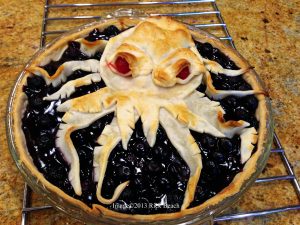 I wish I could take credit for this idea, or even the name someone pegged this with. Both were found floating around on Facebook. The one I happened to see only had a photo and no recipe. So I set off to try and produce the pie. I also wanted my own photo of the trophy…dish… in this case. Blueberries were used to create the desired contrast for the photo. Any fruit pie would work.
The one I saw, I assume had used blueberries for the eyes. I happened to have a partial left over jar of Maraschino Cherries. The remainder of a jar left over from baking a Pineapple upside down cake in a Dutch Oven. The recipe I provide here was baked in a Dutch Oven as well.
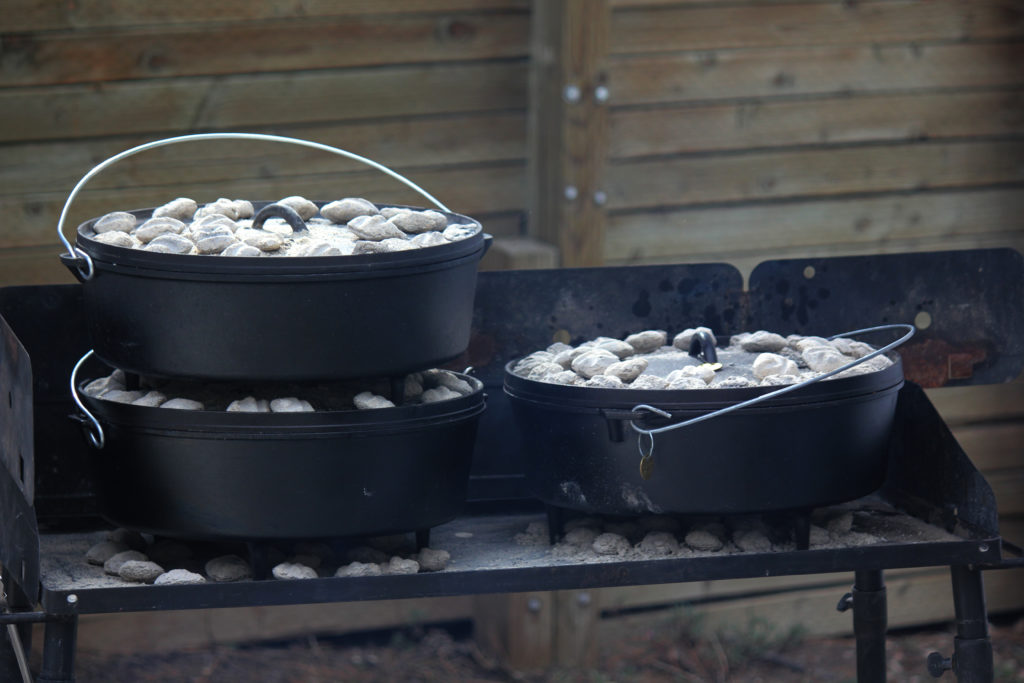
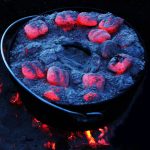
This pie was baked in a glass 9 inch pie dish, raised up off the bottom of a 14 inch, Lodge Cast Iron Dutch oven, via a trivet (an inverted second pie tin works). Several layers of aluminum foil is placed in on top of the trivet/pie tin, prior to placing the glass pie plate containing the raw pie. The foil left long enough to go up the sides. The foil can be folded over in case the top starts browning too fast, but is mostly to assist in lifting out the pie once baking is complete. Enough coals to create 400° heat. Using the “3 uppy-down rule” for heat management. All coals arranged at the far perimeter of the bottom, and the lid.
Ingredients
2 Pie Crusts (prepared for at least a 9 inch pie)
2 21oz Cans Blueberry Pie Filling (Or 4 cups of homemade prepared filling)
1 Small jar Maraschino Cherries (Could also use fresh uncooked Blueberries
6 oz of Fresh Blueberries (washed and stems removed)
1 egg white
¼ cup milk
Mix egg white and milk together (set aside)
Pre-heat Dutch Oven or Kitchen Oven to 400°
Brush both sides of one uncooked pie crust with the egg mixture. Lightly grease Pie plate. Place the one Pie crust in the pie plate, up the sides, and trim off excess. (Save all trimmed pieces)
Spread the Pie filling evenly over the bottom crust. Next spread the fresh blueberries over the filling (remember to save back 2 for the eyes, and about 10 for the brains 🙁 . If you are using Cherries for the eyes and brains, spread all the fresh blueberries on the filling.
Brush both sides of the second uncooked pie crust and lay out on cutting board. Cut an upper main body with short tentacles. Cut a 2nd main body without tentacles. Using these dough 2 parts, sandwich cherries (or some of the fresh blueberries) to in effect become brains, as well as creating fill to form a raised 3D head. Seal the bottom dough to the top dough around the edge using the egg white solution. The tentacle half, is the top. Save back 2 cherries or 2 fresh blueberries to create the eyes. With a circle of dough larger than the cherry/blueberry fold the dough over the berry and lightly pinch to create an eye. Use egg wash to attach these eyes to the head. Keep this whole head/eye unit on the cutting board.
Using other dough scraps, cut long tentacles, and snip along one long side (Or use pinking shears). Arrange these with a twist to make interesting looking Octopus tentacles that start somewhere in the, to be, head area. Extend them down to the very edge of the pie surface. Once those legs are in place use a spatula to gently lift head unit off the cutting board and into position on the pie. The head should cover the upper ends of the in place tentacles.
Bake at 400° for 30 minutes and then check the browning. Cover with foil if excessive browning of the upper crust is occurring. Then bake another 10 minutes for a total bake time of 40 minutes, or until crust is golden brown.
Serve warm with vanilla ice cream. Oh yeah!!
![]()
 Sept 16, 2017
Cathedral Gorge State Park
Panaca, Nevada
This year’s Cathedral Gorge State Park Cook Off is the 3rd Saturday of September 3pm – 7pm.
Last year several members of our local Las Vegas Dutch Oven group participated in the event and had a great time. This is a friendly non sanctioned event.
For those wishing to socialize with the Las Vegas group please contact us through:
Las Vegas Dutch Oven Enthusiasts
TOPONAUTIC
The Dutch Oven Cook
Official Contacts for the State Park or for Competition Rules and Sign up:
Cathedral Gorge Park Contact info:
775-728-4460
cathedralgorge_vc@lcturbonet.com
Cathedral Gorge State Park Facebook Page
The actual cook-off is on Saturday. Many of us go up and start camping Thursday then leave Sunday mid-day. The Cook-off is in the group area in the campgrounds.
For those camping: Campsites do have power. But sites are limited and first come first served. You can not reserve sites. For this weekend the rangers normally work with everyone and allow overflow camping in the parking area’s near the “Group Area”. But if that is where you end up it is totally dry camping. The camp sites and bathroom/showers have been the cleanest I have ever seen.
There is a centrally located Bath/Shower house. This is a small campground so expect to wait if you shower at a popular time of day.
Sites do have power but no sewer or water hook ups. Great for those needing power to run air conditioners and appliances. There is water located at faucets scattered around the campground but that means you have to have a container and carry it to your site. No hose connections allowed.
Sites are very clean. Gravel surface RV spots that are nice and level.
There is a dump station for draining your RV/Trailer Black/Gray tanks. But it is down the road within the park quite a ways on the entrance road. It is kind of inconvenient if you have to drive your RV/Trailer down there to dump while camping. Conserve and use the camp showers if need be. The dump station is even kind of far to tow a portable tank that doesn’t have a real heavy duty set of wheels and a hefty axle. You will trash it easily. So conserve if you are staying a few days. It is conveniently located for dumping when you first enter the park, or as you leave on departure day.
Most tent campers for this cooking event tend to group up around the west end of the Group picnic area. An area that normally is not used for camping.
Many sites are out in the open with no shade from tree’s. The sites with shade go first. Each site does have a picnic table that has a metal shade cover over it.
Each site has a lantern pole out away from the picnic table and shelter. If you want to hang a lantern under the shelter bring s section of light chain and some “S” hooks.
Each site has a metal fire pit, and a raised charcoal BBQ grill. Fires are normally allowed. It is wise if you bring your own shade/EZ up. The sun can still be hot in Nevada’s September weather. Also walls or some type of wind break is advisable.
Firewood is normally available for purchase…and normally far more reasonable than buying it in Vegas at a grocery store. Buy it here and help support the park.
There is a small market within a short driving distance (Panaca). They are stocked really well with almost anything you might need, though it might be in smaller packages and a bit higher in price than you are used to.
If you are entering in the cook-off you will want your EZ up, prep & cook tables, water container, 3 station dish washing, and perhaps a wagon/cart of some sort to shuttle your gear to the cooking area.
There are endless hiking trails. I like taking my mountain bike and either trail ride, or ride the paved roads within the park. Just north of the campground is the caves area. Accessible by a trail from the campground or driving over on the road. Within the caves area there are enough eroded passageways to spend the weekend just exploring these. The early morning and evening sunsets are spectacular. The caves area’s could just as well be on another planet. The whole landscape transports your imagination into a science fiction tale.
We usually are sung to sleep by the coyote songs. So be sure to but your trash up at night. This also means keeping your pets close too you so they don’t wander off and become part of the food chain. They are lower in the chain out there. Coyotes are used to hunting as a group. They are quick and silent. Don’t let your small fido out for a morning run unleashed and unattended while you are distracted doing something else.
The cooking event is a fun day. But expect a long day too. Cooking, judging, eating, raffling, prize awards, and clean-up. Bring your cart/wagon and flashlight.
Much of the cooking space is in full sun. If you plan to participate be sure to bring your own shade, Prep tables, water containers, and dish washing pans.
The Park normally supplies cook tables and the charcoal. You may want to bring both of these for yourself though. Last year we starting prepping and cooking before they started handing out charcoal. If you have to start cooking early for long prep items, you might run into trouble if you rely on their charcoal.
They do not provide food prep tables. You also may want to bring tables to serve from? Or do double duty with your tables. You need to bring your own tables for these purposes. The picnic tables around the area normally fill up with people showing up to eat and are not to be used by those cooking. Don’t set up in such a way that you use the pavilion tables.
You will want to also have your own way of having hot water for cleaning hands etc. Plus any other requirements to practice safe food handling. You own trash container avoids having to run it to one of the parks receptacles that might not be handy while prepping and cooking.
The Cooking Competition area is enough of a distance from vehicle parking or drop off, that you might want to bring some type of wheeled device to shuttle your tables, gear, and food. Several of us use the folding type 4 wheeled wagons.
The judging, eating, raffle, and prize awards goes on until after dark. So be sure to bring lighting/flashlight/lanterns to aid in breaking down gear and cleaning up your cooking area.
As with all of our outings. You are responsible for you and your families Reservations, Payment, Security, Safety & Well being. In addition you are responsible for any damage you, family members, or invited guests, may cause. No other members, this group as a whole, nor trip organizers, accept any responsibility or liability other than for their own individual actions.
![]()