Wow! What a great week we had camping and cooking with the Las Vegas Dutch Oven members. We had some of the best November (2013) weather we could have asked for. We camped and Dutch Oven cooked at Calville Bay campground. This campground is located in the Lake Mead NRA, just east of Las Vegas, Nevada. We had no wind, daytime temps in the mid seventy degree range, and great sleeping temperatures of the low forty degrees.
This group meet-up was the annual Thanksgiving Dutch Oven Gathering (DOG). A pot-luck of Dutch Oven baked treats. With over 30 people attending, this event turned out to be over the top on variety and tastes. Traditional Thanksgiving menu items all baked with charcoal. As a member stated….”The worst thing I ate, was pretty darn good”!
While camping over the few days leading up to the meal event, I occupied my time Dutch Oven baking a loaf of bread, 2 batches of dinner rolls, and a pumpkin pie. I topped out the cooking by doing a “Trash Can Turkey” the day of our DOG (Dutch Oven Gathering).
I had seen Trash Can Turkey roasted, using an inverted midsize galvanized trash can. On two previous occasions the turkey roasted to perfection, moist, and falling off the bone. I even participated in the those meals and found the turkey moist and tasty.
My only concern was the galvanized coating particulate or vapors could enter into the meat and could cause some type of health issue? I am not even sure pre-burning a galvanized can will totally remove all the metal coating and make it food safe?
I know there are many out there using the galvanized can method regardless.
After researching, I found that galvanized metal containers are not considered safe for cooking or food storage. I caution others to do their own research and make their own decision concerning cooking container choice. But bear in mind you may impact those people you are feeding.
Articles I read indicate zinc fumes accumulate in the food. Additionally the fumes are toxic to breathe. Zinc toxicity symptoms include diarrhea, vomiting, and fever, starting anywhere from 3 to 12 hours after consumption.
So I set off to try this with aluminum, rather than galvanized. I would be experimenting with cooking methods and times, on a group of 30 hungry people. I knew this was not the ideal situation. But I was determined to try it. I am happy to report the results where a perfectly roasted turkey….and no one realized my apprehension of cooking this way for the first time.
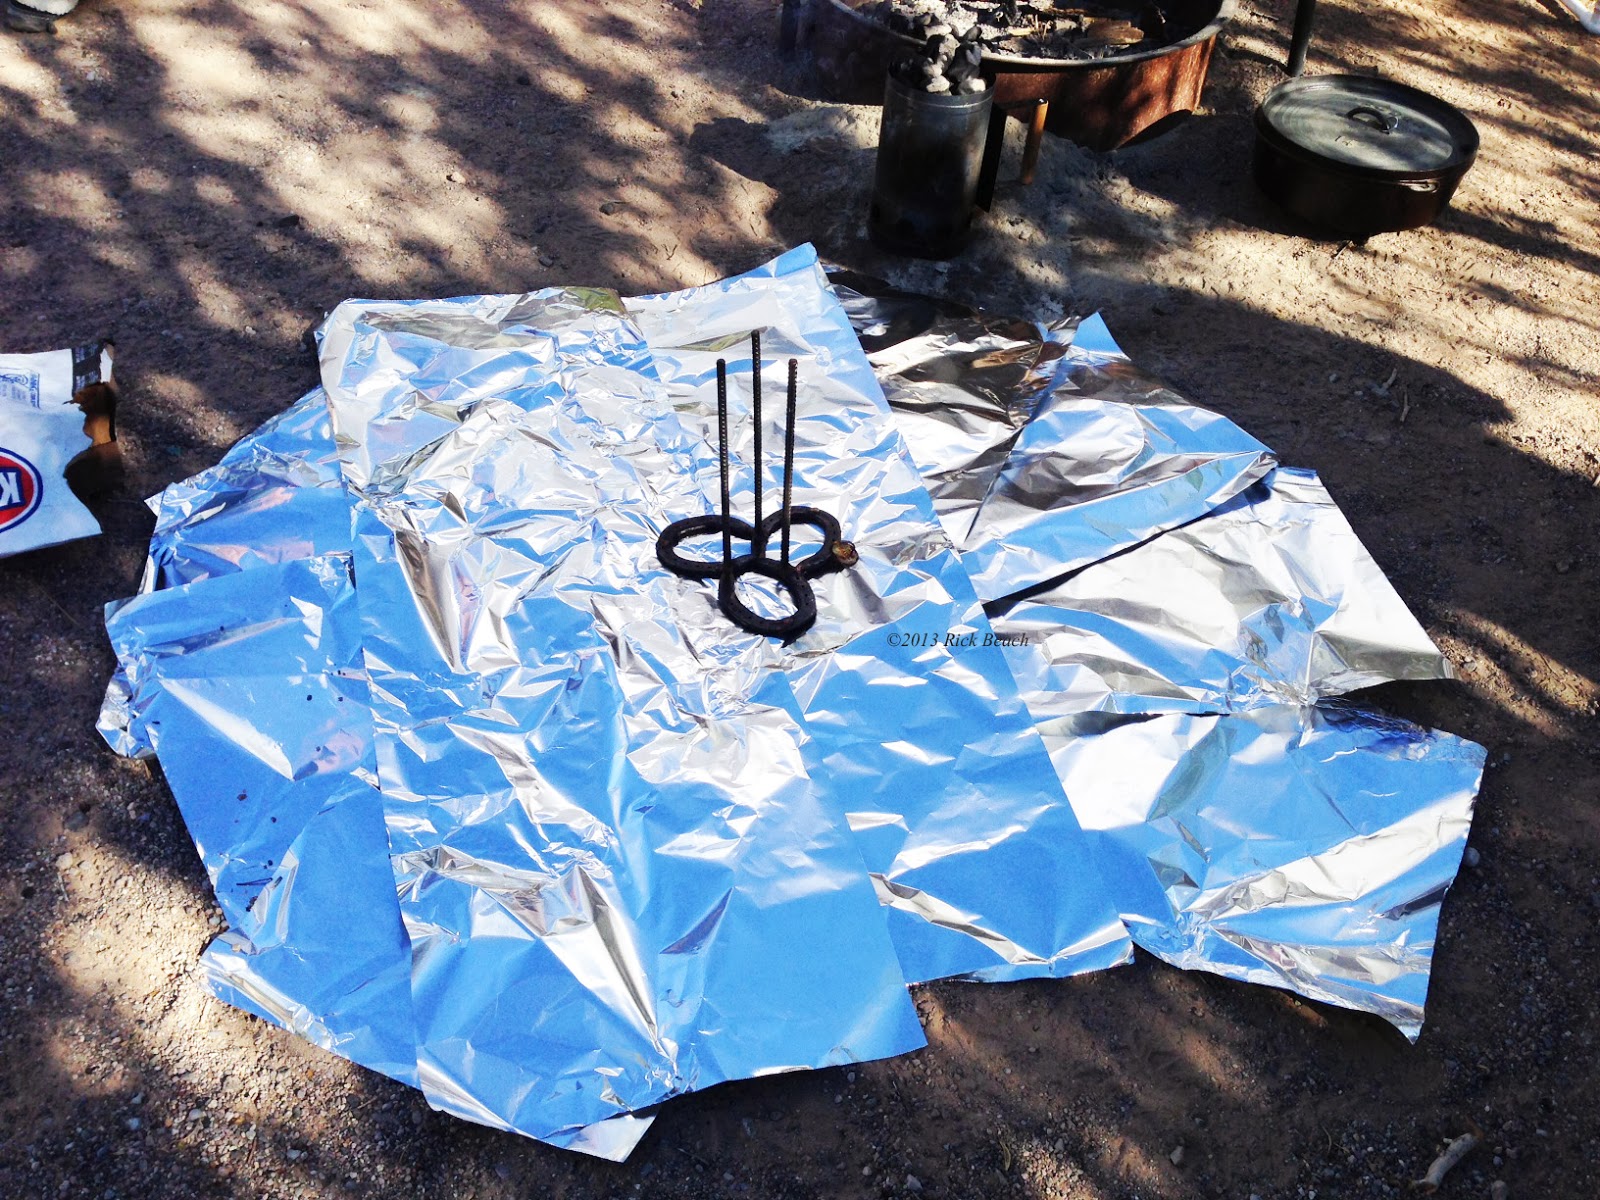 My hardware of choice was a homemade turkey stand/rack which I had fabricated the week before. You want a stand capable of holding a 20-25lb turkey, keep it from tipping over, and able to hold a soda or beer can for moisture. For this I used 3 standard size horseshoes and three pieces of 1/2 inch X 12 inch re-bar. These were welded into the configuration as seen in the photos. This design proved to work extremely well. The 12 inch re-bar might even function better a little shorter. Once this stand was fabricated it received 3 coats of seasoning using the same method as seasoning a dutch oven in your kitchen oven.
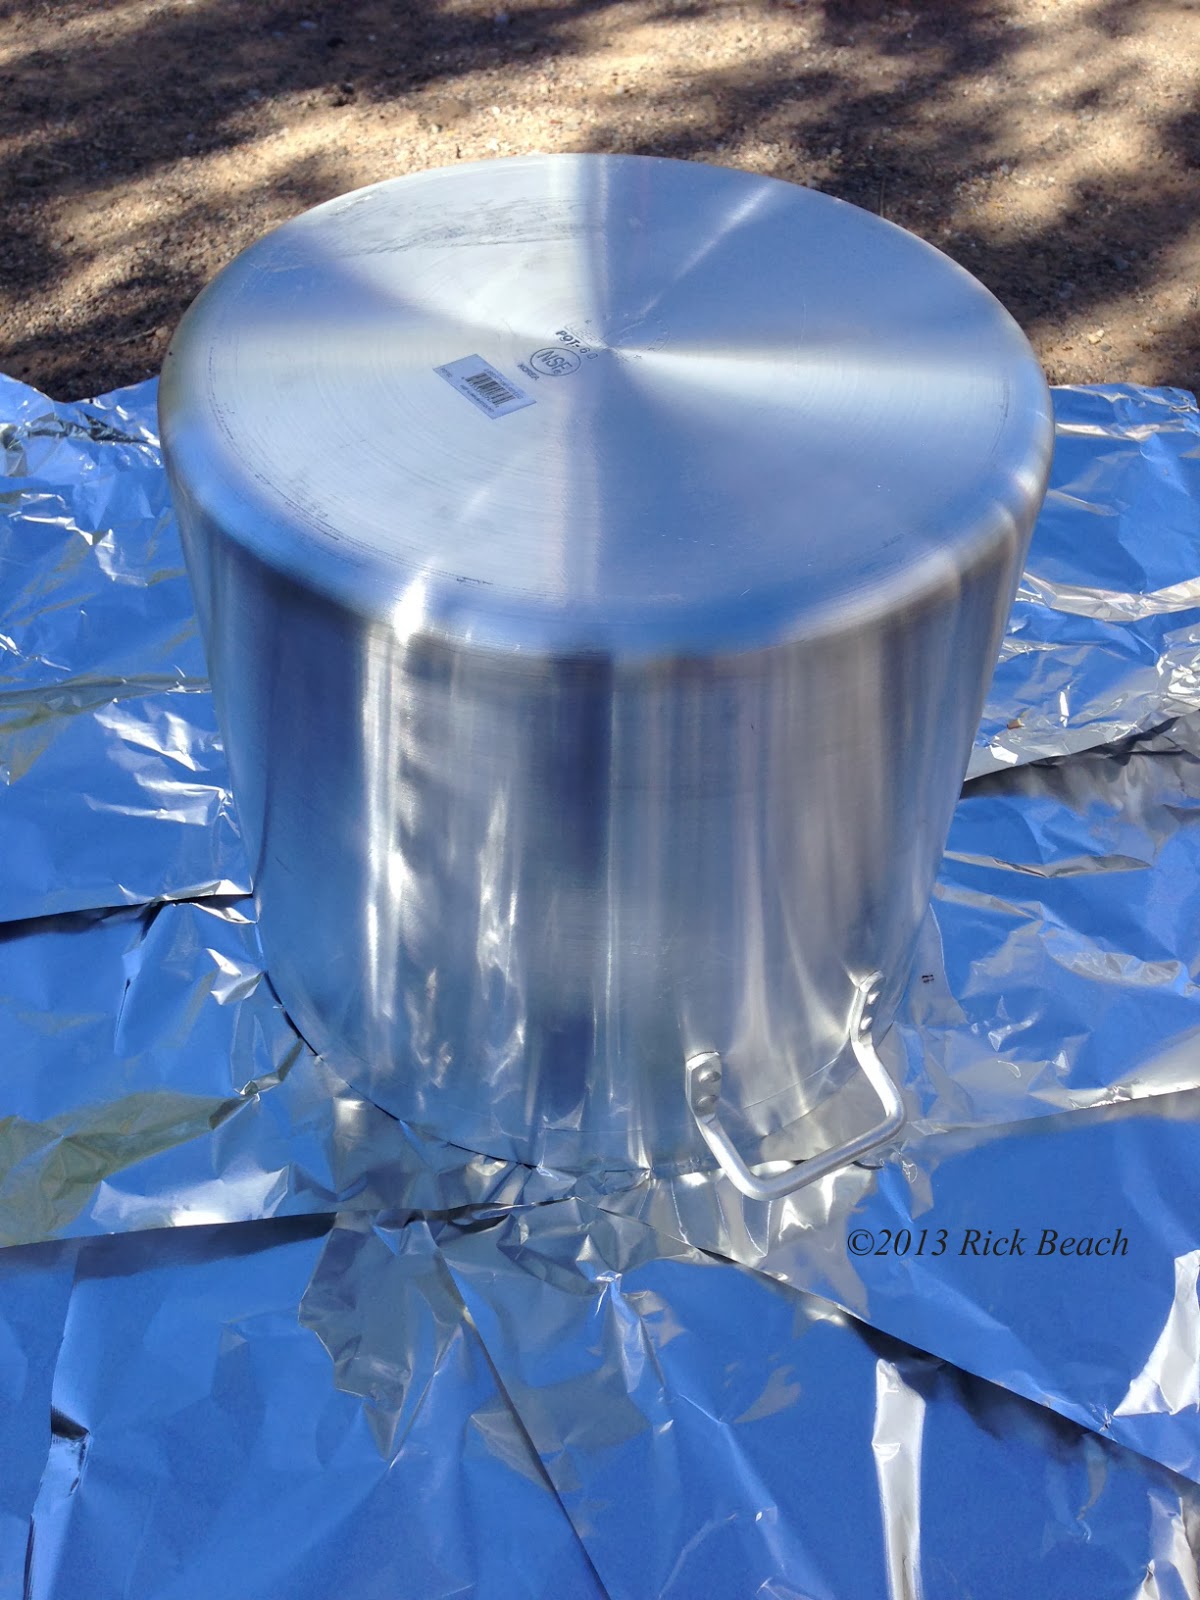
The “Trash Can” in my case was swapped out for a commercial grade 60qt Aluminum Stock pot. I also purchased a lid for it which proved useful after the roasting process. This pot has about a 3/16 inch wall thickness. It is 20 inches deep and 17 inches in diameter.
We had people caution us that the heat would wreck the pot. After the session we found no evidence of damage. In fact I am updating this right now after doing the 6th turkey in this same pot. There is still no damage from the charcoal or heat. It does take some elbow grease to clean it up. The pot comes away from the experience unscathed. No warping or discoloration at all.
We used Kingsford Charcoal for our heat (A total of about 30lbs). A 20lb thawed or fresh turkey. Enough heavy duty aluminum foil to create a bottom and to tent the bottom heat up the sides of the inverted pot. Figure on about 3 hours roasting time for a 20lb bird. We had great conditions. Good air temperature and no wind. As with Dutch Oven Cooking, these variables need factored in with your heat, timing, and wind shielding. About 10 lbs of charcoal is used on each of 3 burns.
Start your first batch of Charcoal (about 10lbs or 3 to 4 charcoal chimney’s full) about 15 minutes before your beginning cooking time.
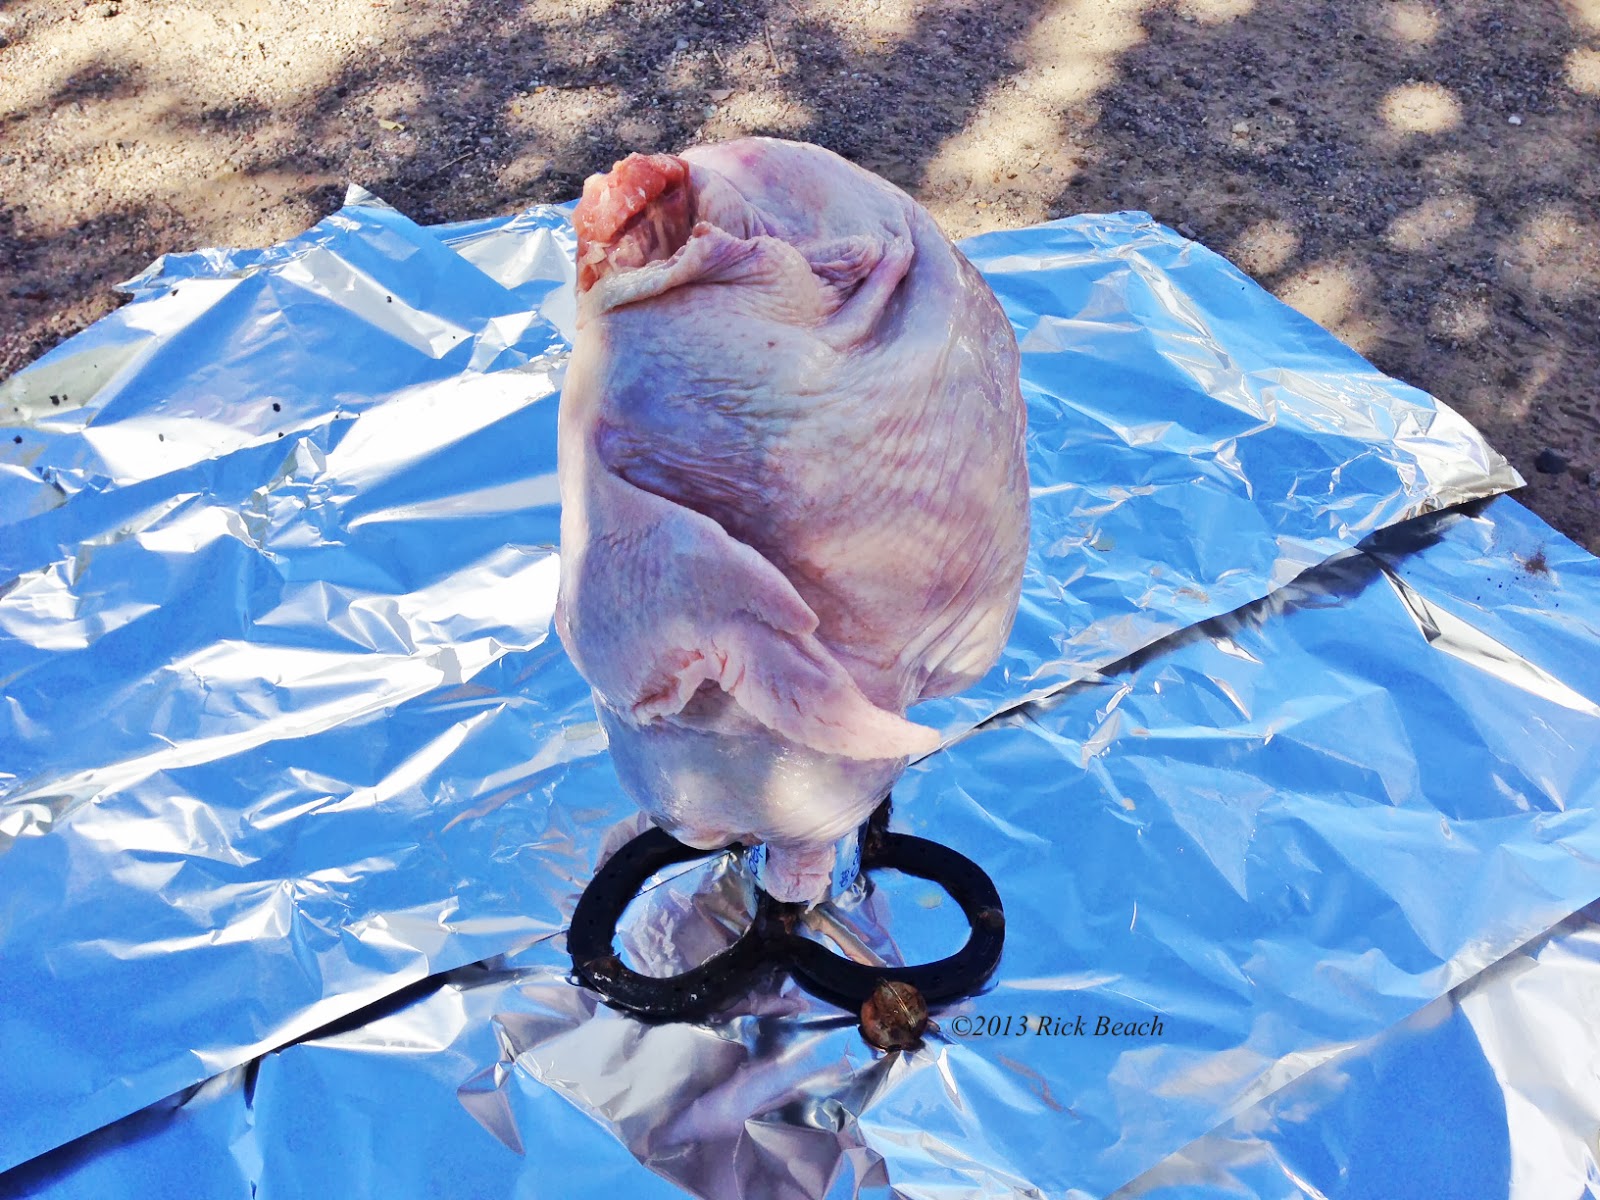
Lay out the foil as shown, somewhat over-lapping and enough to more than go up both sides. Once all foil is down, place the rack in the center of the foil. Add your can of beer, soda, or water to the center of your rack (This adds moisture during roasting). Push your thawed turkey, large opening down, over the rack. Push the bird down to pierce the rack into the meat until the bird is just off the ground. Invert the pot and place it over the bird. This is creating a giant Dutch Oven. (Pot is inverted and no lid used during this process) Rub bird with soft butter and salt & pepper before covering.
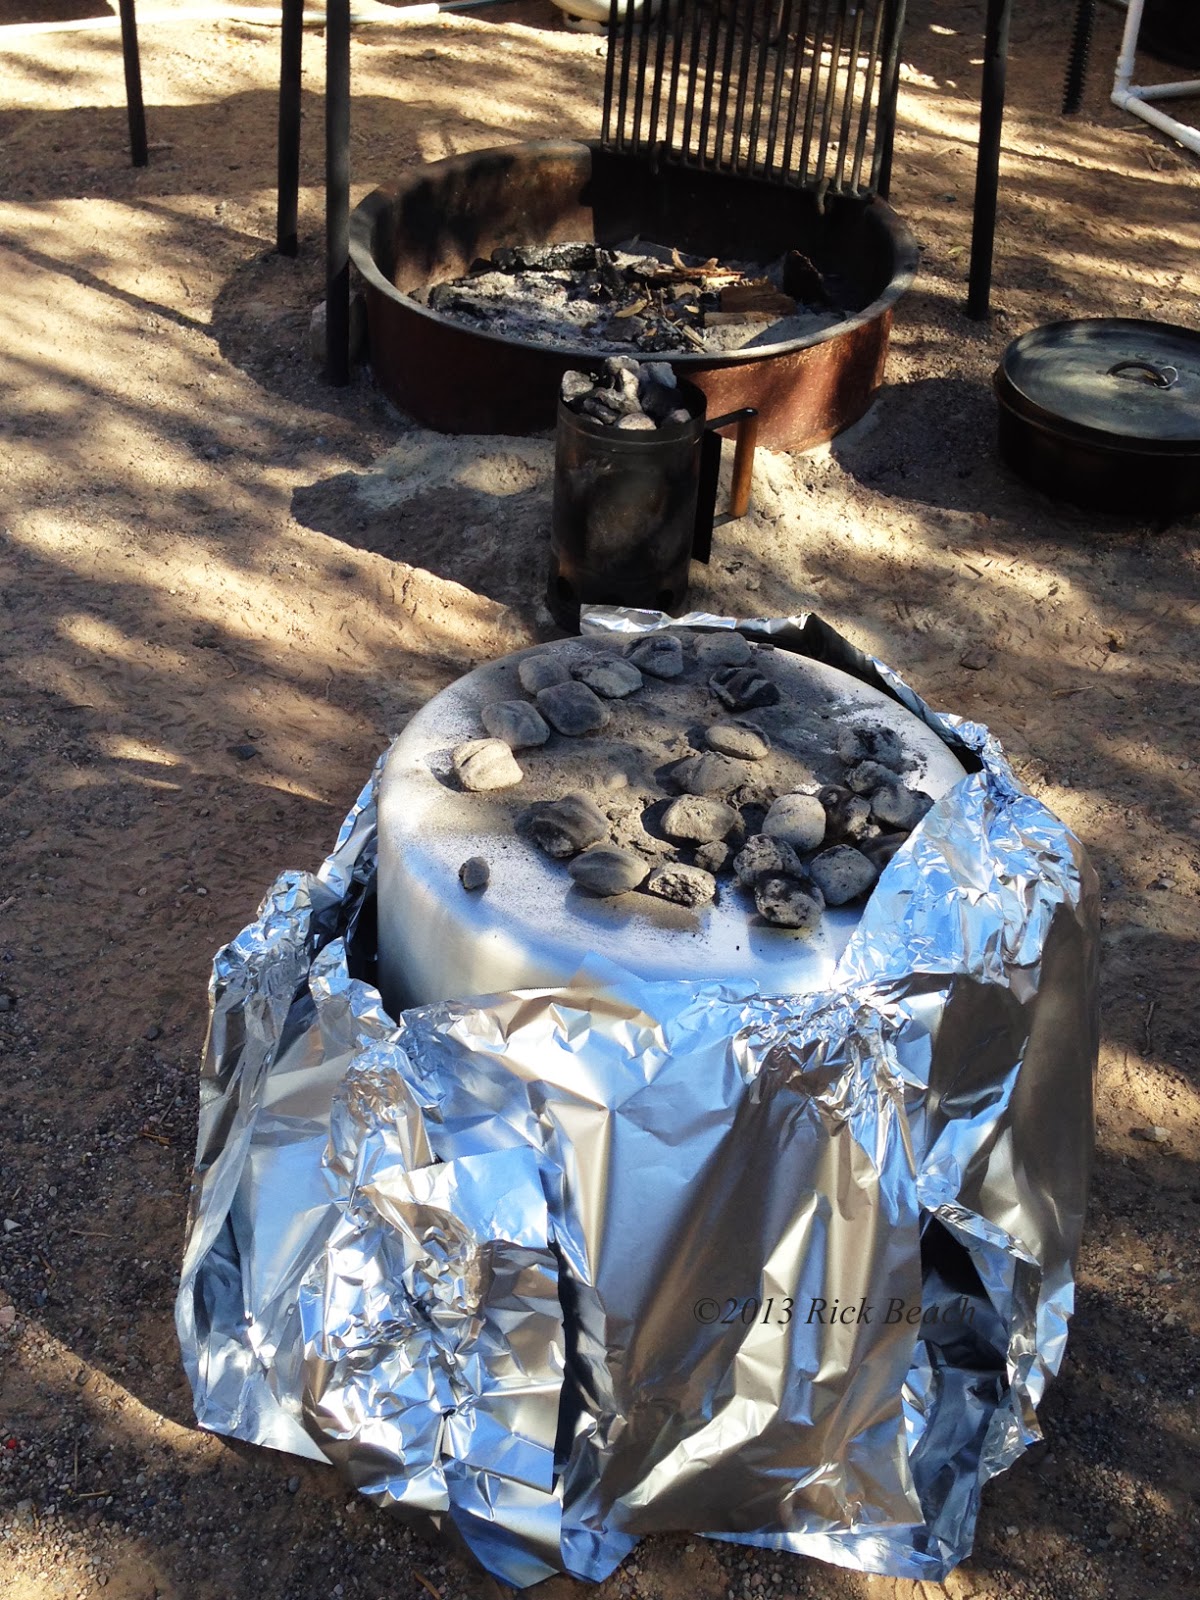
Add about 15 coals on the top of the pot. Place the remaining hot charcoal all around the pot at ground level right on the laid out foil. Push it up against the pot. Pull the foil (using gloves) up the sides of the pot and roll and pinch the foil to connect. Leave about a 2 inch gap between the foil and the exterior sides of the pot to allow the heat to rise up along the sides.
In about 30 minutes you should hear sizzling as some of the juices start oozing and creeping under the pot down at the foil on the ground. As it hits the hot charcoal you will also start smelling the cooking bird.
At the first 45 minutes start batch 2 (10lbs) of charcoal. At hour 1 add batch 2 of your hot charcoal to the top and bottom of the pot right on top of the old. Again most of it goes around the base. Only about 15 on the top.
At 1 3/4 hour start batch 3 (10lbs) charcoal. At hour 2, apply these hot coals in the same manner as hour 1.
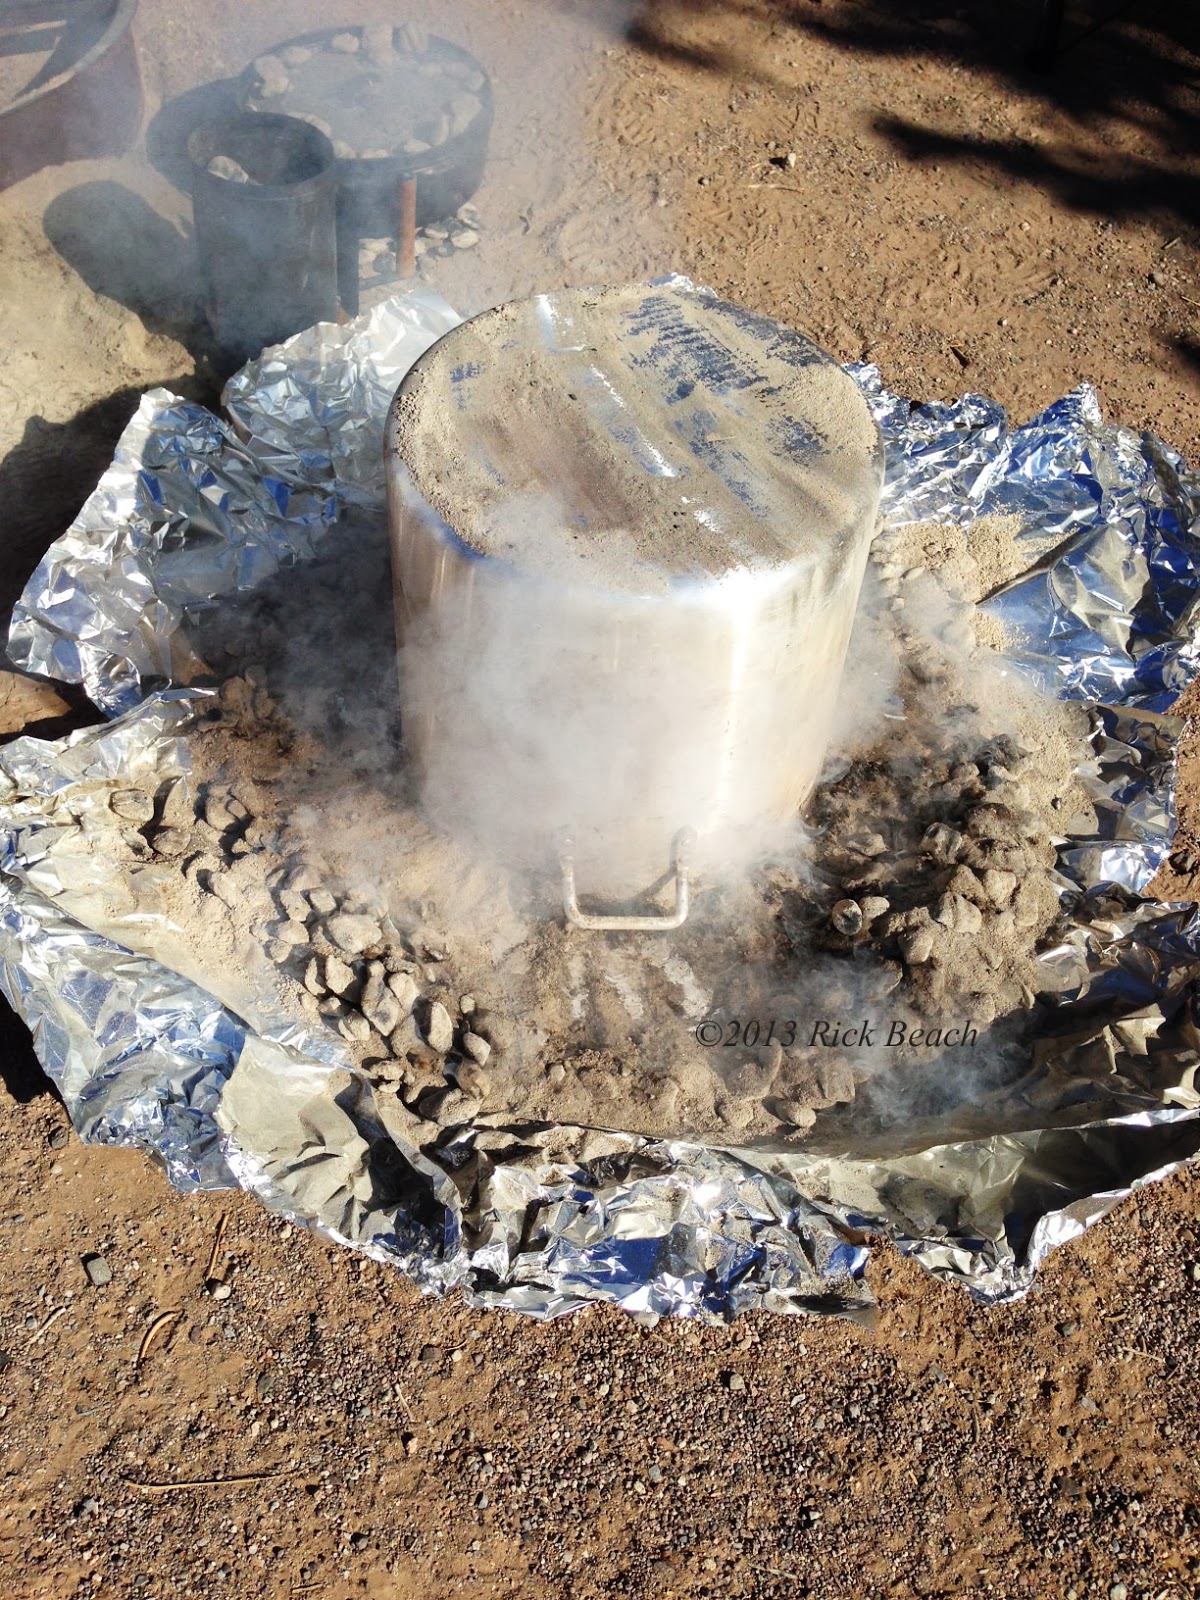
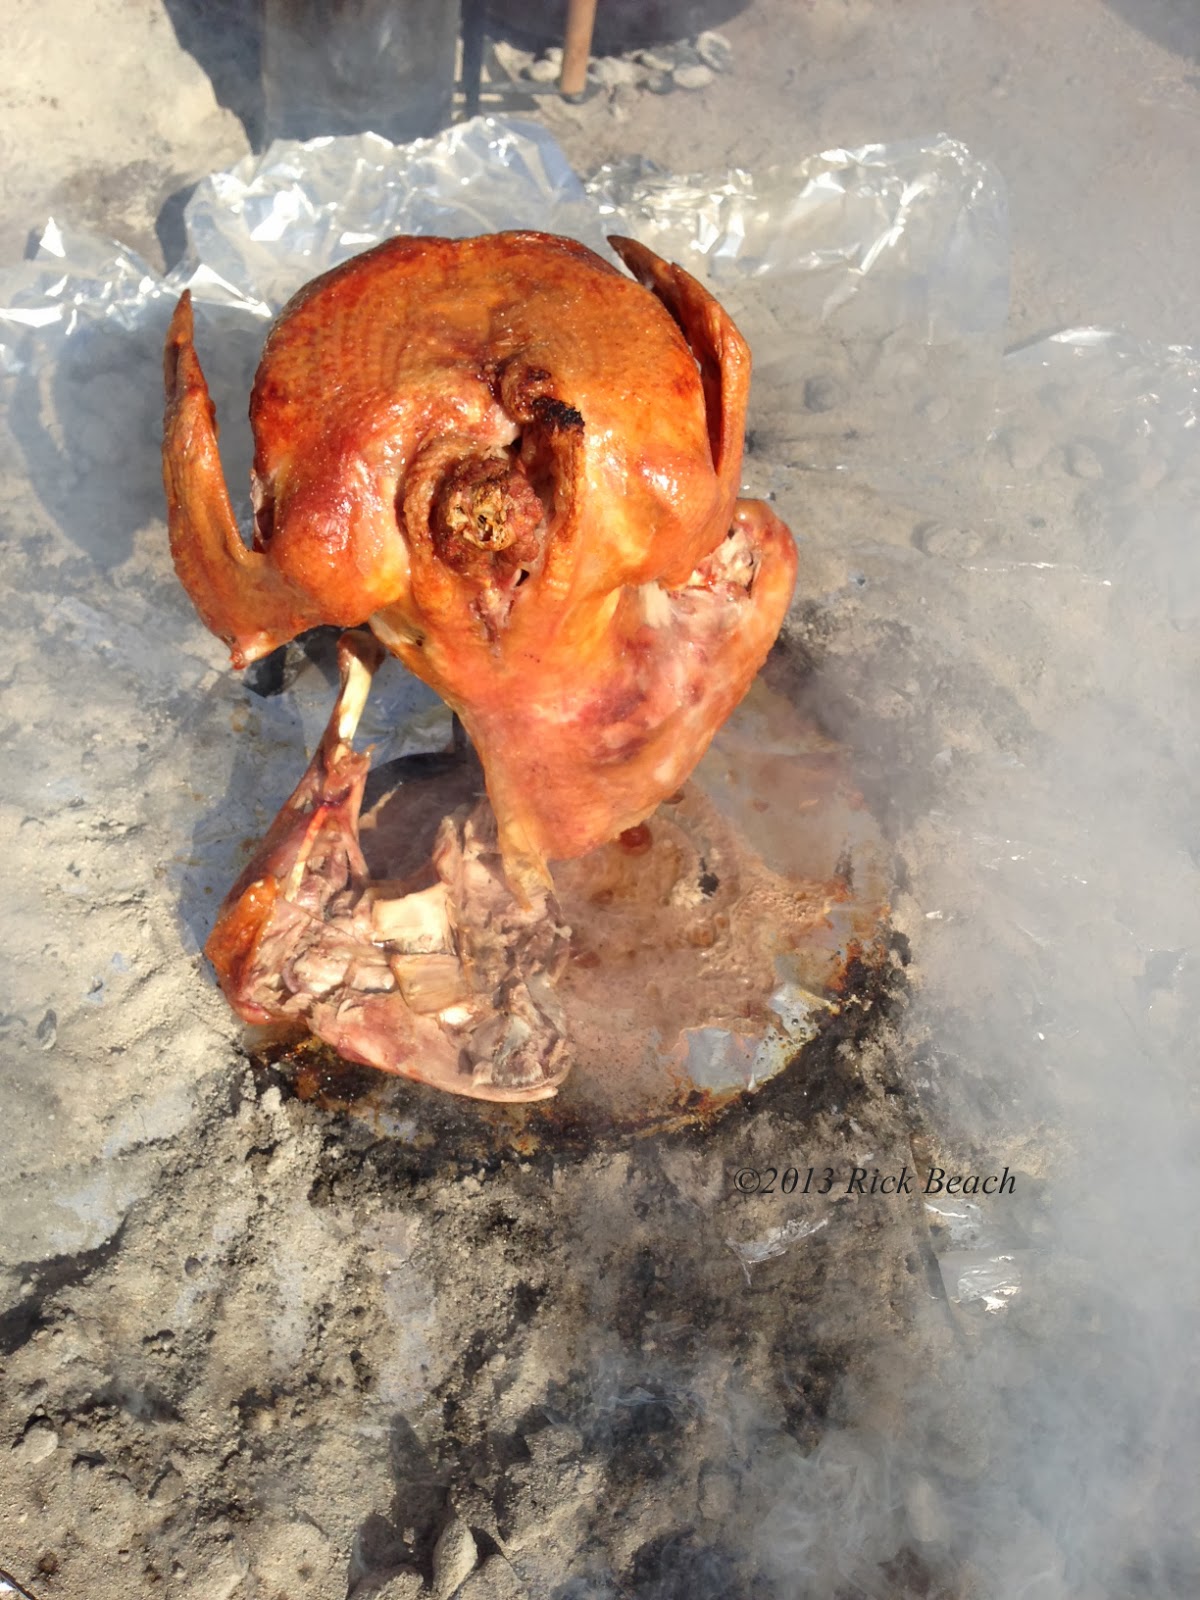
At 3 hrs your bird should be done. Pull the foil tent, that has been direction the heat up the sides, out flat on the ground. Carefully scrape the hot charcoal off the top of the pot and away from the pot down at the base. With gloves, lift the pot off the bird. Be care to tip away so you aren’t burned by the big puff of steam that comes out. The bird may also be up against the side since it will be falling apart if everything went to plan. Hopefully you scraped your ash back far enough none of the meat falls in the ash.
With the pot just off to the side and right side up, start moving the meat into the pot. Drape a fresh piece of aluminum foil over the bird and using gloves lift the bird off the cooking rack/stand and place the bird in the pot. Here’s where the lid comes in handy. Place the lid on to keep the bird warm while the last minute meal preparations are completed.
Our test bird came out perfectly. Well done, moist, and falling apart. The only complaint was we should have made more!
![]()